
Last Updated: November 4, 2026
Quick Summary
Improving guitar workbench ergonomics starts with your body, then the bench: set the surface just below elbow height for most standing tasks and higher for fretwork and detail work. Add adjustable height, padded neck support, two-angle lighting, and task-grouped tool storage so your posture stays neutral.
- Bend your elbows to about 90 degrees and let the work surface meet your hands just below elbow height.
- A wobbly adjustable bench is worse than a solid fixed one, so check that it locks firmly at each height.
- Support the neck along its length and clamp near the joint, not across the thin headstock wings.
- Keep the five most-used tools within arm's reach and store rarely used jigs out of the way.
- Take a short break every 20 to 30 minutes and switch tasks to vary the strain on your hands.
Table of Contents
- Start With Your Body Before You Touch the Bench
- Setting the Right Guitar Workbench Height
- Adjustable-Height Workbench Solutions for Changing Tasks
- Guitar Neck Support and Work Holding That Protect the Instrument
- Guitar Workbench Lighting for Detail Work
- Guitar Workbench Organization and Tool Accessibility
- Work Surface Materials, Vibration, and Acoustic Environment
- Micro-Ergonomics for Fretwork, Sanding, and Detail Tasks
- Choosing Your Ergonomic Bench Setup and Protecting the Headstock
- Frequently Asked Questions
Start With Your Body Before You Touch the Bench
Improving guitar workbench ergonomics for luthiers starts with the person standing at the bench, not the bench itself. Your neck, shoulders, and lower back take the first hit from long repair sessions, and no vise or jig fixes a posture problem you bring to the shop each morning.
Before you buy a single clamp, look at how you stand.
Ask yourself three questions:
- Does your chin drop toward your chest when you focus?
- Do your shoulders creep up toward your ears?
- Do you lean your whole torso forward to see fine detail?
If you answered yes to any of these, your body is compensating for a bench that does not fit you. Poor working posture adds up over months, and the strain shows up in your hands and neck first. Many luthiers find that a few simple changes to stance and bench height ease that strain before they spend a dime on gear.
If you already feel tightness after a long session, it helps to recognize the early signs of guitar neck fatigue in your own body so you can correct course early.
Setting the Right Guitar Workbench Height
Guitar workbench height is the single biggest lever you control. Set it wrong and every task gets harder, from fretwork to sanding. Set it right and your arms, back, and eyes all relax into the work.
The old rule of thumb is simple: stand at the bench, let your arms hang, and bend your elbows to about 90 degrees. Your work surface should meet your hands just below elbow height for most standing tasks. For detail work where you lean in close, a surface a little higher keeps your neck from craning down.
A common mistake is building a fixed bench at one height and forcing every job to fit it. Fretwork, sanding, and clamping all want different working heights. A bench that suits heavy sanding will feel low when you are setting frets under magnification.
Here is how height maps to task:
| Task | Preferred bench height | Why it matters |
|---|---|---|
| Heavy sanding and planing | Slightly below elbow | Lets you lean weight into the stroke |
| Fretwork and setup | At or just above elbow | Brings the work up to your eyes |
| Detail and inlay | Higher still, seated or raised | Reduces neck bend and eye strain |
| Assembly and clamping | Below elbow | Gives room to press down |
Test any height by working for ten minutes. If your shoulders rise or your lower back tightens, adjust before you build anything permanent.
Adjustable-Height Workbench Solutions for Changing Tasks
A fixed bench forces a compromise. An adjustable bench removes it. Adjustable height is often overlooked in workshop guides, yet it can benefit your posture a great deal. You can add it without a commercial bench.
You have three practical paths. The first is a commercial height-adjustable base under a sturdy top. Look for a base rated for the loaded weight of your bench plus clamps and wood. Check the lift mechanism: electric columns move smoothly but add cost and a power cord; manual crank or hydraulic pumps are slower but simpler and cheaper. The second is a shop-built bench with a crank or a set of interchangeable riser blocks that lift the work surface for detail jobs. The third is a hybrid: a solid fixed bench at elbow height plus a raised detail platform or a sit-stand desk converter placed on top for fine work.
Adjustable solutions pay off because luthiery is not one task. You might spend a morning thicknessing plates and an afternoon setting a nut. Each wants a different working height, and a bench that moves with you keeps your posture neutral through both. A bench that adjusts lets you alternate between standing and seated work, which can reduce the static load on your lower back and legs.
Watch out: a wobbly adjustable bench is worse than a solid fixed one. Stability matters more than range. Check that the bench locks firmly at each height and does not rock when you push a plane or lean into a clamp. A base with a wide footprint and cross-bracing at the legs resists racking far better than a narrow pedestal design. Test any adjustable base by loading it with a vise and pushing sideways, if it shifts more than a fraction of an inch, it will frustrate you on every heavy cut.
For many home shops, a solid fixed bench at elbow height plus a raised detail platform covers most tasks. Add full adjustability only when you regularly switch between heavy and fine work, or when two people of different heights share the bench. If you do add it, prioritize a base that locks solidly at each stop over one with the widest height range.
Guitar Neck Support and Work Holding That Protect the Instrument
Good guitar neck support and work holding protect the instrument as much as your body. A neck that rolls or shifts under a clamp can crack at the headstock-neck junction, the most fragile point on many guitars.
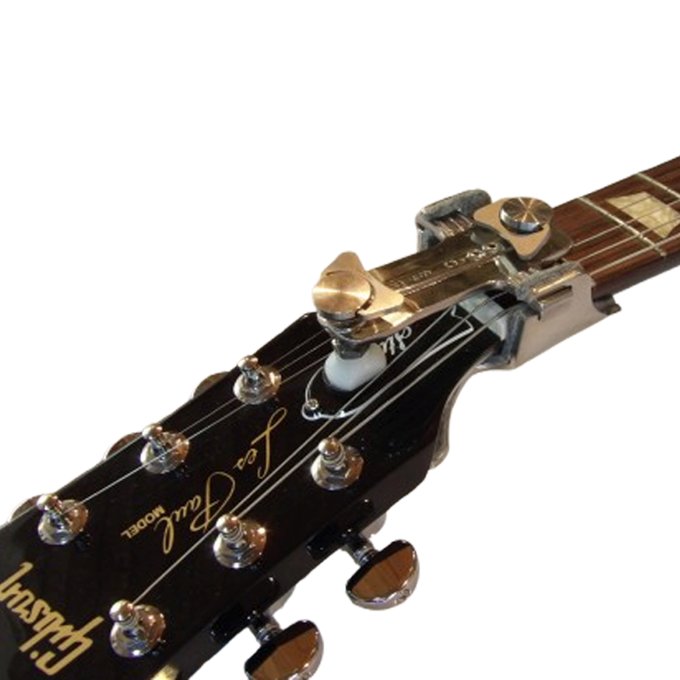
The vulnerable spot is where the neck meets the headstock. On angled-headstock designs, string tension pulls constantly at that joint. When you clamp a neck for fretwork or a repair, support it along its length so the pressure spreads out instead of concentrating at one point.
A few work-holding habits keep instruments safe:
- Use a padded neck rest that cradles the curve of the neck
- Support the headstock so it never hangs unsupported
- Use soft cauls between clamps and finished wood
- Clamp near the joint, not across the thin headstock wings
If you want a deeper look at the options, this guide to guitar neck support covers rests, cradles, and holding methods. And if you are weighing whether the extra gear is worth it, read is guitar neck protection necessary before you buy.
The same care applies to your body. Supporting the neck at the right height means you are not holding it steady with one hand while you work with the other.
Guitar Workbench Lighting for Detail Work
Guitar workbench lighting decides how hard your eyes and neck work. Dim light makes you lean in, and leaning in wrecks your posture within minutes.
Aim for bright, even light directly over the work, with no harsh shadows across the fretboard. A task lamp on an adjustable arm lets you move light to the exact spot. Add a second light from a different angle to kill shadows that hide fret slots and cracks.
Magnification pairs with good light. A magnifier lamp or a headband loupe brings fine detail up to your eyes so your neck stays straight. This is a small change that pays off every session.
Here is what to set up:
- An adjustable task lamp over the bench
- A second light source at an angle to reduce shadows
- A magnifier for fret and inlay work
- Neutral-colored bulbs so finish and wood color read true
Watch out: glare off a glossy finish hides scratches and reflects straight into your eyes. Angle the lamp so light falls across the work, not straight back at you.
Guitar Workbench Organization and Tool Accessibility
Guitar workbench organization is about reach, not tidiness. Every tool you stretch for pulls your shoulder forward and your back out of line. Keep the tools you use most within easy reach and your body stays neutral.
Start by grouping tools by task. Fretwork tools live together. Sanding and finishing tools live together. Setup tools like truss rod wrenches and feeler gauges sit closest to where you do setups.
A pegboard or a magnetic strip on the wall behind the bench keeps tools visible and off the work surface. A small rotating tray or a rolling cart holds the tools for the job you are on right now.
Try these moves:
- Keep the five most-used tools within arm's reach
- Store rarely used jigs and fixtures out of the way
- Use a rolling cart to bring tools to the work
- Clear the bench top so you have room to move
A cluttered bench forces awkward reaches and small knocks that damage instruments. Clean as you go and put tools back in their spot.
Work Surface Materials, Vibration, and Acoustic Environment
Work surface materials affect both the instrument and your body. A dead, solid top absorbs vibration and gives you a stable base. A thin, springy top bounces under a chisel and sends shock up your arms.
Hardwood tops like maple or beech hold up to years of clamping and cutting. Plywood works for a budget bench when it is thick and well supported. The key is mass and stability. A heavy top dampens vibration, so your hands feel less of the shock from sanding and chiseling.
The acoustic side matters too. A shop full of hard, flat surfaces bounces noise around, and constant loud sanders and routers wear you down. Soft surfaces like a rubber mat under the bench and acoustic panels on the walls cut the echo and make the space calmer to work in. Vibration dampening under the bench legs keeps the whole setup steadier and quieter.
A stable, quiet bench is easier on your hands and ears over a long career.
Micro-Ergonomics for Fretwork, Sanding, and Detail Tasks
Micro-ergonomics is the fine adjustment of how your hands, wrists, and eyes work at the smallest scale. This is where most guides stop, and it is where long careers are saved. The content gap here is significant: competitors cover bench height and lighting broadly but rarely address magnification, focal length, and hand-rest positioning, the three variables that determine whether detail work strains your neck and eyes or leaves them neutral.
Start with magnification and focal length. A magnifier lamp or a headband loupe brings fine detail up to your eyes so your neck stays straight, but the working distance matters as much as the power. Most loupes and magnifier lamps specify a focal length, the distance at which the lens is in focus. Choose a magnifier whose focal length matches where you comfortably hold the work.
Hand-rest positioning is the second lever. For fretwork, bring the work up to your eyes instead of dropping your head. Use a neck cradle that holds the fretboard at a comfortable angle, and rest the heel of your hand on a stable surface or a padded hand rest rather than hovering it over the work. A hand rest, a simple block or adjustable arm at the edge of the work, keeps your wrist neutral and reduces the small stabilizing muscle contractions that cause fatigue in the forearm. For sanding, grip the block so your wrist stays straight, and let your arm move the block rather than your fingers.
A few micro-habits that protect your hands:
- Keep your wrists neutral, not bent back
- Grip tools lightly and let the tool do the work
- Take a short break every 20 to 30 minutes
- Switch tasks to vary the strain on your hands
- Set magnification focal length to your natural working distance
- Use a hand rest to stabilize without hovering
For complex neck work, some luthiers weigh whether to tackle a repair with a jig or hand it to a pro. This comparison of a guitar neck reset jig versus a luthier lays out the cost and risk so you can decide.
Small changes to grip, focal length, and hand support add up over years. That is the real payoff of micro-ergonomics.
Choosing Your Ergonomic Bench Setup and Protecting the Headstock
Choosing your ergonomic bench setup comes down to matching the bench to your body and your work. Get the height right, add adjustable options where tasks change, support the neck, light the work, and organize for reach. Do those five things and your body stops fighting the bench.
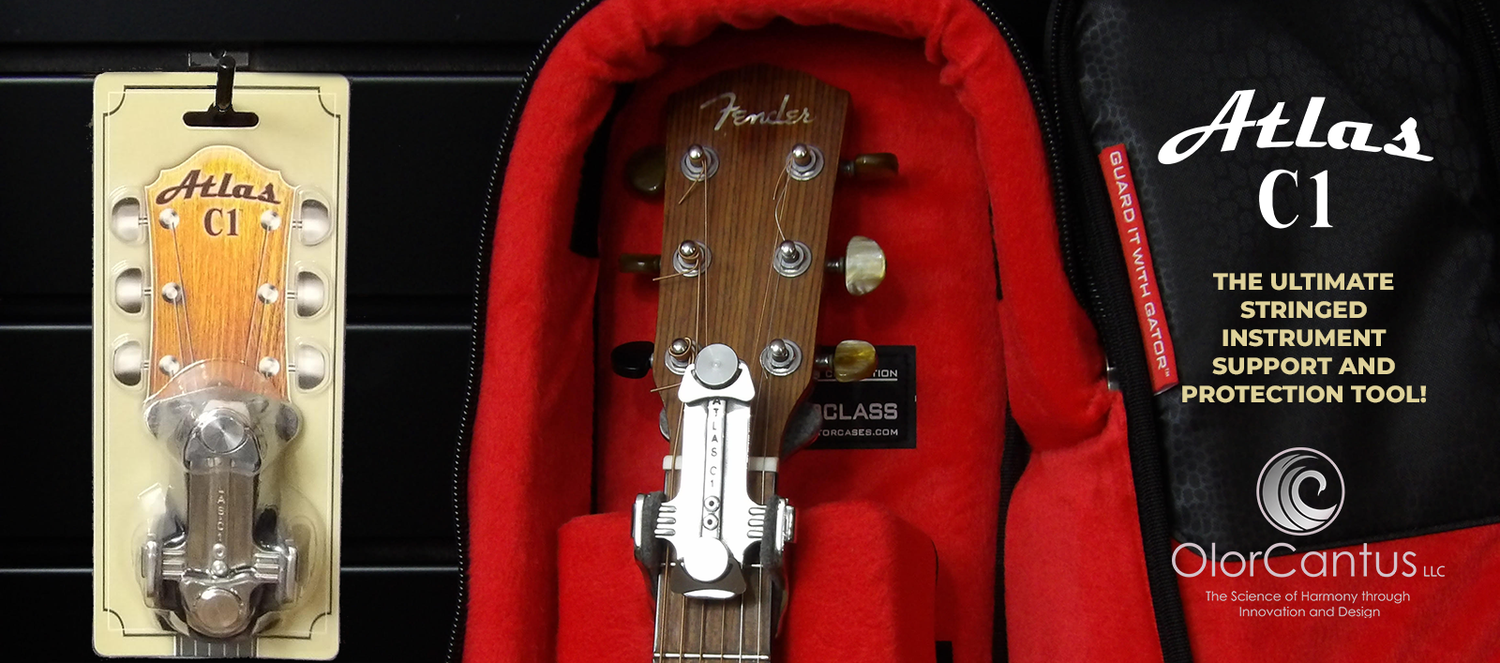
The last piece is protecting the instrument itself. Even a perfect bench cannot stop a headstock break during travel or storage. That is where the Atlas C1 comes in. The Atlas-C1 is a universal, multi-function headstock tool that supports the vulnerable headstock-neck junction and doubles as a pre-aligned repair jig. Its U.S. patent-protected design is built for a lifetime of reliable use.
If you want to secure the instrument while you work, the Atlas C1 headstock support and protection tool holds and protects the headstock during repair and setup.
Here is a quick recap of the setup we recommend:
- Set bench height at or just below elbow for most tasks
- Add adjustability for detail and heavy work
- Support the neck along its full length
- Light the work from two angles with magnification
- Keep tools within easy reach
Get started with Atlas C1 and give your instruments the support they deserve. The Science of Harmony through innovation and design. Long Live the Six String TM
Frequently Asked Questions
What is the best guitar workbench height for guitar repair?
The right guitar workbench height depends on the task and your body. For detail work like fretwork, many luthiers raise the bench so the work sits near elbow height, which keeps the wrists neutral. For heavier tasks like sanding or thicknessing, a slightly lower surface lets you use body weight instead of arm strength. An adjustable-height bench or a sturdy riser lets you switch between the two without hunching over the guitar.
How can luthiers reduce back and neck strain at the workbench?
Start with a bench height that lets you keep your shoulders relaxed and your neck close to neutral. Bring the guitar to you with a neck support or body support rather than leaning in. Take short breaks every 30 to 45 minutes, and rotate between detail work and tasks that use different muscle groups. Good guitar workbench lighting also reduces the urge to crane your neck toward the work.
How do you organize a luthier's workbench for better workflow?
Keep the tools you reach for most, like clamps, cauls, and bench dogs, within arm's length and grouped by task. Store rarely used jigs and fixtures on shelves below or behind the bench. A pegboard or magnetic strip for files and scrapers keeps the work surface clear. Good guitar workbench organization cuts down on twisting and reaching, which matters during long repair sessions.
How can you support a guitar safely while working on its neck or headstock?
Use a padded neck support or cradle so the neck rests without pressure on the fretboard or truss rod access. For headstock work, a dedicated support at the neck junction keeps the angled headstock from taking stress while you clamp or repair. A tool like the Atlas C1 is designed to support that vulnerable headstock-neck junction and doubles as a pre-aligned repair jig, which helps protect the instrument during both routine work and break repairs.