
Table of Contents
- What Happens When a Guitar Headstock Breaks
- Understanding Guitar Headstock Break Causes
- Immediate Steps After a Headstock Break
- Assessing the Damage and Break Type
- How to Fix a Broken Guitar Headstock
- Guitar Headstock Crack Repair and Professional Options
- Guitar Headstock Protection During Travel and Storage
- Repair Costs, Timeline, and Repair Versus Replacement
- Post-Repair Setup and Long-Term Durability
- Frequently Asked Questions
Last Updated: October 9, 2026
What Happens When a Guitar Headstock Breaks
A guitar headstock break is one of the most stressful things that can happen to a musician. The headstock is where the tuning machines attach, and it bears constant tension from the strings. When it breaks, your instrument can become unplayable, costly to repair, or even a total loss depending on the severity.
The good news: most headstock breaks can be fixed. The bad news: prevention is far easier and cheaper than repair. Understanding what causes these breaks, how to assess the damage, and what your repair options are will help you make the right decision when it happens.
At Atlas C1, we've worked with touring musicians and collectors who've faced this exact situation. We know the panic that sets in when you hear that crack. That's why we've built tools designed to prevent it from happening in the first place, and to help you repair it correctly if it does.
This guide covers everything you need to know about guitar headstock breaks: what causes them, immediate steps to take, how to assess damage, repair methods, and how to protect your instruments going forward.
Understanding Guitar Headstock Break Causes
A headstock doesn't break randomly. It breaks because of specific forces that overwhelm the wood. Understanding these causes helps you prevent breaks and recognize when your guitar is at risk.
Impact and Shipping Damage
The most common cause of a broken headstock is physical impact. This happens when:
- A guitar falls during transport or handling
- A case gets dropped or crushed during shipping
- The guitar is leaned against something and tips over
- A guitar is knocked over on a stand during a gig
Shipping damage is especially common for touring musicians. A guitar packed in a standard case can shift during air travel or truck transport. Even a moderate impact at the wrong angle can snap the headstock clean off.
The headstock-neck junction is the weakest point. It's where the solid wood of the neck tapers down, creating a natural stress point. When impact hits that area, the wood fibers snap.
String Tension and Angled Headstocks
Constant string tension also plays a role. A guitar's strings pull with over 130 pounds of force. On guitars with angled headstocks (like Gibson-style instruments), this tension pulls at an angle, creating shear stress at the neck junction.
An angled headstock can be vulnerable because the angle changes how force distributes through the wood. A straight headstock (like on Fender guitars) spreads tension more evenly. But an angled headstock concentrates stress at a specific point.
This is why vintage Gibson guitars sometimes develop stress cracks even without impact. Years of string tension can cause the wood to weaken and eventually crack. Proper support during storage and travel prevents this slow failure.
Immediate Steps After a Headstock Break
If your guitar headstock breaks, take action immediately. The first few hours matter.
Stop playing right away. Playing with a broken headstock can make the break worse. It can also damage the tuning machines or create secondary cracks.
Loosen the strings immediately. Reduce string tension by turning the tuning pegs. This removes stress from the break and prevents the pieces from separating further.
Stabilize the headstock. Don't move the guitar more than necessary. If the headstock is hanging, support it gently with your hand or a soft object. Movement can cause the break to splinter or shift out of alignment.
Document the break. Take clear photos of the break from multiple angles. This helps a repair technician assess the damage and quote repair costs. Photos also help if you need to file an insurance claim.
Contact a luthier. Call a professional guitar repair shop immediately. Many luthiers have waiting lists, and you want to get your guitar in queue quickly. They can tell you if repair is possible and how long it will take.
Assessing the Damage and Break Type
Not all headstock breaks are the same. The type of break determines whether repair is possible and how difficult it will be.
Clean Breaks vs. Splintered Breaks
A clean break is when the wood snaps in a straight line with minimal splintering. The two pieces fit together like a puzzle. Clean breaks are ideal for repair because the wood fibers align well and glue can create a strong joint.
A splintered break is when the wood shatters into multiple pieces or creates jagged edges. This happens with impact at certain angles or when the wood is already stressed. Splintered breaks are harder to repair because the pieces don't fit together neatly and some wood may be missing.
Evaluating Wood Alignment and Grain Integrity
Once you examine the break, check if the pieces still align. Place the headstock back against the neck (without forcing it) and see if it sits flush. If the pieces are parallel and the break line is straight, alignment should be straightforward.
Check the wood grain direction. If the grain runs parallel to the break, the repair will be stronger. If the grain is perpendicular or irregular, the repair may be weaker. A luthier will account for this when deciding on reinforcement methods.
Look for splintered wood or missing chunks. Small splinters can be glued back. Large missing sections may require a wood patch or overlay, which adds complexity and cost.
How to Fix a Broken Guitar Headstock
Headstock repair methods range from simple gluing to complex reinforcement. The method depends on the break type and severity.
Gluing a Clean Break
For a clean break with good alignment, gluing is the primary repair method. A luthier will:
- Clean the break surfaces to remove dust and debris
- Apply wood glue (usually epoxy or hide glue) to both surfaces
- Clamp the pieces together with even pressure
- Hold the clamp for 24 hours while the glue sets
- Remove excess glue and sand the joint smooth
The glue joint itself is often stronger than the surrounding wood. A properly glued clean break can last the life of the guitar.
The key is clamping pressure and alignment. Too little pressure and the glue joint is weak. Too much pressure and you can crush the wood. A repair jig helps apply even pressure across the entire break.
Reinforcing with Backstrap or Overlay
For breaks with splintering or misalignment, reinforcement adds strength. Common reinforcement methods include:
Backstrap reinforcement: A thin strip of wood is glued to the back of the headstock, spanning the break. This adds strength without changing the headstock's appearance from the front.
Overlay repair: A wood patch is glued over the break area. This is used when wood is missing or the break is severe. The overlay is shaped to match the headstock contour and finished to blend with the original wood.
Veneer repair: For valuable guitars, a veneer patch matches the original wood color and grain. This is more cosmetic and works best on breaks that don't affect structural strength.
Reinforcement adds time and cost but creates a more durable repair, especially for guitars that will be played hard or traveled with frequently.
Guitar Headstock Crack Repair and Professional Options
A crack is not the same as a break. A crack is a separation in the wood fibers without full separation of the headstock. A break is a complete failure. The two need different responses, and the break type drives every decision that follows.
Step-by-Step Decision Tree by Break Type
Use this to understand what a professional is likely to recommend.
1. Clean break, pieces align flush.
- Best case. The repair is a glue-up with proper clamping.
- Reinforcement is optional but often recommended for gigging instruments.
- Expected outcome: strong, playable, minimal cosmetic trace.
2. Splintered break, pieces still present.
- The technician must fit splinters back into place before gluing.
- A backstrap or spline is commonly added to restore strength.
- Expected outcome: strong if done well, but more visible repair lines.
3. Break with missing wood.
- New wood must be grafted in to fill the gap.
- An overlay or backstrap covers and reinforces the repair.
- Finish matching becomes a significant part of the job.
- Expected outcome: structurally sound, cosmetically noticeable.
4. Break near the nut.
- This area carries string tension directly and is close to the truss rod access.
- Repair must avoid disturbing the truss rod channel.
- Expect careful clamping and often a spline for strength.
5. Break at or through the tuner holes.
- Tuner holes weaken the wood and complicate clamping.
- The repair may require filling and re-drilling a tuner hole.
- Hardware alignment must be checked after repair.
6. Crack, not a full break.
- A stable hairline crack that is not spreading may only need monitoring.
- A crack that is growing, or that runs with the grain toward the truss rod, needs professional attention.
- Glue injection and clamping are common; reinforcement depends on location.
What a Professional Repair Actually Involves
Knowing the process helps you evaluate a quote and ask better questions.
- Inspection and assessment. The technician examines the break under good light, checks grain direction, looks for hidden cracks, and confirms whether the truss rod is intact.
- Cleaning and dry fitting. Old glue, dust, and finish flakes are removed. The pieces are dry-fitted to confirm alignment before any adhesive is applied.
- Gluing and clamping. Wood glue or epoxy is applied, and the joint is clamped with even pressure using a jig or cauls. Clamp time is typically 24 hours.
- Reinforcement (if needed). A backstrap, spline, or overlay is fitted and glued to add strength across the joint.
- Shaping and sanding. Excess material is removed and the repair is shaped to match the original contour.
- Finish work. Color and clear coat are applied to blend the repair. This is often the longest step.
- Setup. Truss rod, action, intonation, and tuning stability are checked before the guitar is returned.
Questions to Ask Before You Commit
- How many headstock repairs have you done on this style of guitar?
- Will you reinforce the joint, and why or why not?
- What is the realistic turnaround, including finish cure?
- Will the repair be documented with photos and an invoice?
- What is your warranty on the repair?
When Professional Repair Is the Clear Choice
- Vintage, custom-shop, or high-value instruments
- Any break involving missing wood or the truss rod channel
- Guitars that tour or ship regularly
- Any instrument you plan to sell, where documentation protects value
The deciding factor is almost always whether the instrument is replaceable on the same terms.
Guitar Headstock Protection During Travel and Storage
Prevention is always better than repair. Protecting your headstock during travel and storage prevents breaks from happening.
Use a quality guitar case. A hard case provides better protection than a soft gig bag. The case should fit snugly so the guitar doesn't shift during transport.
Add extra padding at the headstock. Place foam or cloth padding around the headstock inside the case. This absorbs impact and prevents the headstock from hitting the case wall.
Support the neck during storage. When storing a guitar upright, the headstock hangs unsupported. Over time, string tension and gravity can stress the neck joint. A wall mount or stand that supports the neck reduces this stress.
Avoid extreme temperature and humidity changes. Wood expands and contracts with humidity. Rapid changes create stress that can cause cracks. Keep guitars in a stable environment.
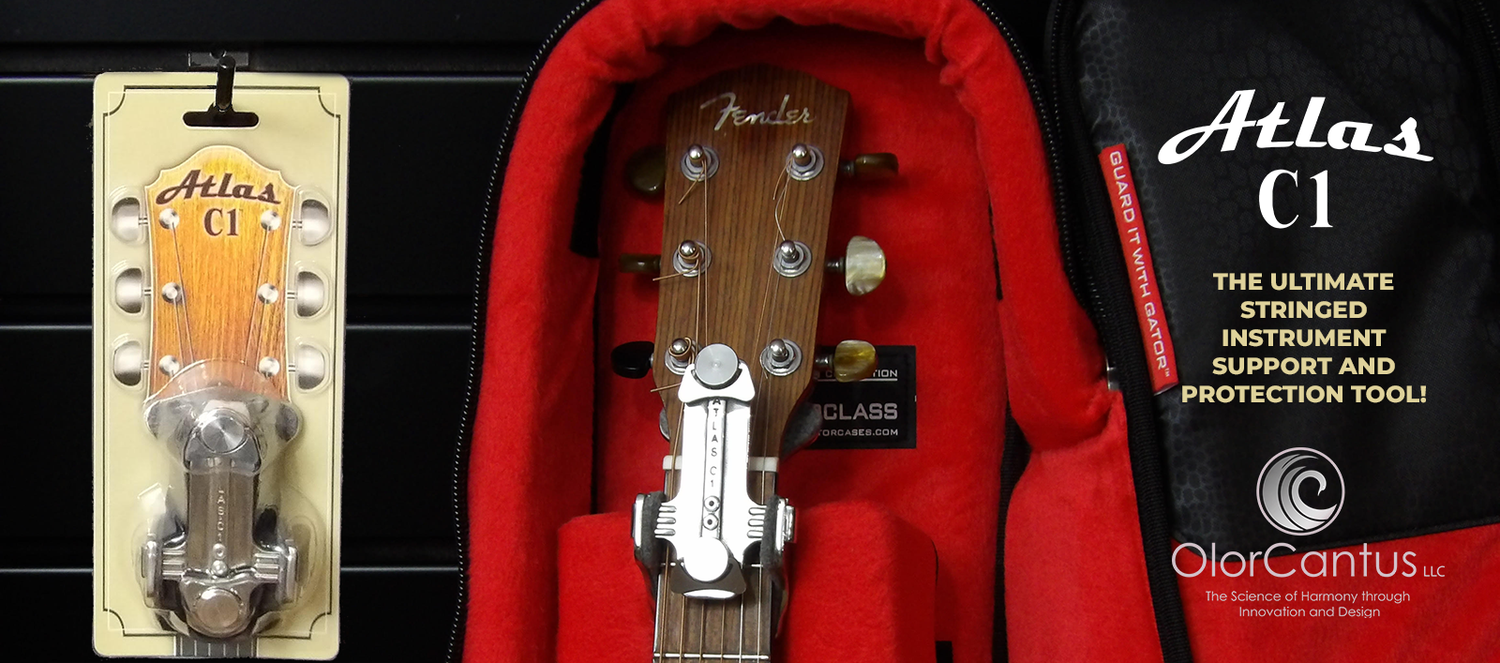
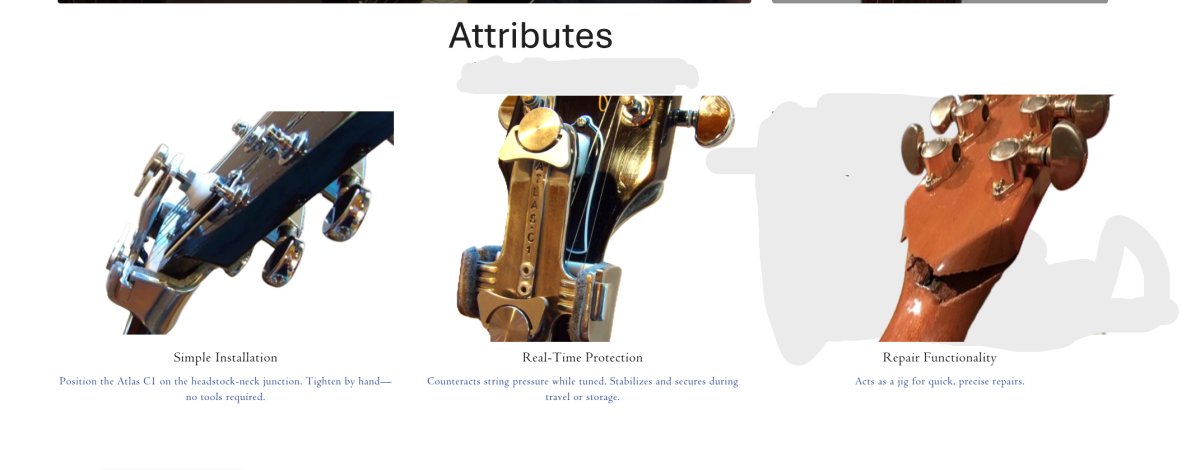
Use a headstock protection tool. A specialized headstock support tool like Atlas C1 provides targeted protection at the vulnerable headstock-neck junction. It works during travel, shipping, and storage, and it doubles as a repair jig if a break does occur. When you order, take advantage of our free shipping and receive a 10% product discount on your first purchase.
Atlas C1's design counteracts the 130+ pounds of string pressure and provides pre-aligned support that protects the most vulnerable area of your guitar. For touring musicians and collectors with valuable instruments, it's a lifetime investment that prevents costly repairs.
Repair Costs, Timeline, and Repair Versus Replacement
When your headstock breaks, the practical question is simple: is it worth fixing? Most ranking pages stop at "take it to a luthier." This section gives you a decision framework instead.
What Drives Repair Cost
Headstock repair is priced by labor hours, not by a flat rate. Headstock repair is priced by labor hours, and the total depends on:
- Break type: A clean snap with good alignment is the fastest repair. A splintered break with missing wood takes longer because the technician must reconstruct the joint.
- Reinforcement needed: A simple glue-up is one job. Adding a backstrap, overlay, or spline is a second job layered on top.
- Finish work: If the break crosses a finished surface, color matching and blending add hours. Vintage instruments with aged lacquer or poly finishes take the longest.
- Setup after repair: Truss rod adjustment, action, intonation, and tuning stability checks are part of a complete job.
Always get a written estimate before authorizing work.
Turnaround Time
Two clocks are running: the shop's queue and the actual repair time.
- Queue time: Popular luthiers often have multi-week waiting lists. Ask for the current backlog before you commit.
- Bench time: A clean glue-up needs 24 hours of clamp time plus drying, then setup. A reinforced repair adds days for shaping, gluing, and finishing.
- Finish cure: If finish work is involved, curing can add days to weeks depending on the product used.
A realistic expectation is that you will be without the guitar for several weeks, not days. If you have a gigging schedule, ask about rush options and whether they change the price.
Repair Versus Replacement: A Decision Framework
Work through these questions in order:
- Is the instrument replaceable? If it is a current production model still sold new, compare the repair estimate against the cost of an equivalent replacement.
- Does the instrument have sentimental or collector value? Vintage, custom-shop, and inherited instruments usually justify repair even at a high estimate, because replacement is not possible on the same terms.
- How severe is the break? Clean breaks favor repair. Splintered breaks with missing wood, or breaks that run into the truss rod channel or tuner holes, raise both cost and risk.
- Will you play it hard? A guitar that tours needs a reinforced repair. A guitar that stays home may be fine with a simpler glue-up.
- What is the resale picture? A documented, professional repair preserves most of the value. An amateur repair or an undocumented break can cut value sharply.
Documentation and Insurance
Before you pay out of pocket, check two things:
- Your insurance policy: Some homeowner's, renter's, and instrument-specific policies cover accidental damage. Ask whether the claim affects your premium.
- Your documentation: Photos of the break, the repair estimate, and the final invoice all matter if you file a claim or later sell the guitar. Keep them together.
Resale and Disclosure
A repaired headstock is not automatically a value killer. What kills value is a hidden or poorly executed repair. Disclose the repair, keep the paperwork, and let the quality of the work speak. Buyers generally accept a clean, documented professional repair; they discount heavily for mystery repairs.
Post-Repair Setup and Long-Term Durability
After repair, your guitar needs proper setup to play correctly. A luthier will:
- Check neck alignment and straightness
- Adjust truss rod if needed
- Set bridge height and action
- Ensure tuning stability
- Test intonation
A properly repaired and set-up guitar should play and feel normal. Tuning stability should be good. If you notice tuning problems after repair, contact the luthier, the repair may need adjustment.
Long-term durability depends on how you care for the guitar after repair. The repaired area is strong, but it's still the weakest point. Protect it the same way you would prevent a break:
- Use a quality case for travel
- Support the neck during storage
- Avoid impact and rough handling
- Maintain stable temperature and humidity
With proper care, a repaired headstock lasts the life of the guitar. Many professional musicians play guitars with repaired headstocks without any issues.
A broken guitar headstock feels catastrophic in the moment. But most breaks can be repaired successfully, and prevention tools make breaks avoidable. Whether you're a touring musician transporting guitars constantly or a collector protecting a valuable vintage instrument, understanding headstock breaks, what causes them, how to assess damage, and how to repair them, gives you confidence and control.
If you play guitar seriously, protecting your headstock during travel and storage isn't optional. Tools like Atlas C1 provide targeted support at the vulnerable headstock-neck junction, counteracting string tension and preventing impact damage. It works as both a protective device during travel and a pre-aligned repair jig if you ever need it. For musicians who value their instruments, it's an investment that pays for itself the moment it prevents your first headstock break.
Frequently Asked Questions
What should I do immediately after a guitar headstock breaks?
Stop playing immediately and remove string tension gradually by loosening the tuning machines. Place the guitar on a flat surface with the headstock supported to prevent further damage. Do not attempt to move or transport the guitar until you've assessed the break. If the pieces separated, keep them together and avoid forcing them back. Photograph the break from multiple angles for documentation. Contact a professional luthier for guidance on next steps, or use a repair jig to stabilize the headstock while you decide on repair options.
Can a guitar with a broken headstock be repaired?
Yes, most headstock breaks can be repaired successfully. Clean breaks with good wood alignment respond well to wood glue and clamping pressure, often restoring structural strength comparable to the original. Splintered breaks require more care and may need reinforcement with a backstrap or veneer overlay. Professional luthiers have specialized tools and expertise to assess whether repair is viable based on the break type, wood condition, and damage extent. The repaired joint, when done correctly, can last the lifetime of the instrument.
How can I prevent a guitar headstock from breaking during travel?
Use a quality padded guitar case with extra foam around the headstock-neck junction, the most vulnerable area. For frequent air or bus travel, consider a protective support tool designed to stabilize the headstock during transport and storage. Keep the guitar in its case when not playing, avoid placing weight on the headstock, and protect it from impact and falls. Store guitars upright or on a stand that supports the neck properly. For high-value instruments or frequent touring, a specialized headstock protection device provides reliable support that counteracts string tension and absorbs shock.
Is it safe to keep playing a guitar with a cracked headstock?
No. Playing a guitar with a cracked headstock risks worsening the damage and potentially causing complete separation. String tension continuously pulls on the damaged area, widening cracks and stressing the wood fibers. A cracked headstock can also affect tuning stability since the neck's structural integrity is compromised. Stop playing until the break is assessed by a professional. Even small cracks can deteriorate rapidly under string tension, making immediate repair or stabilization essential to prevent costly, irreversible damage.