
Table of Contents
- Essential Clamping Systems for Headstock Breaks
- Guitar Headstock Clamping Techniques That Work
- Best Wood Glue for Guitar Neck Repair
- Precision Measuring Tools and Setup Kit Essentials
- Files, Shaping Tools, and Surface Preparation
- How to Fix a Broken Guitar Headstock: A Step-by-Step Approach
- Workholding, Vises, and Post-Repair Finish Restoration
- Frequently Asked Questions
Last Updated: September 5, 2026
A broken headstock is the most common catastrophic guitar injury, often the result of a simple tip-over that snaps the neck joint under string tension. When it happens, the quality of your repair depends almost entirely on the tools you have on hand. This guide from Atlas C1 covers the best tools for guitar headstock repair, from clamping systems and adhesives to precision measuring and finishing gear.

The right setup matters because a headstock break is a structural failure. A clean break along the grain can be repaired invisibly, but a poor glue joint or misaligned repair compromises the instrument's integrity and tuning stability forever.
Essential Clamping Systems for Headstock Breaks
Clamping systems are the backbone of any guitar headstock repair. Without controlled, even clamping pressure, the glue joint will fail under the 130+ pounds of string tension an instrument produces. The essential kit includes deep-throat C-clamps, wooden cauls, and specialized repair jigs that distribute force across the splintered wood.
A common mistake is using hardware-store clamps directly on the finish, which leaves dents. Always use cauls, curved or flat wooden blocks that conform to the headstock's shape and spread pressure evenly. For angled headstocks common on Gibson-style guitars, a pre-aligned repair jig simplifies alignment dramatically.

Guitar Headstock Clamping Techniques That Work
Dry-fit the break before applying any glue. This reveals how the splintered wood aligns and whether your clamping setup can hold the pieces together. Test the fit, adjust your cauls, and confirm clamp positions so the repair goes smoothly when the adhesive is wet.
Apply glue sparingly to both surfaces, then work the pieces together with slight pressure to force out air pockets. Tighten clamps gradually, alternating between them to maintain even pressure. Wipe away excess glue immediately with a damp cloth. The assembly should sit undisturbed for at least 24 hours before testing the joint's strength.
Best Wood Glue for Guitar Neck Repair
Wood glue selection is the most critical material decision in guitar headstock repair, and the choice hinges on the nature of the break itself. Professional luthiers match the adhesive to the fracture pattern to maximize strength and future serviceability.
Matching Adhesive to Break Type
A clean break, where the wood splits along the grain in two or three large, interlocking pieces, is the ideal scenario. Here, aliphatic resin (yellow wood glue, e.g., Titebond Original or Titebond II) is the professional standard. It creates a bond stronger than the surrounding wood itself, and its longer open time (5-10 minutes) gives you the working window to position complex pieces accurately.
A splintered or crushed break, common when the headstock impacts a hard surface, presents a different challenge. The wood fibers are compressed and torn, creating gaps. For this, thick CA glue (cyanoacrylate) or epoxy is often superior. Thin CA glue wicks into hairline cracks, stabilizing the wood fibers. Epoxy, with its gap-filling properties, is the choice for missing chunks or severe compression, though it is less reversible and messier to work with.
The Reversibility Question: Hide Glue
For vintage instruments or any repair where future disassembly is likely, hot hide glue remains the preferred choice. Its bond is strong but reversible with heat and moisture. The trade-off is working time: hot hide glue gels in 30-60 seconds, demanding a perfectly rehearsed clamping setup. Liquid hide glue (e.g., Old Brown Glue) offers a longer open time but slightly lower initial tack.
Curing Time vs. Strength: The Science of the Wait
The single most common cause of repair failure is premature stringing. While a joint may feel dry to the touch in 2 hours, it reaches only about 50% of its ultimate strength in that time. The standard 24-hour clamp time is the minimum for handling, but the bond continues to cure and gain strength for up to a week. Stringing the guitar up early, even at reduced tension, applies the 130+ pounds of string force to a partially cured joint, causing micro-fractures that permanently compromise the repair.
Application Technique for Maximum Strength
Apply a thin, even coat to both mating surfaces. A common error is applying glue to only one side, which leaves dry spots and starved joints. Work the pieces together with a slight twisting motion to force out air pockets. The goal is a glue line so thin it is nearly invisible, thick glue lines are weak glue lines.
Precision Measuring Tools and Setup Kit Essentials
A successful repair isn't just about the glue joint; it's about restoring correct geometry. A broken headstock that cures slightly twisted will never intonate properly. Precision measuring tools confirm that the neck remains straight and the break aligns with the fret plane.
A straightedge and a digital caliper are the minimum essentials. After clamping, check that the headstock angle matches the original spec and that the string slots align with the nut. A setup kit with feeler gauges and a fret rocker helps you verify the repair didn't introduce a twist.
Files, Shaping Tools, and Surface Preparation
Once the glue cures, the repair area needs cosmetic work to blend into the original finish. Luthier files, nut files, and shaping tools remove excess dried glue and level the wood surface. This stage requires patience and fine grits, because aggressive sanding removes the original finish and creates a visible patch.
Start by scraping away dried glue with a razor blade held flat. Then shape the wood with fine files, working down to 400-grit sandpaper and finer. Before finish restoration, clean the area with naphtha to remove oils and dust, and mask off the surrounding finish with tape.
How to Fix a Broken Guitar Headstock: A Step-by-Step Approach
- Assess the break and gather your tools, including clamps, cauls, adhesive, and a repair jig.
- Dry-fit the broken pieces to confirm alignment and test your clamping setup.
- Apply adhesive to both surfaces and press the joint together.
- Position cauls and clamps, tightening gradually to distribute pressure evenly.
- Wipe away excess glue and let the assembly cure for at least 24 hours.
- Remove clamps and check alignment with a straightedge and caliper.
- Scrape and sand the repair area to blend with the surrounding wood.
- Restore the finish and restring the guitar, checking tuning stability.
Workholding, Vises, and Post-Repair Finish Restoration
Workholding is the difference between a controlled repair and a frustrating one. A bench vise with padded jaws or a dedicated guitar neck cradle holds the instrument steady, freeing both hands for clamping and alignment. Without solid workholding, the neck shifts as you tighten clamps.
But the repair is not complete when the glue cures. The final 20% of a professional-grade repair is finish restoration, the stage where most DIY jobs reveal themselves. A structurally perfect joint with a visible scar will always look like a repair.
Assessing the Original Finish
The first step is identifying what you are matching. Nitrocellulose lacquer (used on most American-made guitars from the 1950s through the 1980s and many modern custom builds) melts into itself with solvent, allowing seamless blending. Polyurethane (common on modern production guitars) does not melt; it must be built up in layers and leveled. Shellac (French polish) is the traditional finish on many classical guitars and is the most forgiving to repair.
The Finish Restoration Tool Kit
Tool |
Purpose |
Grit / Specification |
|---|---|---|
Razor blade (single-edge) |
Scrape away dried glue squeeze-out |
Held flat, never at an angle |
Sanding blocks |
Level the repair area |
Start at 220-grit, progress to 400, 800, 1200, 1500, 2000 |
Micro-mesh pads |
Fine polishing of the finish |
2400 to 12000 grit |
Abrasive polishing compounds |
Restore gloss |
Tripoli (cut) then white diamond (polish) |
Denatured alcohol / naphtha |
Surface cleaning before finishing |
Removes oils, wax, and dust |
Artist's brushes |
Apply touch-up finish |
Fine-tipped, for precision work |
Step-by-Step Finish Blending
- Scrape, don't sand, the glue. After the clamps come off, use a single-edge razor blade held perfectly flat to scrape away the dried glue squeeze-out. Sanding glue directly clogs the paper and smears the residue into the surrounding wood grain.
- Level the wood. Once the glue is gone, use a rigid sanding block with 220-grit to level any proud wood fibers. Progress through 400, 800, and 1200-grit, always sanding in the direction of the grain. Stop frequently to check your progress, the goal is to level the repair, not to remove the original finish around it.
- Clean the surface. Wipe the area with naphtha on a lint-free cloth. This removes sanding dust and any oils from your fingers that would contaminate the new finish.
- Apply the touch-up finish. For a lacquer finish, use a fine artist's brush to apply thin coats of nitrocellulose lacquer, letting each coat dry for 2 hours before the next. The solvent in the fresh lacquer will melt into the existing finish, creating a chemical bond rather than a mechanical one. Build up the repair until it is slightly proud of the surrounding surface. For polyurethane, use the same approach with a polyurethane varnish, but expect a visible seam, this finish does not melt into itself.
- Level and polish. After the touch-up has cured for 48 hours, wet-sand the repaired area level with the surrounding finish using 1200, 1500, and 2000-grit paper. Then switch to micro-mesh pads from 2400 up to 12000 grit to restore the gloss. Finish with a polishing compound on a soft cloth, tripoli for the cut, then white diamond for the shine.
When to Stop and Call a Professional
If the instrument is a vintage piece with significant collector value, or if the break extends into the fretboard or truss rod channel, consider stopping. A professional luthier with spray equipment and color-matching expertise can achieve a result invisible under UV light. If you're gathering supplies for the attempt, Atlas C1 offers free shipping on all orders to help you get the right gear without extra cost.
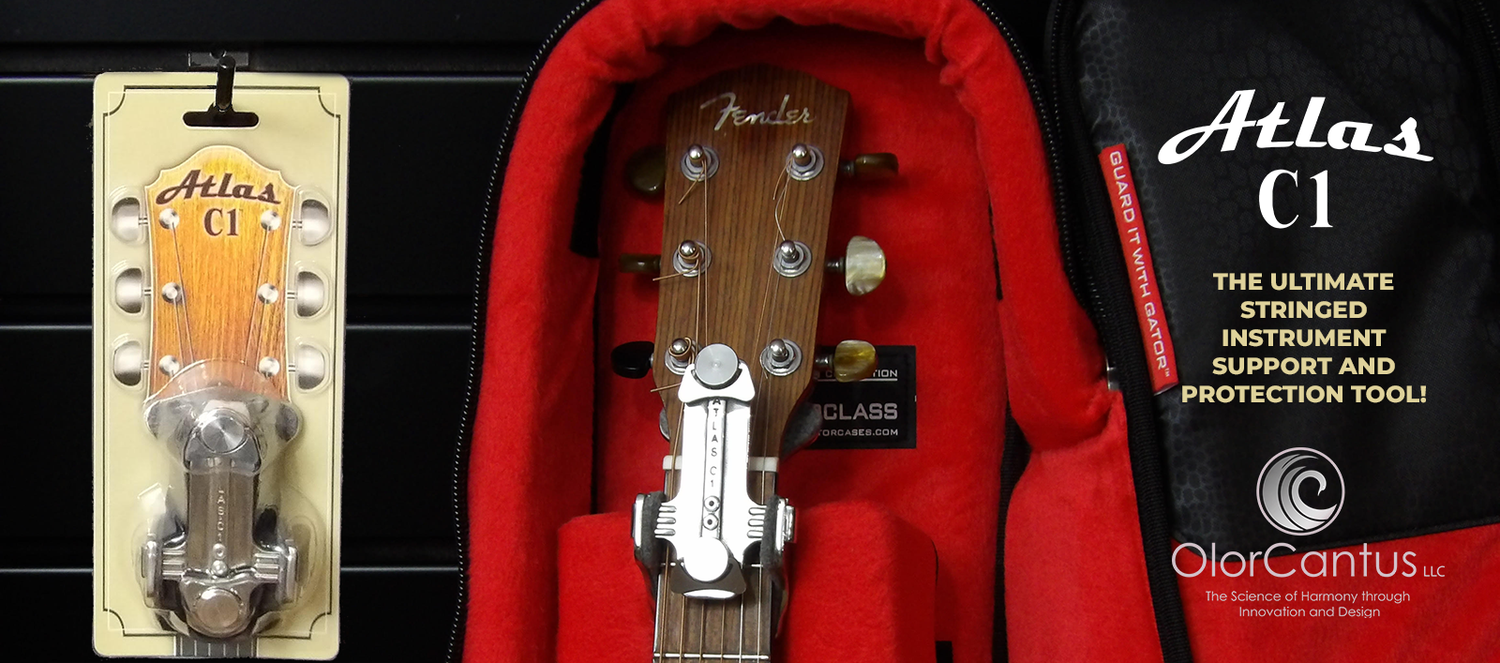
The Atlas C1 tool serves a dual purpose here. It protects the vulnerable headstock-neck junction during travel and storage, preventing the break from happening in the first place. When a repair is necessary, it doubles as a pre-aligned repair jig, holding the break in correct position while the adhesive cures. This patented design simplifies the most stressful part of the process, making a professional-grade alignment accessible to guitarists without luthier experience. For those ready to tackle the job, Atlas C1 also offers a 10 % product discount on your first order to make equipping your workshop more affordable. The Atlas-C1 A is an essential, lifetime-use investment for any guitarist looking to safeguard their valuable gear.
Frequently Asked Questions
What is the best glue to use to repair a guitar headstock?
For most headstock breaks, a high-quality aliphatic resin wood glue, such as Titebond Original, is the standard choice. It creates a bond that is stronger than the surrounding wood, dries clear, and cleans up with water. Hide glue is another option, particularly for vintage instruments, because it is reversible with heat and moisture, which is important for future repairs. Avoid superglue or epoxy for major structural breaks, as they are difficult to reverse and can complicate future professional repairs.
Can a broken guitar headstock be fixed permanently?
Yes, a broken headstock can be fixed permanently when done correctly. The key is a clean joint, proper clamping pressure, and sufficient adhesive curing time. Using the right tools, like a pre-aligned repair jig to maintain geometry, ensures the break is held perfectly while the glue cures. A proper repair with aliphatic resin glue often results in a joint stronger than the original wood. After the finish is restored, the repair can be nearly invisible and structurally sound for decades.
How much does it cost to fix a broken headstock on a guitar?
Professional luthier repairs for a broken headstock typically range from $200 to $300, depending on the complexity of the break. However, investing in the right tools for a DIY repair can save you this cost. A quality wood glue, clamping system, and a precision jig like the Atlas-C1, which costs $129.99, can pay for itself after a single successful repair, providing a lifetime of use for future issues.
What tools are needed for guitar repair?
For headstock repair, you'll need a few essential categories of tools. First, clamping systems like deep-throat C-clamps and wooden cauls to apply even pressure. Second, a high-quality wood glue such as aliphatic resin. Third, precision measuring tools like a straightedge and fret rocker to ensure alignment. Luthier files and sandpaper handle shaping and surface preparation. Finally, a pre-aligned repair jig is critical for maintaining correct geometry while the glue cures.