
Table of Contents
- Why Angled Headstocks Are Vulnerable to Damage
- How to Protect Angled Guitar Headstocks During Travel
- Common Causes of Headstock Fractures and How to Prevent Them
- Guitar Headstock Repair Jig: Pre-Aligned Solutions for Breaks
- Guitar Neck Support for Travel: Storage and Transportation Methods
- DIY vs. Professional Headstock Repair: Cost-Benefit Analysis
- Preventative Maintenance for Long-Term Headstock Protection
- The Role of Structural Support Tools in Preventing Damage
- Frequently Asked Questions
Last Updated: September 30, 2026
Why Angled Headstocks Are Vulnerable to Damage
Angled headstocks represent a structural vulnerability that straight-headstock designs avoid entirely. The angled geometry of headstocks on Gibson-style guitars creates a weak point at the neck junction where the headstock angles back from the neck. This design concentrates mechanical stress at a specific location rather than distributing it along the full length of the neck.
String tension applies roughly 130+ pounds of downward force on the headstock. On an angled headstock, this pressure pulls at an angle, creating shear forces that straight designs simply don't experience. A direct impact, a fall during transport, pressure from luggage, or even aggressive case handling, can snap the headstock clean off at this vulnerable junction.
The wood grain itself becomes a factor. Most headstock fractures follow the grain runout, which is rarely perfectly aligned with the structural load. Luthiers recognize this pattern consistently: breaks occur along the grain, not across it, because the wood fails along its weakest plane. Understanding this vulnerability is the first step toward preventing it. That's where proper support structures and protective equipment become essential.
How to Protect Angled Guitar Headstocks During Travel
Proper Neck Support and Workstation Setup
Protecting an angled headstock during travel begins with understanding how to support the neck properly. The neck must be supported along its entire length, not just at the body. Many musicians wrap their guitars in a case and assume they're protected. In reality, the headstock remains vulnerable to lateral movement and impact within the case.
A proper support structure should cradle the neck from the body all the way to the headstock, preventing any twisting or bending motion. The support must be rigid enough to absorb shock without transferring that shock directly to the headstock. Padding alone is insufficient, padding compresses on impact, which means the headstock can still move and strike the case interior.
Professional workstation setup for repairs or storage follows the same principle. The neck should rest on a stable surface at an angle that matches the headstock's natural angle. This reduces tension on the wood fibers and prevents stress concentration at the junction. A neck rest designed specifically for angled headstocks maintains proper alignment without requiring constant adjustment.

Safe Clamping Techniques for Headstocks
Clamping a headstock requires precision to avoid causing the very damage you're trying to prevent. Excessive clamping pressure can crush wood fibers or create new stress points. The goal is even pressure distributed across the support surface, not maximum pressure at any single point.
A protective caul, a shaped block of wood, distributes clamping force across a wider area of the headstock. Without a caul, clamp pressure concentrates in a small spot, potentially creating dents or compression damage. The caul should be shaped to match the headstock's contour, protecting the tuning machine bushings and the headstock face equally.
Clamping pressure should be firm enough to prevent movement but light enough that you don't need a wrench to tighten it. A common mistake is over-tightening, which can actually weaken the wood by crushing its cellular structure. The structural integrity of the headstock depends on wood fiber integrity, crushing those fibers reduces strength rather than increasing it.
Common Causes of Headstock Fractures and How to Prevent Them
Headstock fractures fall into three primary categories: impact damage, chronic stress damage, and manufacturing defects. Impact damage is the most obvious, a drop, a collision, or pressure from luggage. Chronic stress develops over months or years from repeated string tension and vibration, particularly if the neck isn't properly supported during storage.
Impact fractures typically occur at a single point and follow the grain runout. The break is clean and localized. Chronic stress fractures develop gradually, often starting as a hairline crack that expands over time. These fractures may not be visible until they suddenly worsen.
Manufacturing defects are rare in quality instruments but do occur. A knot in the wood, grain runout that runs perpendicular to the structural load, or inadequate glue lines in a scarf joint can create a weak point that fails under normal playing tension.
Prevention requires addressing all three categories. Protect against impact through proper transport and storage. Minimize chronic stress through proper neck support and tension management. For vintage or valuable instruments, have a luthier inspect for existing weak points before they become failures.
Guitar Headstock Repair Jig: Pre-Aligned Solutions for Breaks
Scarf Joints vs. One-Piece Construction
A scarf joint is a woodworking technique where two pieces of wood are cut at matching angles and glued together. Many quality guitar necks use scarf joints to join the headstock to the main neck, allowing the grain to run in the optimal direction for each section. A one-piece neck is carved from a single block of wood, eliminating the glue line but sometimes requiring grain runout that's less than ideal.
Scarf joints, when properly executed, create a strong connection that can be as strong as one-piece construction. The glue line itself is the potential weak point. Wood glue bonds are strong when pressure is applied during curing, but they can fail if the glued joint experiences excessive stress or if the original glue line was compromised.
When a scarf joint breaks, repair requires realigning the two pieces perfectly before re-gluing. A pre-aligned repair jig holds the pieces in exact position, ensuring the grain lines up and the joint is flush. Without proper alignment, a repaired scarf joint becomes weaker than the original, creating a stress concentration point.
Durability of Repaired Headstocks
A properly repaired headstock can be as durable as an original. The key factors are alignment, glue quality, and curing pressure. When a headstock is repaired without proper support and alignment, the repair fails within months or years because the glue joint never properly sets or the joint reopens under string tension.
Professional repairs use clamps, cauls, and alignment jigs to ensure the joint is perfectly aligned during the entire curing process. Curing typically takes 24 hours for modern wood glue, during which the clamps must maintain consistent pressure. Any movement during this window compromises the repair.
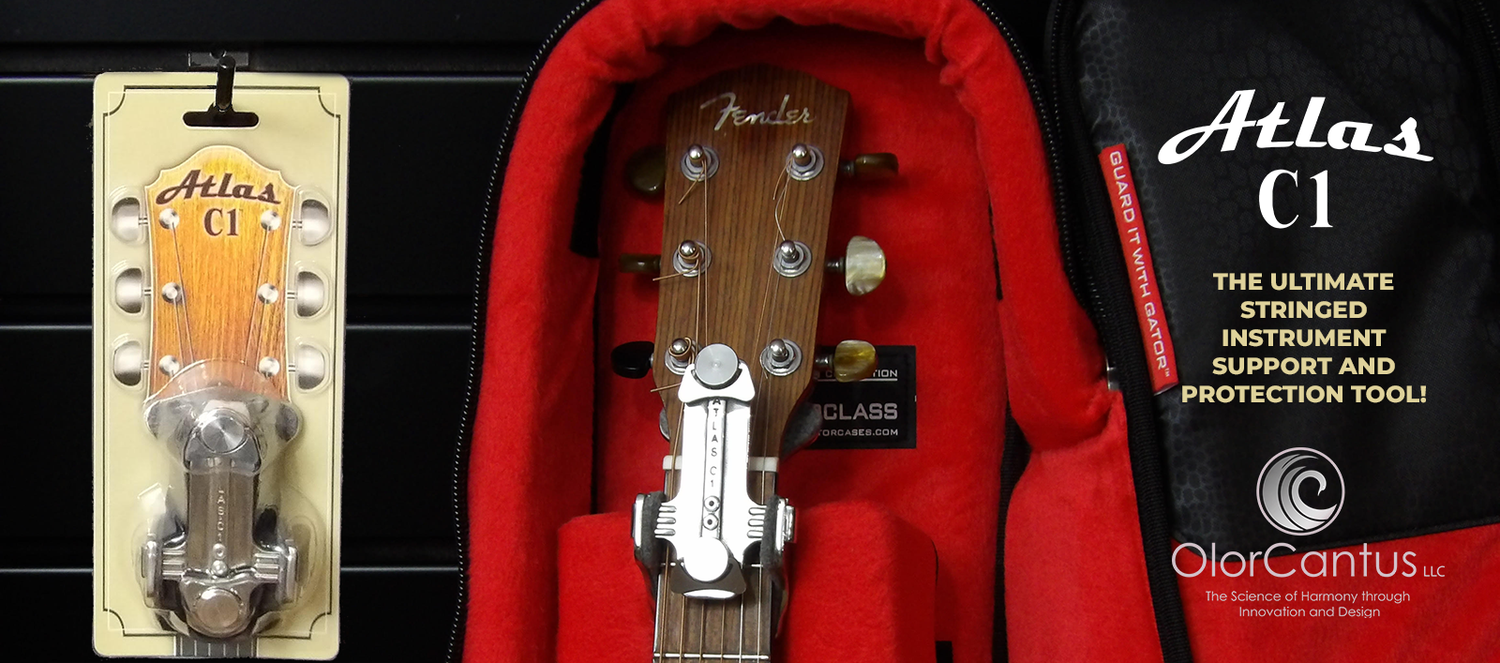
A repair jig that serves as both a protective support tool and a repair alignment device simplifies this process. The same tool that protects the headstock during travel can be used to hold the headstock in perfect alignment while the glue cures, eliminating the need for multiple setups and reducing the risk of misalignment.
Guitar Neck Support for Travel: Storage and Transportation Methods
Storage and transportation present fundamentally different challenges that require distinct support strategies. During storage, the primary concern is preventing chronic stress from string tension and wood movement due to humidity fluctuation. During transportation, the concern shifts to impact protection and vibration isolation.
Storage Protocols for Angled Headstocks
For long-term storage, the guitar should rest on a neck rest that supports the full length of the neck at the proper angle. The headstock should never hang unsupported, this is where many musicians inadvertently create the chronic stress that leads to hairline cracks months or years later. The neck rest should cradle the neck from the body junction all the way to the headstock, preventing any twisting or lateral deflection.
String tension management during storage is critical. Many luthiers recommend loosening strings to 50% of normal playing tension for storage periods exceeding two weeks. This reduces the downward force on the headstock from 130+ pounds to roughly 65 pounds, significantly lowering stress on the wood fibers at the vulnerable headstock-neck junction. Some musicians debate whether to remove strings entirely for storage lasting months; the consensus among professional repair shops is that partial tension (not full removal) keeps the wood in its seasoned shape while reducing chronic stress.
Humidity control is non-negotiable. Wood expands and contracts with relative humidity changes, creating internal stress that can open existing weak points or initiate new cracks. A stable environment between 45-55% relative humidity minimizes this wood movement. Instruments stored in dry environments (below 40% RH) or exposed to rapid humidity swings experience wood shrinkage that can cause the glue lines in scarf joints to separate. Conversely, high humidity (above 60% RH) causes swelling that creates compression stress. For valuable instruments, a room humidifier or dehumidifier is a worthwhile investment, the cost of humidity control equipment is trivial compared to the cost of repairing stress-induced headstock cracks.
Transportation-Specific Support Requirements
During travel, the guitar must be in a hard case with the neck supported along its full length. A soft case provides virtually no protection for an angled headstock during air travel, bus transport, or vehicle accidents. The case interior should have padding or rigid support blocks that prevent the headstock from moving laterally or forward. Even minor movement during transport, a shift of half an inch during turbulence or a sudden stop, can cause impacts that crack the headstock at the grain runout.
For frequent travelers (100+ days per year), a dedicated support structure designed specifically for travel is essential. This structure should prevent headstock movement in all directions: lateral (side-to-side), fore-aft (forward-backward), and vertical (up-down). A support tool that cradles the headstock and neck junction while distributing support pressure across the entire neck profile significantly reduces the risk of impact damage. The tool should remain in place throughout the journey, not be removed and reinstalled at each leg of travel, each removal and reinstallation introduces a moment of vulnerability.
Shipping presents an additional layer of risk. Guitars shipped via common carrier (UPS, FedEx, DHL) experience vibration, temperature swings, and handling impacts that ground transport doesn't. A guitar shipped without internal neck support has experienced multiple documented cases of headstock fractures occurring in transit despite being in a hard case. Professional musicians who ship instruments regularly use a combination of internal neck support (a rigid support block inside the case) and external shock absorption (foam padding around the case exterior). When ordering protective equipment, look for options that include free shipping to make protection more accessible.
DIY vs. Professional Headstock Repair: Cost-Benefit Analysis
Attempting a DIY headstock repair without proper tools, knowledge, and workspace usually results in a failed repair that requires professional correction. A luthier must then spend extra time fixing the failed repair, increasing the total cost beyond what a professional repair would have cost initially. Understanding the specific failure modes of DIY repairs helps clarify when professional intervention is necessary.
Why DIY Repairs Fail
The most common DIY failure is misalignment during glue-up. A headstock break at the scarf joint requires the two pieces to be realigned perfectly, grain lines must match, the joint must be flush, and the headstock face must be parallel to the neck. Without a precision alignment jig, achieving this is nearly impossible by hand. Even a 1-degree misalignment creates a stress concentration point that causes the repair to fail within months under string tension.
A second failure mode is inadequate clamping pressure or uneven pressure distribution. Wood glue requires consistent pressure across the entire joint for 24 hours during curing. Uneven pressure causes the glue to set incompletely in some areas, creating weak spots. Over-tightening clamps crushes wood fibers, weakening the joint. Most DIY repairs use bar clamps or C-clamps without cauls (protective blocks), concentrating pressure in small spots rather than distributing it across the joint surface.
A third failure mode is using the wrong glue or applying it incorrectly. Modern wood glues (polyurethane-based or cross-linking aliphatic resins) require specific moisture conditions and clamping pressure to cure properly. Many DIY repairs use old glue bottles or apply glue unevenly, resulting in incomplete bonding. Additionally, DIY repairs often skip the critical step of cleaning old glue residue from the break surfaces before re-gluing, old glue prevents new glue from bonding to the wood.
Finish matching is a fourth issue. After a headstock repair, the finish must be sanded, stained, and sealed to match the original. Most DIY repairs leave visible finish lines or color mismatches that reduce the instrument's value and indicate a repair to any experienced player or appraiser.
Professional Repair: What You're Paying For
Professional repairs can be costly, depending on break severity and instrument value. This cost covers:
Structural assessment: A luthier determines whether the break is repairable or if the headstock should be replaced. Some breaks (particularly those involving multiple fracture lines or damage to the tuning machine mounting holes) are not economically repairable. A professional can make this call; a DIY attempt wastes time and money on a repair that won't hold.
Precision alignment: A luthier uses a repair jig or custom-built alignment fixture to hold the pieces in exact position. This ensures grain lines match and the joint is flush. The alignment is maintained throughout the 24-hour curing period without drift.
Glue chemistry: A professional selects the appropriate glue for the wood species and break type. They clean old glue residue, apply new glue evenly, and manage moisture conditions during curing. The glue joint becomes stronger than the surrounding wood.
Clamping and cauls: A professional uses shaped cauls that distribute clamping pressure across the entire joint surface, protecting wood fibers from crushing. Pressure is monitored and adjusted throughout curing.
Finish matching: The repair area is sanded, stained, and sealed to match the original finish. The repair becomes invisible to casual inspection.
Decision Tree: When to DIY vs. Professional
Choose professional repair if:
- The instrument has significant monetary or sentimental value (vintage guitars, custom builds, instruments over $500)
- The break involves multiple fracture lines or damage to tuning machine mounting holes
- You lack a precision alignment jig and clamping setup
- You need the repair completed within 2 weeks (DIY curing takes 24 hours; if you make a mistake, you've lost time)
- The headstock is a one-piece design (one-piece repairs are more difficult than scarf joint repairs)
DIY repair is only viable if:
- The instrument is a student or budget model (under $300 value)
- The break is a clean, simple scarf joint fracture with no secondary damage
- You have access to a precision alignment jig (either a commercial tool or a custom-built fixture)
- You have proper clamping equipment (bar clamps, cauls, pressure distribution blocks)
- You have experience with wood glue chemistry and finish matching
- You can dedicate 24 hours to maintaining clamp pressure without interruption
The Real Cost-Benefit Analysis
The true cost-benefit comparison is prevention versus repair, investing in proper support now is the most effective way to prevent costly headstock repairs. A professional headstock repair costs $150-400. A structural support tool that prevents the break in the first place costs less than a single professional repair and protects your entire instrument collection for life. For a musician with 3+ angled-headstock guitars, the prevention investment pays for itself in avoided repairs.
For musicians who travel frequently or own high-value instruments, professional-grade prevention equipment is far more economical than paying for repairs. The equipment provides lifetime protection, whereas repairs are one-time costs per break, and each break carries the risk of permanent value loss if the repair is visible or imperfect.
Preventative Maintenance for Long-Term Headstock Protection
Preventative maintenance focuses on reducing stress on the headstock and catching problems before they become breaks. String tension should be appropriate for the instrument, using lighter gauge strings reduces headstock stress. Tuning machines should be in good condition; worn machines can slip, causing sudden tension changes that stress the headstock.
Humidity control is critical. Wood expands and contracts with humidity changes, creating internal stress. A stable environment between 45-55% relative humidity minimizes this stress. Instruments stored in dry environments or exposed to rapid humidity changes experience wood movement that can open existing weak points.
Regular inspection by a luthier can identify hairline cracks, grain runout problems, or weak glue lines before they become failures. A professional can assess the headstock's structural integrity and recommend preventative measures. For valuable instruments, annual inspection is worthwhile.
Proper storage support prevents chronic stress damage. The neck should always be supported along its full length, never hanging from the headstock.
The Role of Structural Support Tools in Preventing Damage
Structural support tools serve multiple functions: they protect during travel, support during storage, and align during repair. A well-designed support tool handles all three roles, making it an essential investment for serious musicians.
Frequently Asked Questions
Why are angled headstocks more prone to breaking than straight headstocks?
Angled headstocks create structural stress at the neck-junction due to the direction of string tension and the grain runout in the wood. The angle concentrates mechanical stress on a narrower glue joint, making the headstock more vulnerable to impact and vibration during travel. Straight headstocks distribute tension more evenly along the grain, reducing fracture risk. This is why Gibson-style angled designs require additional support during transportation and storage to prevent costly damage.
How much does a professional headstock repair typically cost?
Professional luthier headstock repairs can be costly, depending on the extent of damage, wood type, and whether the truss rod or tuning machine bushings need attention. Vintage instruments or those with complex scarf joints may cost significantly more. Beyond labor, you face shipping costs and potential instrument downtime. Preventative support during travel and storage can eliminate these expenses entirely, making structural protection tools a worthwhile long-term investment.
Can a broken headstock be repaired to original strength?
Yes, a properly repaired headstock can achieve structural integrity comparable to the original, especially with quality wood glue and proper clamping caul techniques. The repair durability depends on the severity of the break, the grain runout at the fracture point, and the luthier's skill in realigning the headstock. However, the repair process is complex and time-consuming. Using a pre-aligned repair jig simplifies the alignment process and improves the likelihood of a durable, structurally sound repair that restores the instrument's playability and value.
What is the best way to support a guitar neck during storage?
Store guitars with the neck resting on a protective support structure that prevents vibration and mechanical stress on the headstock-neck junction. Use a neck rest or support tool that distributes weight evenly and keeps the headstock stable. Avoid storing guitars leaning against walls or in positions where the headstock bears weight. For high-value instruments, especially those with angled headstocks, a specialized support tool designed to counteract string tension and stabilize the vulnerable junction area provides the best long-term protection during both storage and travel.