
Table of Contents
- What a Guitar Neck Repair Jig Actually Does
- Tools Required and Materials for Jig Construction
- Essential Guitar Repair Tools for Beginners
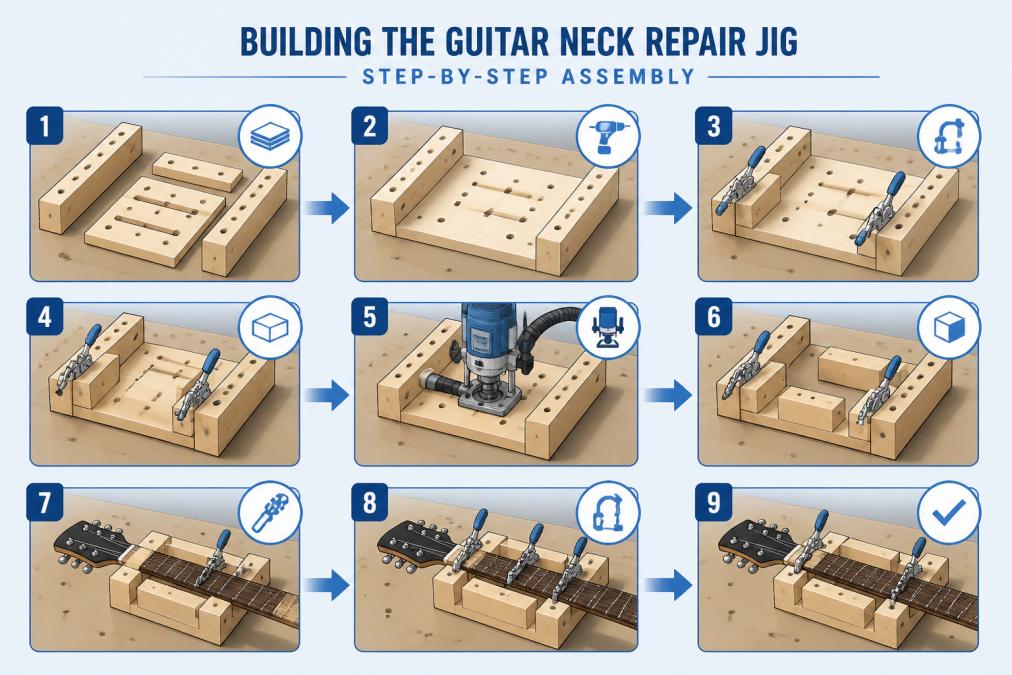
- Building the Guitar Neck Repair Jig: Step-by-Step Assembly
- Safety-First Workflow: Protecting Yourself and the Instrument
- How to Fix a Broken Guitar Headstock Once the Jig Is Ready
- Universal vs. Specific Jig Designs: Which One Should You Build?
- Conclusion
Last Updated: August 23, 2026
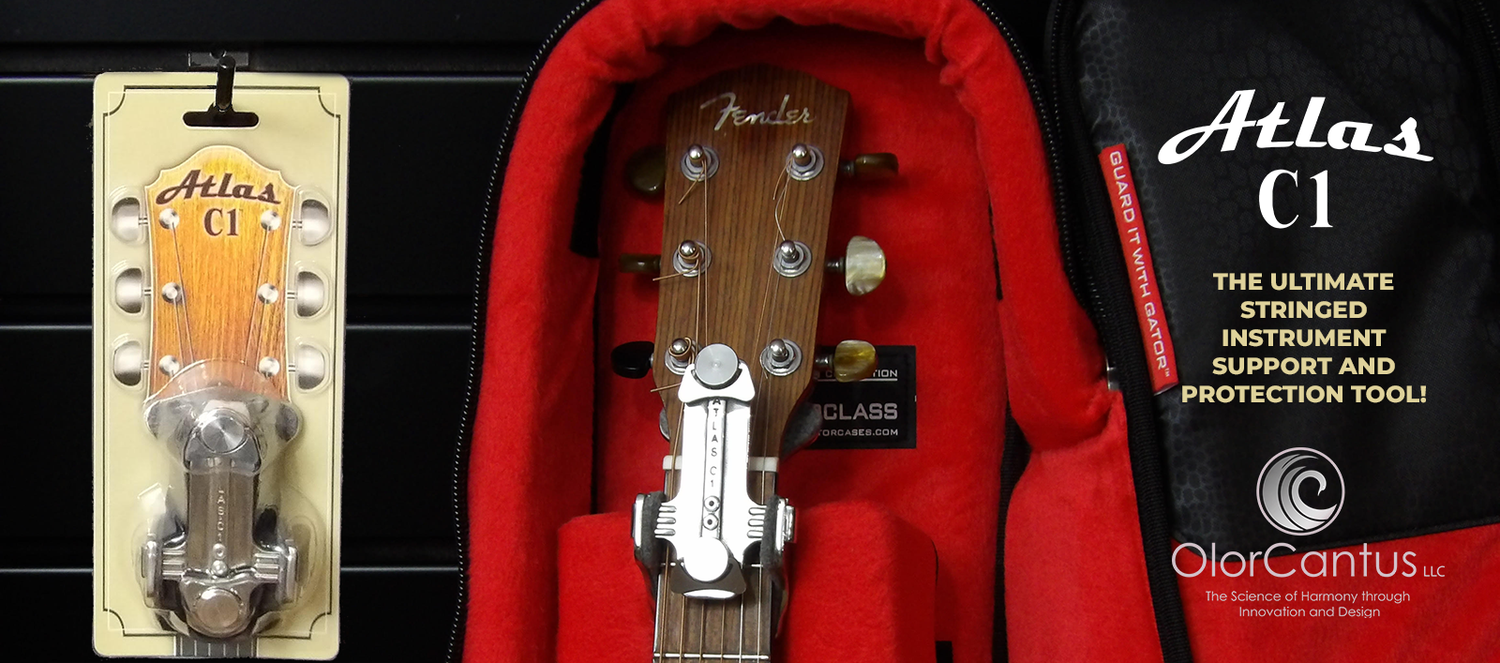
What a Guitar Neck Repair Jig Actually Does, Vs. using the Atlas-C1 .
A guitar neck repair jig is a custom-built workstation that holds a damaged guitar neck at a precise angle while you rout channels, apply adhesives, or insert reinforcement splines during a headstock repair. The jig's entire purpose is alignment accuracy: without it, even skilled hands struggle to maintain consistent clamping pressure and the correct break angle through the full cure time.
Most headstock breaks occur at the neck-to-headstock junction, where grain orientation creates a natural weak point under the 130-plus pounds of string tension a standard instrument carries. A repair jig holds the two surfaces in exactly the right position so the epoxy or wood glue bonds correctly and structural integrity is restored.
This guide walks through the complete build process, from material selection to calibration, so that even a first-time builder can produce a functional, accurate jig. We'll also cover the safety-first workflow, the difference between universal and specific jig designs, and when a pre-engineered solution becomes the smarter call.
Tools Required and Materials for Jig Construction
Building a functional guitar neck repair jig does not require a fully equipped professional shop. What matters is precision, not expense.
Choosing Hardwood Blocks and Baseplate Materials
The baseplate is the foundation of the entire jig. Baltic birch plywood in 18mm or 19mm thickness is the most practical choice: it's dimensionally stable, resists warping, and holds mechanical fasteners well. Solid hardwood blocks, such as maple or ash, work well for the neck support cradle because they can be shaped precisely to match the neck contour.
Avoid MDF for the baseplate, it compresses under toggle clamp pressure and absorbs moisture, which causes swelling and calibration errors. For neck support blocks, orient grain perpendicular to the clamping direction to prevent compression or splitting.
Essential materials:
- 18mm Baltic birch plywood, at least 600mm x 400mm for the baseplate
- Two hardwood blocks for the neck cradle, approximately 100mm x 75mm x 50mm each
- One adjustable support block for the headstock end
- Sanding blocks in 80, 120, and 220 grit
Mechanical Fasteners, Toggle Clamps, and Clamping Pressure
Toggle clamps are the workhorses of any neck repair jig. A horizontal-action toggle clamp with a rubber-tipped foot applies even pressure without marring the finish. Two toggle clamps are sufficient: one over the neck heel and one near the nut end.
Mechanical fasteners should be coarse-thread wood screws combined with wood glue at every joint. Screws alone allow micro-movement; glue alone is brittle under vibration. Together, they create a stable, rigid structure. Pre-drill all screw holes to prevent splitting.
Install cork or thin leather under every clamping foot to protect the fretboard during clamping and prevent the neck from shifting under pressure.
Essential Guitar Repair Tools for Beginners
For jig construction:
- Table saw or circular saw for cutting the baseplate
- Router with straight-cut and flush-trimming bits
- Drill/driver with brad-point bits
- Chisels (12mm and 25mm) for fitting the neck cradle
- Rasps and carving knives for shaping support blocks
- Combination square and marking gauge for layout
For headstock repair:
- Router with a 6mm straight bit for cutting spline channels
- Sanding blocks in multiple grits
- Mixing palette and spreaders for epoxy
- At least four bar clamps or cam clamps
- Razor blades and scrapers for cleanup
According to American Association of Woodturners' safety guidelines, router operations require eye protection, hearing protection, and dust collection as baseline safety measures.
A good combination square is essential. Alignment accuracy in a repair jig depends on whether your reference surfaces are truly square to each other. A cheap square with play in the blade will introduce errors that compound through every step.
Building the Guitar Neck Repair Jig: Step-by-Step Assembly , or if its not a complex repair, the Atlas-C1 is the tool of choice saving a ton of time and money.
The build sequence below produces a functional guitar neck repair jig that can handle most standard headstock repairs.
Step 1: Cut and Square the Baseplate and Support Structure
Cut the baseplate from 18mm Baltic birch plywood to approximately 550mm x 380mm. Verify that all four corners are square using a combination square. Any error here propagates through the entire build.
Attach the two main support blocks to the baseplate using wood glue and 50mm wood screws. Position the heel support block approximately 80mm from one end. Clamp it flat while the glue sets for at least two hours. Once fixed, position the headstock support block at the opposite end with clearance for the headstock.
Step 2: Align the Neck and Set the Break Angle
Place the guitar neck in the jig with the fretboard facing up. The break angle for a typical Gibson-style angled headstock runs between 14 and 17 degrees from the neck centerline. Measure this angle using a digital protractor or bevel gauge against the headstock face.
Shim the headstock support block until the broken surfaces align flush and the break angle matches the original geometry. This step is the most critical in the entire process. A misaligned break angle affects string action and playability permanently.
Mark the shim position on the baseplate with a pencil so you can return to it if the neck shifts.
Step 3: Secure the Neck and Route for Reinforcement Splines
With the neck correctly aligned, engage the toggle clamps over the neck shaft, not the fretboard. Apply moderate clamping pressure, enough to prevent movement, not enough to compress the wood. Protect the fretboard with cork or thin leather under each clamp foot.
Routing for reinforcement splines requires a router with a straight-cut bit set to 8-10mm depth. Rout the channels perpendicular to the break line, not parallel to it. Two spline channels, one on each side of the centerline, provide the best structural reinforcement.
Check truss rod clearance before routing. On many Gibson-style necks, the truss rod channel runs close to the headstock face. A router bit that goes too deep can damage or sever the truss rod.
Step 4: Calibrate and Test the Jig Before Committing to a Repair
Before using the jig on a real repair, run a dry test with an undamaged neck or scrap piece cut to the same profile.
Check these points:
- The neck centerline aligns with the baseplate centerline within 1mm
- The break angle reads consistently at both edges of the headstock
- Toggle clamp pressure does not cause lateral neck shift when released and re-engaged
- The router base plate sits flat on the jig's reference surfaces with no rocking
Adjust shims and support block positions until all checks pass. Document the final settings with measurements and photographs.
Safety-First Workflow: Protecting Yourself and the Instrument
Router work on a guitar neck repair jig carries real risks if approached carelessly. The router bit spins at speeds that can cause serious injury and can damage an irreplaceable instrument in a fraction of a second.
The Occupational Safety and Health Administration's woodworking safety standards specify that rotating cutting tools require guards where practicable, and operators must use appropriate personal protective equipment. For luthier work, that means eye protection, hearing protection, and a dust mask rated for fine wood particles.
Specific precautions for guitar neck routing:
- Always rout in the correct feed direction: feed the router against the bit's rotation, not with it.
- Make depth cuts in multiple passes. Routing to full depth in a single pass overloads the bit and workpiece.
- Never rout toward your body. Position yourself so a router grab would push the tool away from you.
- Secure the jig to the workbench with clamps before starting the router.
- Keep the fretboard covered with protective tape during routing.
How to Fix a Broken Guitar Headstock Once the Jig Is Ready
Fixing a broken guitar headstock follows a clear sequence once the jig is set up and calibrated. The repair itself is less about skill and more about patience: rushing any stage of bonding or curing is the most common reason amateur repairs fail.
Epoxy Bonding, Wood Glue Selection, and Fretboard Protection
The adhesive choice depends on the break condition. Clean breaks with mating surfaces that fit tightly respond well to high-quality instrument-grade wood glue. Wood glue is easier to clean up, sands cleanly, and creates a joint often stronger than surrounding wood when properly clamped.
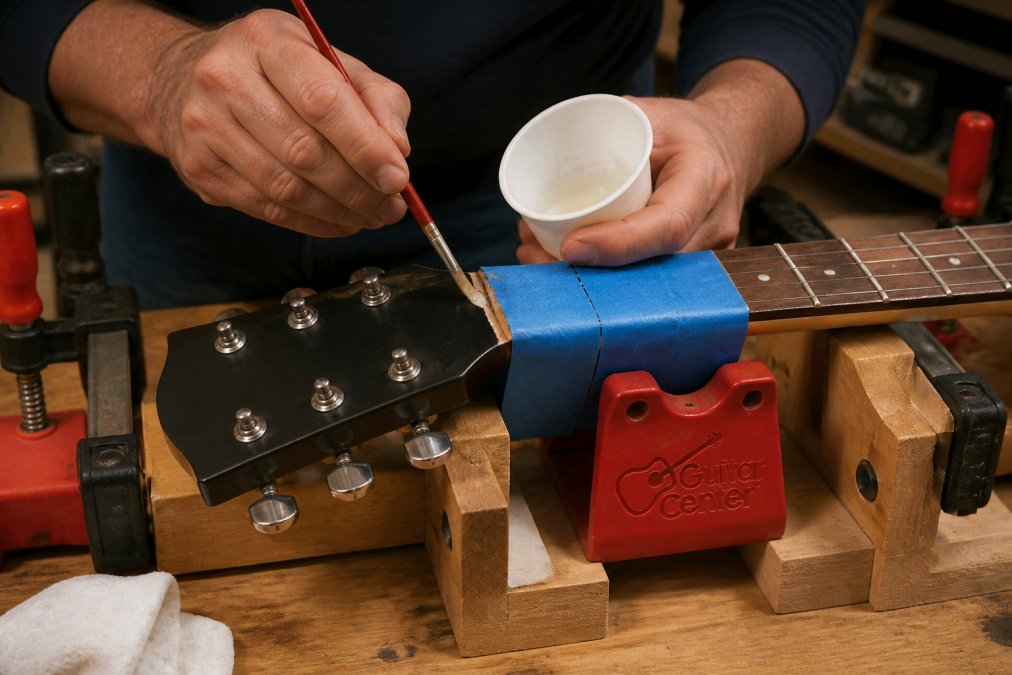
Breaks with gaps, missing material, or contaminated surfaces require structural epoxy. Two-part epoxy fills voids and bonds to surfaces that wood glue cannot adequately wet. A 30-minute or longer working time is preferable to a 5-minute version for headstock repairs.
According to the Forest Products Laboratory's wood adhesive research, joint strength depends on surface preparation as much as adhesive selection. Both mating surfaces must be clean, dry, and free of old finish or contamination.
Fretboard protection during bonding is non-negotiable. Apply painter's tape along the full length of the fretboard before applying any adhesive. Epoxy that cures on a fretboard is extremely difficult to remove without damaging the wood surface or fret ends.
After applying adhesive and engaging the jig's toggle clamps, add supplemental bar clamps across the break line to ensure even pressure distribution. Allow full cure time before removing clamps: 24 hours minimum for wood glue, 48 hours for epoxy, regardless of packaging claims. Ambient temperature below 65°F significantly extends cure time.
Universal vs. Specific Jig Designs: Which One Should You Build?
For most beginners, a universal jig design is the right starting point. A specific jig, optimized for a single guitar model, produces marginally better alignment accuracy but is useless for any other neck profile.
A universal guitar neck repair jig uses adjustable support blocks and shimming to accommodate different neck widths, thicknesses, and headstock angles. The setup takes longer for each repair, but the jig handles everything from a vintage acoustic to a modern electric.
Jig Type |
Setup Time |
Accuracy |
Best For |
|---|---|---|---|
Universal |
20-30 min per repair |
High with calibration |
Multiple instruments, beginners |
Model-specific |
5-10 min per repair |
Very high |
Single model, high-volume repair |
Pre-engineered tool |
Under 5 min |
Pre-aligned |
Touring musicians, collectors |
Building a functional guitar neck repair jig takes 6-10 hours of focused work, requires a router and several woodworking tools, and produces a result still dependent on the builder's calibration accuracy. For a single repair on a valuable instrument, the time investment often exceeds the benefit.
With the advent of the Atlas-C1, there is no longer a necessity to waste time building your own custom headstock repair jig. The Atlas-C1 does all of that and more, arriving pre-aligned and ready to use, with a universal design that accommodates the full range of guitar neck profiles without the build time, tool requirements, or calibration risk.
For luthiers running a repair shop, a custom-built jig is a reasonable long-term investment. For everyone else, the pre-engineered route is faster, more reliable, and eliminates the possibility of a calibration error damaging an instrument.
According to Premier Guitar Magazine's instrument care coverage, purpose-built headstock protection and repair tools have become standard equipment for professional touring musicians precisely because improvised solutions introduce variables that pre-engineered designs eliminate.
Conclusion
Headstock breaks are among the most stressful repairs a guitarist faces, and the quality of the outcome depends almost entirely on how well the neck is held during the repair process. A well-built guitar neck repair jig solves that problem, but building one correctly demands time, tools, and careful calibration that many players simply don't have.
The Atlas-C1 is the direct answer to that gap. Designed with a U.S. patent-protected universal fit, it functions as a pre-aligned repair jig from the moment you open the box, counteracting the inertial forces that cause headstock breaks and simplifying the repair process for players without luthier experience. Get started with the Atlas-C1 and protect your instrument before the next break happens, not after.

Frequently Asked Questions
Q: Is it difficult to build a custom guitar neck repair jig from scratch?
A: Building a guitar neck repair jig from scratch takes patience and intermediate woodworking skills. You need to accurately set the headstock break angle, square the baseplate, and calibrate toggle clamps before routing. Even small alignment errors can compromise structural integrity during a repair. For most beginners, the time investment runs several hours across multiple sessions. A pre-aligned tool like the Atlas C1 removes that complexity entirely, giving you a ready-to-use repair jig without any of the build time.
Q: How do I safely support a guitar neck during headstock repair?
A: Proper neck support during a headstock repair means distributing clamping pressure evenly across the neck contour without stressing the truss rod channel. Use hardwood blocks shaped to the neck profile and apply only enough clamping force to hold alignment while the adhesive cures. Always protect the fretboard with padding before any clamp makes contact. Rushing clamping pressure or skipping alignment checks is the most common cause of a failed repair, especially on Gibson-style guitars with angled headstocks.
Q: What are the essential tools needed to build a guitar repair jig?
A: A functional guitar neck repair jig requires a router with a flush-trim bit, a reliable drill, toggle clamps, hardwood blocks, a flat baseplate (typically plywood), mechanical fasteners, and accurate measuring tools. For the actual headstock repair, you also need epoxy or wood glue suited to instrument-grade wood, rasps, carving knives, and sanding blocks for final shaping. Beginners should prioritize calibration tools to verify alignment accuracy before committing to any routing cuts.
Q: What are the risks of using a homemade headstock repair jig?
A: A poorly calibrated homemade jig can introduce misalignment at the headstock neck junction, which affects tuning stability and long-term structural integrity. Incorrect router bit depth during spline routing risks cutting into the truss rod channel. Uneven clamping pressure can cause the headstock to shift while epoxy cures, resulting in a visible gap or a joint that fails under string tension. These risks are why many luthiers and musicians prefer a pre-engineered, patent-protected tool like the Atlas C1 for headstock repair.
This article was written using GrandRanker