
Table of Contents
- Assessing the Headstock Break: Type and Severity
- Preparing Your Guitar and Workspace for Repair
- Opening and Cleaning the Broken Joint
- Choosing the Right Adhesive for Headstock Repair
- Aligning the Headstock with the Neck Using Reference Points
- How to Clamp a Guitar Headstock Repair Securely
- Guitar Headstock Repair Drying Time and Curing
- Using a Guitar Headstock Repair Jig for Precision
- Guitar Headstock Repair with Splines: Reinforcement Techniques
- When to Call a Professional Luthier Instead
- Frequently Asked Questions
Last Updated: October 12, 2026
Assessing the Headstock Break: Type and Severity
A guitar headstock break is a crack or separation where the headstock meets the neck, and successful guitar headstock repair alignment depends on understanding the break's type and severity. This joint carries tremendous stress from string tension and impacts during transport. Understanding what you're dealing with is the first step toward a successful repair.
Breaks fall into a few categories. A clean break is a single fracture line with minimal splintering. A stepped break has jagged surfaces at different angles. A shattered break involves multiple cracks radiating outward. The severity depends on how much the pieces have moved and whether the wood is splintered or crushed.
Inspect the break closely. Look for:
- Visible separation between pieces
- Splinters or crushed wood fibers
- Damage to the finish around the break
- Whether the headstock still aligns with the neck
A minor break with clean surfaces and good alignment is a solid DIY candidate. A severe break with heavy splintering, missing wood, or misalignment may need professional attention. When in doubt, consult a luthier before attempting the repair yourself.
Preparing Your Guitar and Workspace for Repair
Set up a clean, flat workspace before you begin. Dust and debris will contaminate the glue joint and compromise the repair. A workbench or sturdy table works well. Cover the surface with clean paper or cloth.
Gather your tools and materials:
- Clean rags and soft brushes
- Clamps (bar clamps or C-clamps work)
- Adhesive of your choice
- Scraper or old credit card for spreading glue
- Masking tape for protecting the finish
- Newspaper or drop cloth
- Gloves and safety glasses
Protect the guitar's finish. Wrap masking tape around the break area, leaving just the joint exposed. This prevents glue from dripping onto the finish where it's hard to remove. Use newspaper under the guitar to catch drips.
Position the guitar securely. A guitar stand or padded vice holds it steady during glue application and clamping. The guitar should not shift or rock while you work. If using a vice, pad the jaws with cloth to avoid damaging the finish.
Check that your workspace has good lighting. You need to see the break clearly to apply glue evenly and align the pieces correctly.
Opening and Cleaning the Broken Joint
Before gluing, you must open the break and remove old glue, dirt, and debris. This gives the new adhesive a clean surface to bond with.
Gently pry the break open. Use a thin, flat tool like a putty knife or old chisel. Work slowly and carefully to avoid splintering more wood. If the break is already open, skip this step.
Once open, inspect the joint surfaces. Old glue appears as a crusty layer or dried residue. Use a soft brush or compressed air to remove loose debris first. Then scrape away old glue with a scraper or plastic tool. Be gentle, you're cleaning, not gouging.
For stubborn old glue, lightly dampen the joint with water or rubbing alcohol. Let it soak for a few minutes to soften the glue, then scrape again. Wipe the joint clean with a damp rag and let it dry completely before proceeding.
Clean surfaces are critical. Any dust or old glue left behind will weaken the bond and make alignment harder. Take your time here.
Choosing the Right Adhesive for Headstock Repair
Adhesive choice determines whether a repair holds under string tension, whether it can be undone later, and how forgiving the process is for a first-timer. The three common options behave very differently.
Polyvinyl acetate (PVA) wood glue, sold as yellow or white carpenter's glue, is the most forgiving for clean, tight-fitting breaks. It cleans up with water while wet, has an open working time of roughly 10 to 20 minutes at room temperature, and reaches full strength in about 24 hours. Its weakness is creep: under sustained load it can slowly deform, so it is a poor choice for a break with gaps or crushed fibers. It is also not reversible with heat or moisture once fully cured.
Two-part epoxy fills small gaps and resists creep far better than PVA, which makes it the better pick when the break surfaces do not mate perfectly or when the headstock has an angled design that puts the joint under constant load. Working time depends on the formulation, five-minute epoxy gives you about four minutes of usable pot life, while 30-minute epoxy gives you closer to 25. Full cure is typically 24 hours. Epoxy is difficult to reverse, so treat the joint as permanent.
Hide glue is the restorer's choice because it is reversible with heat and moisture, which matters on vintage instruments where future repairs are likely. It requires heating to roughly 140-150°F, has a short open time, and demands practice to apply cleanly. It is not the best first adhesive for a DIY repair.
A simple decision path:
- Clean break, surfaces mate tightly, modern guitar → PVA wood glue.
- Slight gaps, crushed fibers, or an angled headstock under load → two-part epoxy.
- Vintage or high-value instrument where reversibility matters → hide glue, or refer to a luthier.
Avoid craft glues, superglue, and construction adhesive. Superglue is brittle and fails under the shear stress a headstock sees; construction adhesive never fully hardens and will creep.
Adhesive safety data and ventilation guidance
Aligning the Headstock with the Neck Using Reference Points
Guitar headstock repair alignment is the step that separates a repair that plays from one that buzzes, pulls sharp, or fails. The goal is to restore three things at once: the centerline, the headstock pitch angle, and the string path. Competitors mention alignment as a challenge but rarely show how to measure it. Here is a setup you can repeat.
Step 1, Establish the neck centerline. Run a strip of low-tack masking tape down the center of the fretboard and onto the headstock face. Measure the fretboard width at the nut and at the 12th fret, divide each in half, and mark those midpoints. Lay a straightedge through both marks and extend the line onto the tape on the headstock. This is your centerline reference. Do the same on the back of the neck if the break runs through the back.
Step 2, Check the pitch angle. The headstock sits at an angle to the neck, commonly around 13 to 17 degrees on many acoustic and set-neck electric designs, and closer to 0 on some bolt-on and classical designs. Before the break, that angle was set by the guitar's design. After the break, you need to confirm the headstock returns to it. With the joint dry-fitted and held closed by hand, place an angle finder or a bevel gauge along the headstock face and compare it to the neck plane. If the reading differs from the unbroken side (on a symmetrical headstock) or from the manufacturer's spec, the joint is not seated.
Step 3, Verify the string path. Run a piece of string or thin elastic from the low E tuning post, through the nut slot, down to the bridge saddle. Do the same for the high E. Both lines should pass cleanly through their nut slots without binding on the sidewalls and should stay parallel down the neck. If a string rides the edge of its slot or crosses the centerline, the headstock is rotated.
Step 4, Dry-fit and mark. With the joint closed and no glue applied, clamp lightly and re-check all three references. Mark the headstock and neck with a pencil tick across the joint so you can see instantly if anything shifts during glue-up. Photograph the dry fit, it is your reference if the joint moves.
Step 5, Re-check after glue and after clamping. Alignment can shift the moment clamp pressure is applied. Re-measure the centerline and string path after the clamps are snug. If anything moved, loosen, adjust, and re-clamp before the adhesive sets.
How to Clamp a Guitar Headstock Repair Securely
Clamping pressure holds the break tight while glue cures. Too little pressure leaves gaps. Too much pressure can crush the wood or force out all the glue, weakening the joint.
Use bar clamps or C-clamps positioned perpendicular to the break. The clamp should press the two pieces together along the grain, not across it. Pad the clamp jaws with cloth or wood blocks to distribute pressure evenly and protect the finish.
Apply pressure gradually. Tighten the clamp slowly, checking alignment as you go. Stop when you feel firm resistance. You should see a thin line of glue squeeze out along the joint, this is good. It means the pieces are in full contact. Wipe away excess glue with a damp rag.
For a headstock break, you often need multiple clamps. One clamp pressing the break closed is not enough. Add a second clamp above or below the first to prevent the headstock from twisting. A third clamp may be needed for stability.
Check the alignment one more time after clamping. Look at the string path and the centerline marks you made. If anything has shifted, loosen the clamps slightly, adjust, and re-tighten.
Some repairs benefit from a repair jig that holds everything in place. A jig removes guesswork and ensures consistent pressure across the joint.
Guitar Headstock Repair Drying Time and Curing
Patience is critical. Rushing the cure time ruins the repair. Different adhesives cure at different rates, and temperature affects cure time.
White glue typically sets in 30 minutes and reaches full strength in 24 hours. Epoxy sets in 5-10 minutes and cures fully in 24 hours. Hide glue sets as it cools and is ready to remove clamps in 2-3 hours, but takes 24 hours to reach full strength.
Leave the clamps on for the full cure time. Removing them early allows the joint to flex and separate slightly. Even a tiny gap will weaken the repair and may cause it to fail under string tension.
During cure time, keep the guitar in a stable environment. Avoid temperature swings, direct sunlight, and humidity changes. A steady room temperature between 65 and 75 degrees Fahrenheit is ideal.
Do not move or jostle the guitar while the glue cures. Set it on a stable surface and leave it alone. Any vibration or movement can disturb the glue before it hardens.
After 24 hours, carefully remove the clamps. Inspect the joint. It should be solid with no visible gaps. If you see separation, the repair failed, you'll need to re-glue it.
Using a Guitar Headstock Repair Jig for Precision
A repair jig holds the headstock and neck in perfect alignment while glue cures. It removes the need for multiple clamps and guesswork. A jig is especially valuable if you're repairing a guitar with an angled headstock, where alignment is more complex.
A jig works by cradling the headstock and neck in fixed positions. The break is held closed with controlled pressure. The jig ensures that the headstock sits at the correct angle and doesn't twist or shift during curing.
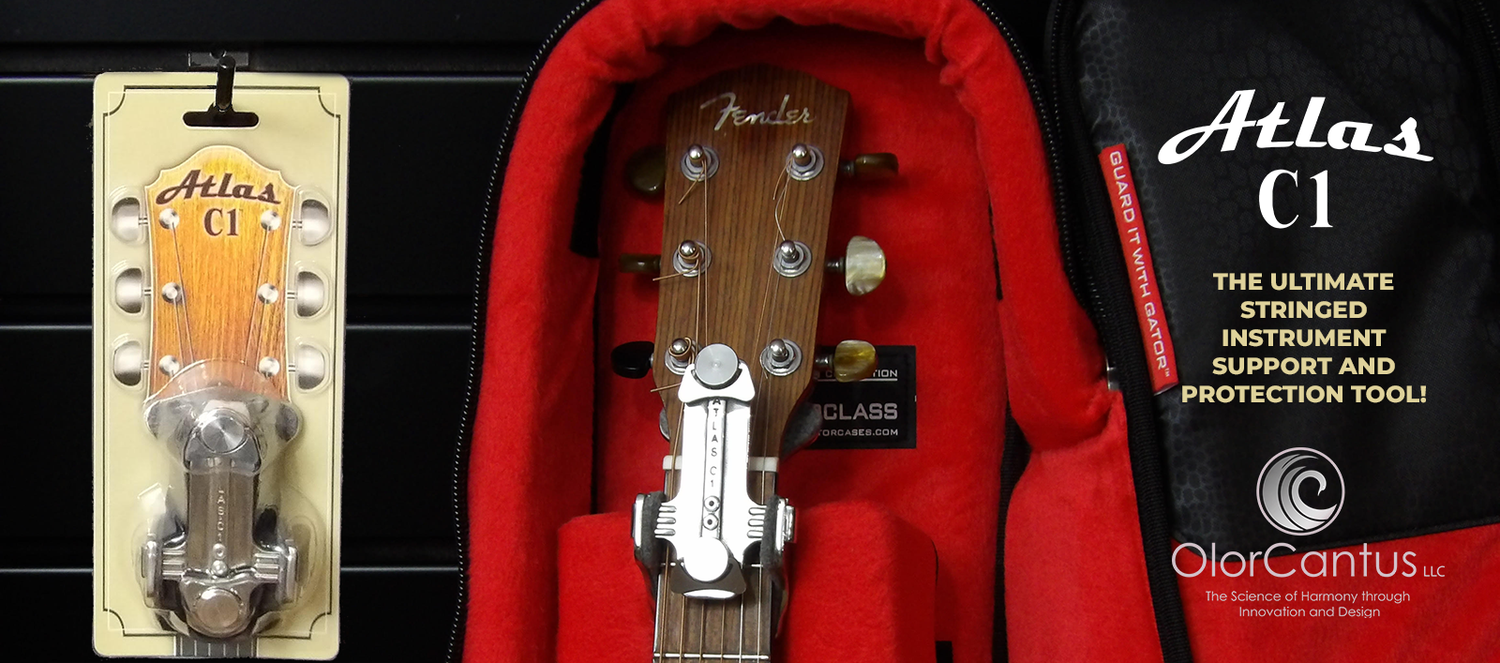
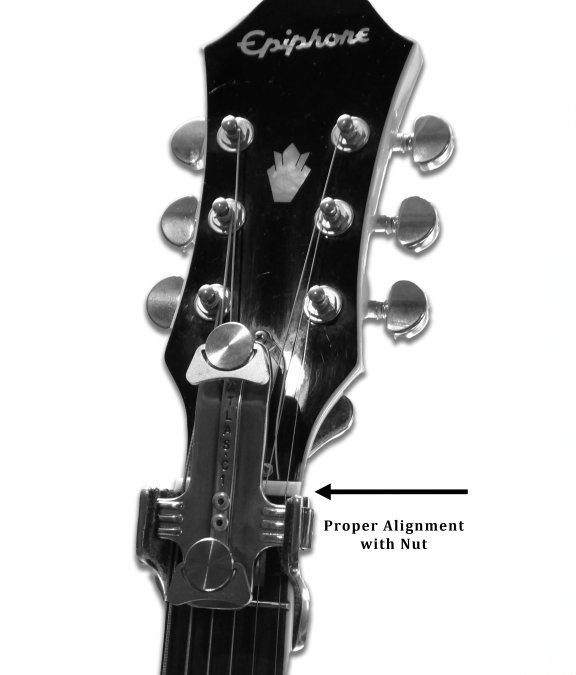
Many luthiers use custom jigs built for specific guitar models. For DIY repairs, a universal jig that works with different guitar types is more practical. The Atlas C1 headstock repair jig is designed to hold classical, acoustic, and electric guitars with both straight and angled headstocks.
Using a jig simplifies the process:
- Position the guitar in the jig
- Apply glue to the break surfaces
- Close the break and let the jig hold it
- Leave it curing undisturbed for 24 hours
A jig also protects the guitar's finish. The padded contact points prevent clamp marks and damage to the body. When you order the Atlas C1, you'll also receive a 10% product discount, plus free shipping on your order.
Guitar Headstock Repair with Splines: Reinforcement Techniques
For breaks with significant splintering or wood loss, reinforcement with splines adds strength. A spline is a thin strip of wood glued into a routed slot across the break.
Splines work best on the back of the headstock, where they're less visible. Route a shallow slot perpendicular to the break, running across both pieces. The slot should be deep enough to hold a spline snugly but not so deep that it weakens the headstock further.
Cut a spline from hardwood that matches the guitar's wood species if possible. Maple or walnut work well. The spline should fit snugly in the slot with no gaps.
Apply glue to the slot and insert the spline. Clamp it in place and let it cure fully. Once cured, sand the spline flush with the headstock surface. The spline bridges the break and adds rigidity to the joint.
Spline reinforcement is not necessary for clean breaks with good surface contact. It's most useful for severe breaks where the joint alone may not hold under string tension.
This technique requires routing equipment and woodworking skill. If you're not comfortable routing, a luthier can do this step for you.
When to Call a Professional Luthier Instead
Some breaks are beyond safe DIY repair. Know your limits before you start.
Call a luthier if:
- The headstock is shattered into multiple pieces
- Large chunks of wood are missing
- The break has been open for years with oxidation or contamination
- The headstock angle is severely misaligned and you can't straighten it
- The guitar is vintage or extremely valuable
- You've attempted a repair and it failed
A luthier has specialized tools, experience, and access to replacement wood if needed. They can also refinish the repair area to hide any traces of the break. The cost of professional repair is worth the peace of mind on a valuable instrument.
For most clean breaks with good alignment, a DIY repair is achievable. But if you're uncertain, consulting a luthier first costs far less than ruining a guitar you love.
A broken guitar headstock is stressful, but many breaks can be repaired at home with the right approach. Clean the joint, choose the right adhesive, align carefully, clamp firmly, and be patient during curing. The result is a solid repair that restores your guitar to playable condition.
For guitarists who travel frequently or own valuable instruments, prevention is smarter than repair. The Atlas C1 headstock protection tool prevents breaks from happening in the first place. It doubles as a pre-aligned repair jig, so you have both protection and a precision repair solution in one device. Whether you're protecting a vintage Les Paul or setting up for a DIY repair, the Atlas C1 gives you the confidence that your headstock stays safe.
Frequently Asked Questions
Can you repair a broken guitar headstock at home?
Yes, many headstock breaks can be repaired at home if the break is clean, the pieces fit together well, and you have basic tools like clamps and adhesive. However, breaks involving finish damage, multiple fragments, or angle misalignment may require professional luthier work. Assess the severity first: if pieces align naturally and the break is a simple glue joint, DIY repair is feasible. Complex breaks with splintering, missing wood, or bolt-on neck damage should go to a professional.
How do you align a broken guitar headstock before gluing it?
Use reference points on the headstock to ensure the centerline matches the neck. Dry-fit the pieces without glue, checking that the string path and tuning machine holes align. Mark the centerline on both the headstock and neck with a straightedge or pencil. Secure the guitar in a repair jig or bench vise with padding to hold the neck steady. Adjust the headstock position until it sits flush against the neck, then apply glue and clamp firmly.
What glue should you use to repair a guitar headstock?
White glue (like Titebond) and two-part epoxy are the most common choices. White glue is easier to work with and allows longer assembly time. Epoxy is stronger and water-resistant, making it ideal for instruments exposed to humidity. For most acoustic and electric guitars, white glue works well. Epoxy is better for classical guitars or high-value instruments. Always test the adhesive on scrap wood first to ensure it matches your timeline and strength needs.
How long should a guitar headstock repair stay clamped?
White glue typically requires 24 hours of curing time under clamp pressure. Two-part epoxy may need 12 to 24 hours depending on the formulation. Keep the clamp pressure steady throughout curing; releasing it too early compromises joint strength. After the initial cure, allow an additional 24 hours before removing the clamps completely. Tuning stability and full strength develop over several days, so avoid playing the guitar heavily for at least 48 hours after unclamping.