
Table of Contents
- What Drives the Cost of Professional Guitar Headstock Repair
- How to Fix a Broken Guitar Headstock: Repair Options and Risks
- Guitar Neck Break Repair Time: What to Expect
- Best Tools for Guitar Headstock Repair
- When to Replace the Neck vs. Repair the Headstock
- Resale Value and Insurance After a Headstock Repair
- Frequently Asked Questions
Last Updated: September 10, 2026
What Drives the Cost of Professional Guitar Headstock Repair
The cost of professional guitar headstock repair depends on how the wood broke, not simply on how bad the break looks in a photo. A clean crack along the grain takes far less bench time than a shattered headstock with missing splinters, and that labor difference is what moves the final bill.

Touring players and collectors often ask: why does one repair quote come in low and another come in high for what looks like the same damage? The answer sits in three variables: the type of break, whether the repair is structural or cosmetic, and how much finish work the job requires afterward.
Clean Break vs. Shattered Headstock
A clean break is a single fracture line where the wood separates along the grain and the two halves still fit together. A shattered headstock involves multiple fracture lines, crushed wood fibers, or missing pieces that must be rebuilt with matching stock.
The clean break is the best-case scenario. A luthier can often realign the pieces, glue, and clamp in a single session. A shattered headstock can take several sessions, sometimes with spline reinforcement or a carbon fiber rod to restore structural integrity. That extra bench time is the single biggest driver of a higher quote.
Structural Repair vs. Cosmetic Touchup
Structural repair restores strength; cosmetic touchup restores appearance. They are not the same job, and confusing them leads to bad decisions.
Structural repair means regluing the break, clamping it to the correct neck angle, and confirming the joint holds under string tension. Cosmetic work means sanding, color matching, and applying a lacquer or polyurethane clear coat so the repair disappears. A guitar can be structurally sound and still look repaired, and plenty of players choose to stop there and save money. The mistake is assuming a cheap quote covers both.
How to Fix a Broken Guitar Headstock: Repair Options and Risks
You have three realistic paths when you need to know how to fix broken guitar headstock damage: pay a professional luthier, attempt a DIY reglue, or replace the neck entirely. Each carries a different risk profile, and the wrong choice on a valuable instrument can cost far more than the original repair.
Before you choose a path, classify the break. That single step determines whether DIY is even on the table.
Visual Inspection Guide: Clean Break or Shattered Headstock?
Use this checklist before you call anyone or buy any tools.
Clean break indicators:
- A single fracture line that follows the wood grain
- The two halves fit back together with light hand pressure and no gaps
- No missing wood, no crushed fibers, no splinters
- The break is confined to the headstock, above the neck-junction
- The truss rod access and fretboard are unaffected
Shattered headstock indicators:
- Multiple fracture lines radiating from the impact point
- Missing pieces or wood dust in the case
- Crushed or compressed fibers along the break edge
- The break extends into the neck-junction or the truss rod channel
- The headstock won't sit flush when you try to align it by hand
If you check even one shattered indicator, DIY is the wrong call. A shattered break needs reinforcement beyond glue, and that means a luthier's bench.
The Three Paths, Compared
- Professional luthier repair - Highest reliability, correct clamping pressure, proper wood glue selection (hide glue or Titebond depending on the instrument), and finish work included. The luthier also has the jigs and clamps to hold alignment, which is the hardest part to get right by hand.
- DIY reglue - Cheaper upfront, but alignment errors and weak clamping are the most common failure points. A misaligned headstock throws off neck angle and playability. DIY is only reasonable on a clean break, on a player-grade instrument, and with a proper alignment jig.
- Neck replacement - Only sensible when the break is beyond saving or the neck was already compromised. On a bolt-on neck this is a straightforward swap; on a set neck it's major surgery.
Long-Term Durability: Is a Repaired Headstock Weaker?
This is the fear that drives most DIY attempts and most bad decisions. The short answer: a properly repaired headstock is not meaningfully weaker than the original wood, and in some cases it's stronger.
Here's the mechanism. Wood glue, when applied to clean, well-fitted surfaces and clamped correctly, forms a bond that is stronger than the wood fibers themselves. A well-executed glue joint fails by tearing the surrounding wood, not by failing at the glue line. That's why a clean break, properly repaired, is a durable instrument.
The caveats matter:
- Alignment is everything. A joint that cures even slightly off-angle concentrates stress at the glue line and can fail under string tension.
- Reinforcement helps on shattered breaks. Splines or a carbon fiber rod restore structural integrity that glue alone can't provide when wood is missing.
- Glue choice affects reversibility, not just strength. Hide glue can be softened and undone later if the repair needs revisiting; many modern glues cannot. On a collectible guitar, reversibility matters.
- Finish work is cosmetic, not structural. A guitar can be structurally sound and still look repaired. Plenty of players stop at structural repair and save money.
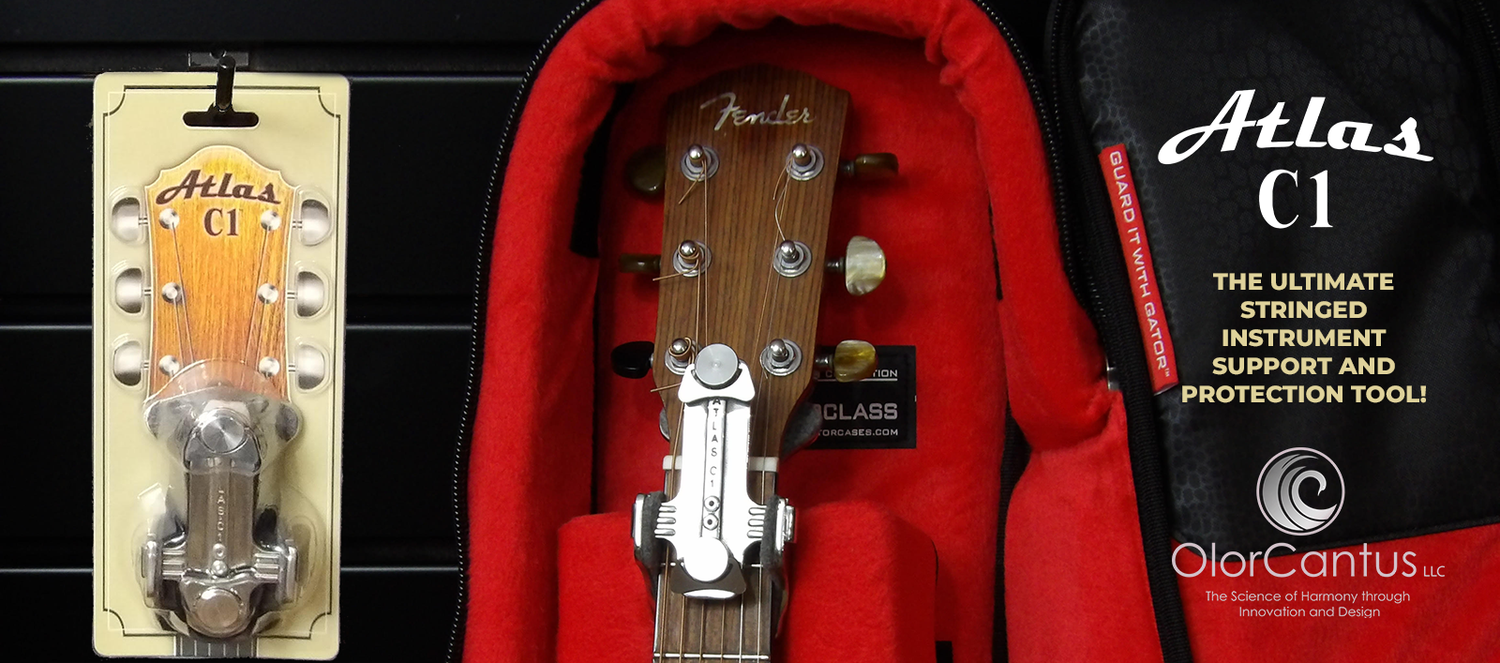
If you're coming from a background of basic setups and restrings, understand that headstock work is a different skill tier. A repair jig that holds the break in correct alignment removes most of the guesswork, which is exactly the problem the Atlas C1 was built to solve.
Guitar Neck Break Repair Time: What to Expect
Guitar neck break repair time typically runs from a few days to several weeks, and the clock is dominated by glue cure time and finish work, not the actual repair. A straightforward clean break can be glued and clamped in under an hour of active work, but the joint needs to cure fully before string tension goes back on.
Here is how the timeline usually breaks down:
| Repair Stage | Active Bench Time | Wait Time |
|---|---|---|
| Assessment and alignment | 20-40 minutes | None |
| Glue and clamping | 30-60 minutes | 24-48 hours cure |
| Spline or rod reinforcement | 1-2 hours | 24 hours cure |
| Finish and color matching | 1-3 hours | Days between coats |
| Setup and restring | 30-60 minutes | None |
A shop juggling multiple jobs adds queue time on top of this. If you're touring, ask upfront whether the luthier can prioritize your instrument, because a repair that takes two weeks of calendar time may only be a few hours of actual work.
Best Tools for Guitar Headstock Repair
The best tools for guitar headstock repair are the ones that control alignment and clamping pressure, because those two factors decide whether the joint holds. Everything else is secondary.
- A pre-aligned repair jig - Holds the headstock at the correct angle while the glue cures, which is the hardest part to get right by hand.
- Proper clamps - Even, adjustable pressure without crushing the wood.
- Wood glue matched to the instrument - Hide glue for vintage instruments where reversibility matters, Titebond for modern builds.
- Spline or carbon fiber rod stock - For shattered breaks that need reinforcement beyond glue alone.
- Finish materials - Sanding blocks, color-matched lacquer or polyurethane, and buffing compound for the cosmetic stage.
The Atlas C1 doubles as a pre-aligned repair jig, which is why luthiers and touring players keep one on the bench. It counteracts the 130+ pounds of string pressure tension that pulls on a repaired joint, keeping the headstock locked in alignment while the glue sets. If you're stocking up on bench supplies at the same time, a 10 % product discount and free shipping may be available, making it easier to add one to your kit.
When to Replace the Neck vs. Repair the Headstock
Replace the neck when the break extends into the fretboard, the truss rod is damaged, or the wood is too compromised to hold a glue joint. Otherwise, repair the headstock. Replacement is the more invasive and expensive path, and on a set neck it means major surgery.
The decision hinges on where the damage stops. A break confined to the headstock itself is almost always repairable. Once the fracture reaches the neck-junction or the truss rod channel, a repair may not restore structural integrity, and a replacement neck becomes the honest recommendation.
Bolt-on necks make this easier: a replacement is a straightforward swap. Set necks are glued in, so replacement is a serious job that only makes sense when repair genuinely isn't viable. For most headstock breaks, repair wins on both cost and preservation of the instrument's original parts.
Resale Value and Insurance After a Headstock Repair
A repaired headstock reduces resale value, and how much depends on the quality of the repair and the instrument's original worth. A well-executed, nearly invisible repair on a player-grade guitar barely dents the price. A visible or poorly aligned repair on a vintage instrument can cut value significantly.
What most guides skip is the mechanism behind that discount. Buyers and appraisers aren't reacting to the break itself; they're pricing in uncertainty. A documented professional repair removes most of that uncertainty, which is why the same physical repair can be worth thousands more on paper when the paperwork is clean.
What Documentation Actually Protects
Keep a repair file that includes:
- The luthier's invoice with a description of the repair method (glue type, spline or rod reinforcement, finish work)
- Before-and-after photos from multiple angles, including the neck-junction and truss rod access
- The luthier's notes on alignment and any reinforcement used
- A statement of the instrument's pre-repair condition and post-repair setup specs
A common pattern is that buyers treat a documented professional repair far more favorably than an unexplained scar. On a collectible instrument, an undocumented repair is often assumed to be the worst-case version of itself.
Insurance and Warranty Realities
Many users are unsure whether their homeowner's or renter's insurance covers accidental headstock damage. The honest answer is: sometimes, and the details matter.
- Homeowner's and renter's policies often cover accidental damage to musical instruments, but coverage is usually subject to a deductible and may be capped under a category like "personal property." A repair that costs less than your deductible is effectively out of pocket.
- Scheduled personal property riders (also called floaters) list the instrument specifically and typically cover damage without a deductible, which is the more reliable path for a valuable guitar.
- Manufacturer warranties generally do not cover accidental damage. They cover defects in materials or workmanship. A headstock break from a drop or a fall is not a defect claim.
- Disclose prior repairs. An undisclosed prior repair can complicate a future claim, and some carriers treat undisclosed damage as a misrepresentation issue.
If you're shipping a guitar for repair, confirm whether your policy covers the instrument in transit. Many standard policies exclude or limit coverage for items in commercial shipping, which is why specialist instrument shippers offer their own declared-value coverage.
On high-value instruments, the goal isn't just a strong repair. It's a repair you can prove was done right, because documentation is what protects both resale value and insurance coverage.
Shipping Logistics for Repairs
If you're sending a guitar out for repair, the shipping itself is a cost and a risk. A headstock that's properly supported in transit arrives intact. An unsupported headstock is the classic shipping casualty.
- Packing: Detune the strings, support the headstock so it cannot move inside the case, and double-box with padding at all corners.
- Carrier and coverage: Use a carrier that offers declared-value coverage for musical instruments, and photograph the packed case before sealing it.
- Cost reality: Round-trip shipping on a full guitar case can be a significant expense, which is why local luthiers are often a practical economic choice unless the instrument needs a specialist.
- Risk transfer: If the guitar arrives damaged, the claim process depends on your documentation and the carrier's declared-value terms, not on the luthier.
Protection during transport is cheaper than repair after it, and it's the one part of the process you fully control.
Frequently Asked Questions
Can a broken guitar headstock be repaired to its original strength?
A clean break repaired by a skilled luthier with wood glue and proper clamping can restore most of the original structural integrity. The repaired joint often becomes stronger than the surrounding wood. However, a shattered headstock with multiple fractures may never fully regain original strength. Proper alignment and reinforcement, such as splines or carbon fiber rods, improve long-term durability.
Does a headstock repair significantly decrease the resale value of a guitar?
A repaired headstock typically reduces resale value for vintage or collectible instruments. The devaluation depends on the quality of the repair, the guitar's original value, and whether the finish was refinished. A clean, professional repair with color matching and a clear coat preserves more value than a visible DIY fix. Documentation of the repair helps buyers trust the work.
How long does a professional headstock repair typically take?
Professional headstock repairs can take several weeks. The timeline includes clamping and glue curing, spline reinforcement if needed, finish repair, color matching, and buffing. Complex shattered headstocks or vintage instruments requiring hide glue and lacquer may take longer. Rushed repairs risk weak joints and poor cosmetic results.
What factors influence the total cost of a headstock repair?
Key cost factors include the type of break (clean vs. shattered), whether structural reinforcement like splines or carbon fiber rods is needed, finish repair complexity (lacquer vs. polyurethane), and the luthier's experience. Vintage instruments often cost more due to hide glue and color matching requirements. Additional setup, restring, and truss rod adjustment may add to the final bill.