
Table of Contents
- Why a Guitar Repair Jig Matters for Home Luthiers
- Types of Guitar Building Jigs and Their Uses
- How to Fix Broken Guitar Headstock: Step-by-Step Process
- DIY Guitar Neck Repair Tools: Essential Equipment for Home Workshops
- DIY vs. Store-Bought Jigs: What Makes Sense for Your Workshop
- Setting Up Your Home Luthier Workstation
- Safety Protocols for Home Guitar Repair Work
- Conclusion
Why a Guitar Repair Jig Matters for Home Luthiers
A guitar repair jig for home use transforms how you approach instrument maintenance and restoration. The headstock represents your guitar's most vulnerable point, a single drop can result in a break costing hundreds of dollars to repair professionally. With the right jig in your workshop, you're not just protecting your investment; you're gaining the ability to handle repairs yourself with precision that rivals professional luthiers.
The headstock-neck junction endures constant stress from string tension, exerting over 130 pounds of force on that joint alone (peer-reviewed research). Without proper support during transport, storage, or repair work, this vulnerable connection becomes a liability. A quality guitar repair jig for home use provides the alignment and clamping support that prevents damage and enables confident repairs when breaks occur.
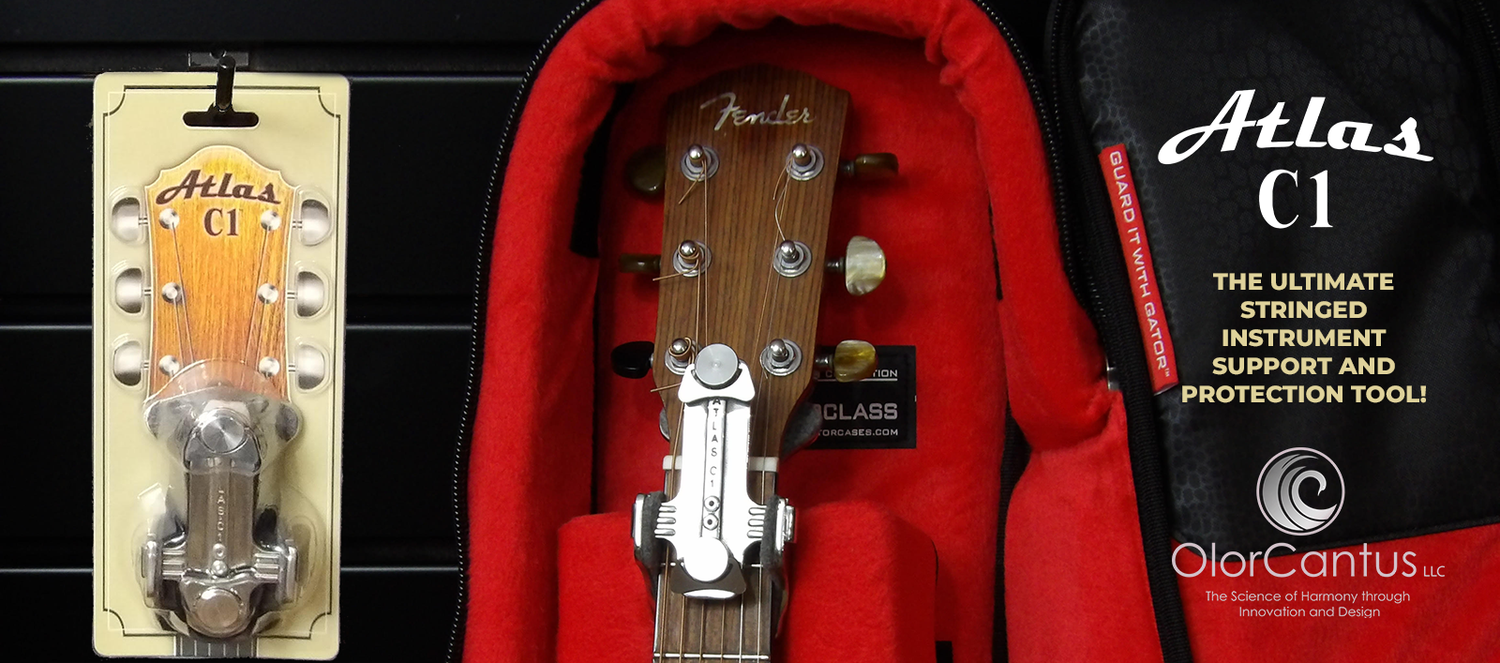
At Atlas C1, we understand that most guitarists lack access to professional repair shops or can't afford expensive repairs. That's why we engineered a solution that serves dual purposes: protection during everyday use and a pre-aligned repair platform when needed. This guide walks you through everything you need to know about selecting, setting up, and using a guitar repair jig for home use effectively.
Types of Guitar Building Jigs and Their Uses
Understanding different jig categories helps you identify which tools solve your specific problems. Professional luthiers and serious hobbyists rely on specialized fixtures because each addresses a different stage of guitar work.
Headstock Support Jigs
Headstock support jigs cradle the most fragile part of your instrument, preventing the headstock from twisting, bending, or breaking under its own weight or external pressure.
A proper headstock support jig maintains precise alignment between the headstock and body. During glue-ups, even slight angle shifts prevent the repair from holding long-term. The jig locks everything in place while adhesive cures, ensuring the repair bond forms at the correct angle.
Many home builders start with simple wooden blocks and C-clamps, but this approach introduces alignment problems. Blocks slip, clamps twist the joint, and you end up with a repair that fails under normal playing conditions. A purpose-built headstock support jig eliminates these variables.
Neck Pocket Alignment Fixtures
The neck pocket is where the neck meets the body, determining your guitar's playability and structural integrity. Alignment fixtures ensure the neck sits at the correct angle relative to the body, affecting action height, intonation, and instrument response to string tension.
Without a fixture, maintaining proper neck pocket alignment is nearly impossible for home builders. A well-designed fixture handles the geometry for you, keeping the neck centered and at the correct angle while you work.
Professional luthiers use self-centering fixtures that automatically position the neck in the pocket. For home shops, simpler alignment templates work well, delivering the precision you need at lower cost.
Routing and Shaping Templates
Templates guide your routing tools when shaping channels, body cavities, or neck profiles. A good template resists tool pressure while accommodating minor variations in wood grain or thickness.
Routing templates matter most when creating multiple identical parts or repairing damage requiring precise material removal. Without a template, freehand routing introduces inconsistencies and often results in over-cutting or under-cutting critical areas.
How to Fix Broken Guitar Headstock: Step-by-Step Process
A broken headstock doesn't mean your guitar is ruined. With the right jig and approach, you can restore structural integrity and get back to playing. The key is understanding that headstock breaks require precision alignment and adequate curing time.

Assessment and Clamping
Before clamping, assess the break carefully. Examine where the headstock separated from the neck, is it a clean break at the pocket, or does it extend into the headstock itself? Is the wood splintered or relatively straight?
Clean breaks respond best to repair. Splintered breaks require removing loose wood fibers first, resulting in more material loss but a stronger final bond. Measure the break angle and identify any chips or missing pieces.
Position your guitar repair jig so the headstock and neck pocket align exactly as they would in playing position. Tighten clamps gradually, applying even pressure across the break line. Uneven clamping twists the joint and creates a weak repair.
Alignment and Glue-Up
Once clamped, verify alignment by sighting down the neck and checking the headstock angle relative to the body. The headstock should sit at the correct angle, typically 13-17 degrees for Gibson-style instruments, less for Fender-style guitars (fender.com).
Apply adhesive carefully. Most luthiers use hide glue or epoxy for headstock repairs because these create strong, permanent bonds. Spread glue evenly across the break surface, using just enough to create a thin line when clamped.
Tighten clamps in sequence to maintain alignment. Start with clamps closest to the break, then work outward. Check alignment again after each clamp to prevent joint shifting.
Curing and Finishing
Hide glue typically cures in 24 hours at room temperature; epoxy varies by brand but often requires 24-48 hours (peer-reviewed research). Don't rush this step, the bond reaches full strength only after complete curing.
Once cured, remove clamps carefully and inspect the repair. Sand the area smooth if necessary, removing excess glue and blending the repair into surrounding wood. If refinishing, match the finish carefully to make the repair invisible.
Finally, string the guitar and let it sit for a few days under string tension. This tests whether the repair holds under actual playing forces. Most quality repairs show no movement or cracking after this test.
DIY Guitar Neck Repair Tools: Essential Equipment for Home Workshops
Building a capable home repair station doesn't require spending thousands on professional equipment. Strategic tool selection lets you handle most common repairs effectively.
Workholding and Clamping Solutions
Clamps are the foundation of any repair jig setup. You need a variety of sizes and types: bar clamps for large surfaces, C-clamps for smaller areas, and quick-grip clamps for rapid positioning.
Clamping blocks, wooden pads that distribute pressure, protect your guitar's finish from clamp marks. Cut these from hardwood scraps and glue sandpaper to the clamping surface for extra grip.
A workbench with a solid surface is essential. Your bench should be sturdy enough that clamping force doesn't flex it. Height matters too, your bench should position work at elbow height to minimize fatigue.
Precision Measurement and Alignment Tools
A straightedge is your most important measuring tool. A 24-36 inch straightedge lets you check neck relief, headstock angle, and body flatness.
A quality digital caliper measures pocket depth, neck width, and other critical dimensions. Spend extra on a caliper with a depth-measurement probe for checking pocket depth.
A torpedo level confirms that your workbench is truly level. An uneven bench introduces systematic errors into every measurement and repair.
Angle gauges or protractors verify headstock angles. Most guitars have specific headstock angles, Gibson instruments typically run 13-17 degrees, while Fender designs use smaller angles. Measure your guitar's factory angle before any repairs.
DIY vs. Store-Bought Jigs: What Makes Sense for Your Workshop
Building your own jigs offers flexibility and cost savings, but store-bought solutions provide precision difficult to achieve at home. The decision depends on your skill level, available tools, and repair frequency.
DIY jigs work well if you're comfortable with basic woodworking. A simple wooden headstock support jig can be built from hardwood scraps in an afternoon. The tradeoff is that homemade jigs rarely match the precision of engineered designs, and small alignment errors compound during repair work.
Store-bought jigs like the Atlas C1 deliver precision engineering designed by luthiers who understand how forces distribute during repair work.
The financial calculation depends on repair frequency. If you're fixing one headstock every few years, a basic DIY jig makes sense. If you're regularly repairing guitars, a quality store-bought jig pays for itself quickly through faster, more reliable repairs.
Many serious home builders use a hybrid approach: they build specialized templates for specific tasks while investing in a quality guitar repair jig for home use for the most critical work.
Setting Up Your Home Luthier Workstation
A functional repair station doesn't require a dedicated room or expensive equipment. Smart layout and tool organization let you work effectively in limited space.
Space-Saving Jig Designs
Wall-mounted jigs save bench space significantly. A headstock support jig can be mounted on a swing arm that folds away when not in use, keeping your bench clear while keeping the jig immediately accessible.
Modular jig designs let you combine different components for different repairs. A base platform can accept various clamping attachments, routing guides, and support blocks, requiring less storage space than maintaining separate jigs.
Vertical storage uses wall space efficiently. Mount clamps on pegboard, hang templates on hooks, and store wood blanks in vertical racks, keeping frequently-used tools within arm's reach.
Jig Maintenance and Calibration
Jigs require regular maintenance to stay accurate. Wooden components can swell or shrink with humidity changes, affecting alignment. Check your jigs quarterly by measuring critical dimensions.
Clamps need periodic cleaning and lubrication. Sawdust accumulation reduces clamping force and can bind threads. Clean clamps with a brush and apply light machine oil to threads and pivot points.
Calibration involves verifying that your jig maintains correct angles and alignments. Use your straightedge and angle gauge to confirm reference surfaces haven't shifted. Document your jig's original measurements and keep calibration records.
Safety Protocols for Home Guitar Repair Work
Working safely protects both you and your instruments. Guitar repair involves sharp tools, adhesives, and sometimes power tools, all requiring proper precautions.
Wear eye protection whenever cutting, routing, or sanding. Safety glasses with side shields offer the best protection.
Use clamps correctly to prevent hand injuries. Position your hands away from pinch points before tightening. Use a clamp key or wrench to apply pressure, keeping hands clear.
Adhesive safety matters significantly. Hide glue requires heating, creating burn hazards. Epoxy generates heat during curing and can irritate skin. Always read adhesive labels and follow safety instructions.
Power tools demand respect. Secure your guitar firmly before routing or sanding. Keep hands clear of moving bits. Never reach across a spinning tool.
Work at a comfortable height and take breaks frequently. Position your workbench at elbow height and take 10-minute breaks every hour during intensive work.
Protecting your guitar from headstock damage starts before anything breaks. A quality guitar repair jig for home use like the Atlas C1 serves as both prevention and repair platform, giving you the confidence to transport your instruments safely and handle repairs when needed. The Atlas C1's precision engineering and universal design work with virtually any guitar style, and its pre-aligned setup means you can achieve professional-quality repairs without years of luthier experience. With the Atlas C1 in your workshop, you're investing in your instruments' longevity and your own capability as a musician and builder. Get started with Atlas C1 today and add 10% to your order with code HOMESHOP, plus free shipping on all purchases.
Frequently Asked Questions
Q: What is the best guitar repair jig for home use if I'm just starting out?
A: Start with a pre-aligned headstock support jig designed for your guitar type (Gibson-style angled headstocks or Fender-style straight headstocks). These eliminate the guesswork on neck angle and alignment, which are critical for a successful repair. A precision-engineered tool like the Atlas C1 provides the stability and alignment accuracy you need without requiring luthier experience. Budget-friendly options exist, but investing in a quality fixture prevents costly mistakes on valuable instruments.
Q: Can I build my own guitar repair jigs at home, or should I buy one?
A: You can build basic routing templates and fixtures from plywood and hardwood, but headstock repair jigs demand precision that's difficult to achieve without specialized tools. The neck angle, clamping geometry, and alignment tolerance are unforgiving, even small errors can worsen a break. A store-bought jig eliminates this risk. For hobbyists and collectors protecting high-value guitars, a commercial tool is worth the investment. DIY jigs work better for routing and shaping tasks where tolerance is less critical.
Q: How do I know if a guitar repair jig will work for my headstock style?
A: Most modern repair jigs are universal or adjustable for both angled (Gibson-style) and straight (Fender-style) headstocks. Check the product specs before buying. The jig should support the headstock at the break point without tilting or shifting under string tension. If you own multiple guitar types, a multi-function tool that handles both configurations saves space and cost. Test the stability by gently applying downward pressure, it should resist movement.
Q: How long does a headstock repair actually take with a home jig?
A: The repair process itself takes 30 minutes to an hour: assessment, clamping, alignment, and glue application. The real time commitment is curing, wood glue typically needs 24 hours to fully set. Some repairs require additional time for sanding, refinishing, or fret recrowning afterward. A quality jig speeds up the hands-on work by eliminating trial-and-error alignment, so you spend less time troubleshooting and more time waiting for the glue to cure.
This article was written using GrandRanker