
Table of Contents
- Understanding Guitar Neck Break Anatomy
- Inspection and Damage Assessment
- Tools and Supplies Required for Repair
- How to Fix Broken Guitar Headstock: Initial Stabilization
- Best Wood Glue for Guitar Repair
- Clamping Techniques and Pressure Application
- Guitar Neck Repair Jig Setup and Use
- Curing Time and Structural Integrity Assessment
- Refinishing and Touch-Up After Repair
- Post-Repair Setup Adjustments
- DIY Repair vs. Professional Luthier Services
- Long-Term Structural Stability and Prevention
- Repairing Different Neck Profiles and Materials
- Frequently Asked Questions
Last Updated: September 23, 2026
Understanding Guitar Neck Break Anatomy
A guitar neck break is a structural fracture in the wood connecting the headstock to the body. This damage typically occurs at the most vulnerable point: the neck-to-headstock junction, where the grain structure transitions and wood thickness changes dramatically. Understanding where breaks happen and what types exist is essential before attempting any repair.
The headstock bears tremendous stress during normal use. String tension, which can exceed 130 pounds of cumulative pressure on the neck, constantly pulls downward and forward. When a guitar is dropped, falls from a stand, or experiences impact during travel, the headstock junction is the first casualty. This area lacks the reinforcement of the body's deeper wood mass, making it the critical failure point.
Atlas-C1 Flash sale
Where Breaks Occur: Headstock and Neck Junction
The most common break location is the angled transition where the headstock meets the neck. Gibson-style guitars with angled headstocks face particular risk because the geometry creates a stress concentration point. The wood grain runs vertically through the neck but must transition to support the headstock's angle, this directional shift weakens structural integrity at the junction.
Fender-style straight headstocks experience breaks differently. Rather than snapping at a single junction point, straight headstocks often fracture along the grain or develop stress cracks that radiate from the tuning peg holes. The break line typically runs perpendicular to the grain, following the path of least resistance through the wood.
Less common but still significant are breaks that occur within the headstock itself, fractures that separate the headstock face from the back or splits that run lengthwise through the peghead. These breaks are often more complex to repair because they involve multiple wood surfaces and grain directions.
Clean Breaks vs. Stress Fractures
A clean break is a sharp separation where two pieces of wood have completely parted. The wood fibers are severed cleanly, and the two halves can typically be realigned without missing material. Clean breaks are the most repairable because the original wood structure remains intact, you're simply rejoining what was separated.
Stress fractures are partial breaks where the wood has cracked but the pieces remain partially connected. The wood fibers are damaged but not fully severed, and the crack may follow an irregular path through the grain. Stress fractures are more challenging because the damage is distributed across a larger area, and realignment is less straightforward.
Impact fractures involve crushing or splintering of the wood fibers rather than a clean separation. When a headstock hits something at an angle or with rotational force, the wood doesn't break in a straight line, it splinters, crushes, and separates in multiple directions. These repairs require careful assessment of which pieces can be preserved and which must be reinforced or replaced.
Inspection and Damage Assessment
Before attempting any repair, you must understand the full extent of the damage. A thorough inspection determines whether DIY repair is realistic or if professional help is necessary. Start by examining the break from multiple angles under good lighting. Look for the direction of the crack, whether the pieces are still aligned, and whether any wood is missing or crushed.
Run your fingers along the break line. You're feeling for gaps, splinters, and areas where the wood is soft or compressed. A clean break with tight-fitting edges is far easier to repair than one with gaps or crushed fibers. Check whether the headstock can be realigned to its original position without forcing. If the pieces don't want to sit together naturally, the break may be more complex than it appears.
Inspect the tuning peg holes and the fretboard area. Breaks that extend into these areas complicate the repair significantly. If the break runs through a tuning peg hole, that hole may need to be redrilled after repair. Breaks affecting the fretboard junction require extra care to maintain proper neck geometry.
Assess the overall structural integrity of the headstock. Is the wood solid elsewhere, or are there other cracks, checking, or weak areas? A headstock with multiple damage points may be beyond safe DIY repair. Look for signs of previous repairs, old glue lines, filled cracks, or reinforcing wood. Previous repairs can complicate new work because you're dealing with mixed wood types and adhesives.
Tools and Supplies Required for Repair
Successful guitar neck break repair requires specific tools and materials. Many of these are specialized, but quality matters significantly. A poorly executed repair due to inadequate tools will fail under string tension.
Essential tools:
- Clamps (minimum 4, preferably 6-8 bar clamps with 12-18 inch reach)
- Cauls (flat pieces of hardwood to distribute clamping pressure evenly)
- Straightedge or precision level to check alignment during curing
- Drill with appropriate bits for pilot holes if reinforcement is needed
- Sandpaper (120, 180, 220, 320 grit)
- Scrapers and chisels for cleaning excess glue
- Measuring tools (calipers, ruler, angle gauge)
- Clamp pressure gauge or spring scale to verify even pressure
Essential supplies:
- Wood glue (specific type depends on repair requirements)
- Masking tape to protect finished areas
- Cloth or paper towels for cleanup
- Glue spreader or old credit card for even application
- Wax paper to prevent glue from bonding clamps to the guitar
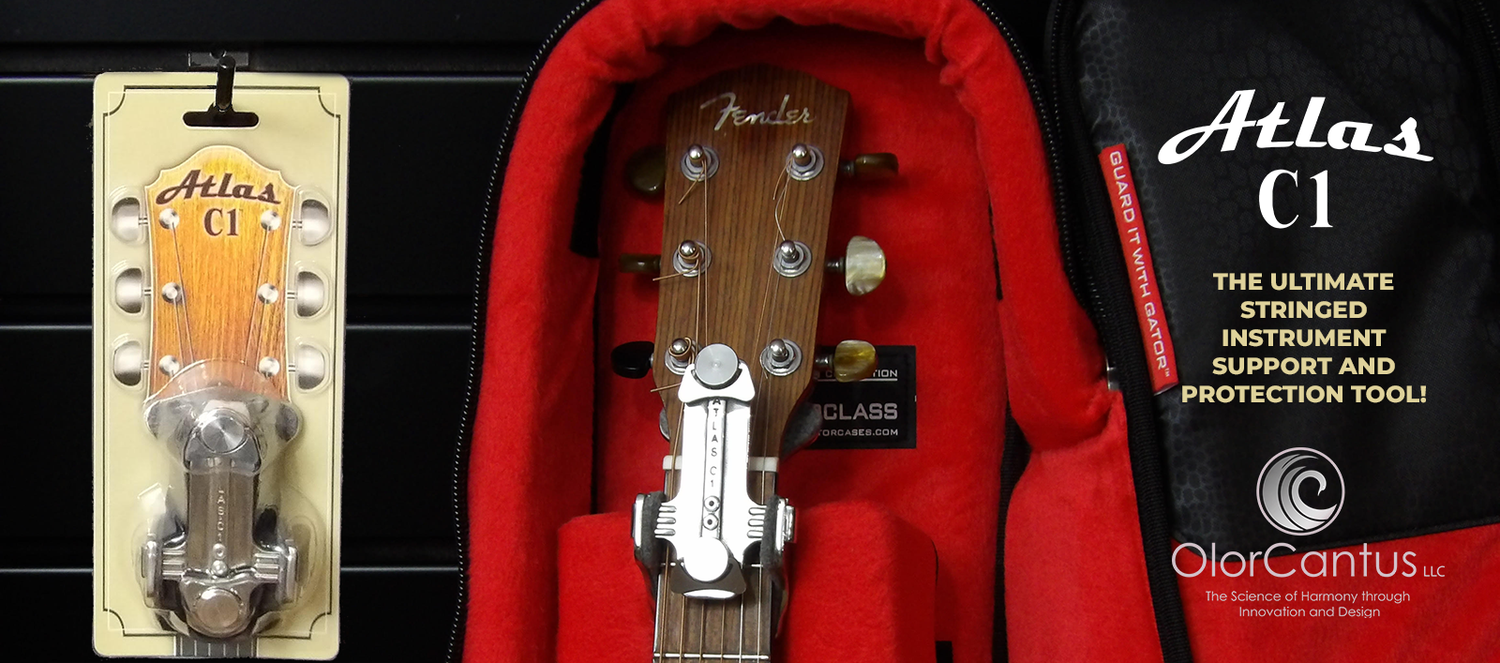
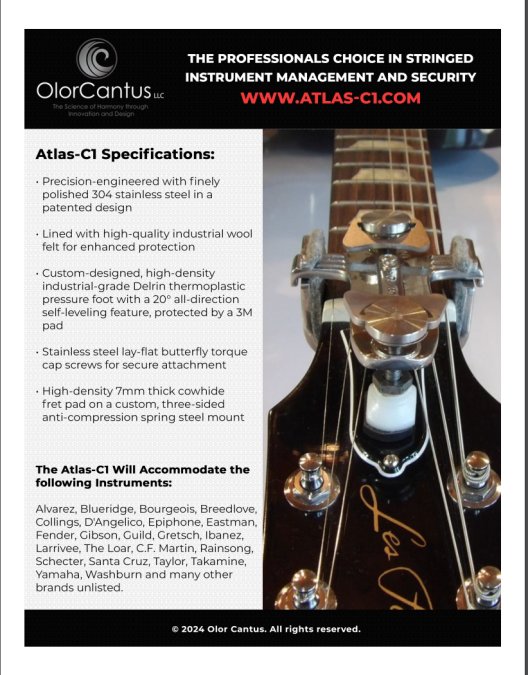
The Atlas C1 serves as both a protective transport tool and a pre-aligned repair jig, eliminating the need to fabricate custom cauls and alignment fixtures. Its universal design works with Gibson-style angled headstocks and straight-headstock designs, providing the precise alignment that prevents common mistakes during clamping.
How to Fix Broken Guitar Headstock: Initial Stabilization
Before applying glue, the broken pieces must be stabilized and aligned. This step determines whether your final repair will be structurally sound or prone to failure. Start by laying the guitar flat on a padded surface with the headstock extending beyond the edge of your work table. This positioning gives you access to the break and allows gravity to help with alignment.
Gently separate the broken pieces just enough to inspect the mating surfaces.
Managing String Tension and Grain Alignment
String tension constantly pulls the headstock forward and downward. During repair, you must counteract this force and maintain proper grain alignment. The wood grain should run continuously across the break line, if grain direction is misaligned, the repair will be weak and prone to re-breaking.
Best Wood Glue for Guitar Repair
Choosing the correct adhesive is critical. Different glues have different properties, and the wrong choice can result in a repair that fails under string tension or becomes permanent in ways that affect future repairs.
Hide Glue vs. Aliphatic Resin vs. Modern Epoxy
Hide glue is the traditional choice for guitar repair. It's made from animal collagen and has been used for instrument repair for centuries. Hide glue creates a bond that's reversible, if a future repair is needed, heat can soften the joint. It's thin enough to create tight glue lines and doesn't create visible gaps. However, hide glue requires careful temperature control during application and curing, and it's vulnerable to humidity and moisture.
Clamping Techniques and Pressure Application
Clamping pressure is where most DIY repairs fail. Too little pressure and the glue joint is weak. Too much pressure and you squeeze out all the glue, creating a starved joint with no adhesive. The goal is even pressure across the entire break surface.
Using a Guitar Neck Repair Jig for Alignment
A repair jig holds the guitar in precise alignment while glue cures. The Atlas C1 functions as a pre-aligned repair jig, eliminating the need to fabricate custom fixtures. Its universal design accommodates different headstock angles and neck profiles, ensuring that grain alignment is maintained throughout the curing process.
Guitar Neck Repair Jig Setup and Use
Setting up a repair jig correctly is essential for successful guitar neck break repair. The jig must support the neck without creating stress points that would damage the repair joint. It must maintain alignment in three dimensions: straight along the neck, level across the headstock, and properly angled for the specific headstock design.
Curing Time and Structural Integrity Assessment
Curing time depends on the adhesive used. Hide glue typically requires 24 hours at 65-75°F with 45-55% relative humidity. Aliphatic resin (such as Titebond II or III) requires 24-48 hours for full strength, with full cure extending to 7 days under load. Epoxy varies by formulation but typically requires 24 hours minimum, with full strength developing over 5-7 days. Temperature and humidity directly affect cure speed; cold or dry conditions slow curing, while warmth accelerates it.
Systematic Post-Cure Validation Protocol
Stage 1: Visual and Tactile Inspection Examine the break line under bright light. The glue line should be nearly invisible, with no visible gaps, voids, or misalignment. Run your fingers along the break, there should be no ridge, step, or depression where the pieces meet. The surface should feel continuous and smooth. If you see gaps wider than a hair's width or feel a step, the repair has failed and must be re-glued.
Graduated String Tension Application
Once all three validation stages pass, apply string tension gradually over 48 hours. This staged approach allows the glue joint to adjust to load incrementally:
- Hour 0-12: Install all six strings but tune only to half tension (approximately 65 pounds total). Monitor the repair area continuously for movement or gaps.
- Hour 12-24: Tune to three-quarter tension (approximately 100 pounds total). Check the pencil-line mark for any offset.
- Hour 24-48: Bring strings to full pitch (approximately 130-150 pounds total, depending on gauge and tuning). Watch the repair closely during this final phase.
Long-Term Monitoring
After the guitar returns to full playing tension, continue monitoring the repair for 30 days. Check the pencil-line mark weekly. Inspect the break during string changes. Listen for any new creaks or pops from the headstock area during playing, which would indicate micro-movement at the joint. Most failures occur within the first two weeks; if the repair holds through 30 days of regular playing, it is structurally sound and should remain stable indefinitely.
Refinishing and Touch-Up After Repair
Once the glue has cured and the guitar is stable, refinishing begins. The repair area needs to be sanded smooth and finished to match the rest of the headstock.
Sanding, Lacquer Application, and Clear Coat
Start with 120-grit sandpaper to remove excess glue and flatten the repair area. Progress to 180-grit, then 220-grit to create a smooth surface. Sand in the direction of the grain to avoid creating cross-grain scratches that will be visible under finish.
Post-Repair Setup Adjustments
After repair and refinishing, the guitar needs setup adjustments to ensure it plays correctly. String tension and headstock geometry changes may have affected neck relief, action, and intonation.
Truss Rod Adjustment and Intonation Verification
Check neck relief with a straightedge. The neck should have a slight forward bow under string tension, typically 0.010 to 0.015 inches of relief. If the neck is too straight or has back-bow, adjust the truss rod. Turn the truss rod clockwise (when looking at the headstock) to reduce relief; counterclockwise to increase relief. Make small adjustments, a quarter turn at a time, and wait 24 hours between adjustments for the wood to settle.
DIY Repair vs. Professional Luthier Services
The decision between DIY repair and professional service depends on several factors: the guitar's value, your skill level, the complexity of the break, and the time you have available.
Long-Term Structural Stability and Prevention
A properly executed guitar neck break repair is permanent. The glued joint becomes stronger than the surrounding wood. However, preventing future breaks is the real priority.
Protecting Against Future Breaks During Travel
String tension is the constant stress on your guitar. Proper case selection and handling reduce the risk of impact damage. Hard cases provide better protection than soft cases, but even hard cases don't prevent all damage if dropped from height.
Repairing Different Neck Profiles and Materials
Guitar neck construction and wood type fundamentally alter repair strategy. A one-size-fits-all approach fails because clamping angles, adhesive selection, and pressure distribution must account for how the neck is attached and how the wood responds to stress and moisture.
Bolt-On vs. Set-Neck Construction
Bolt-On Necks (typical on Fender Stratocasters, Telecasters, and many modern guitars) are attached to the body with four to six bolts through the neck heel. The advantage for repair is that the neck can be removed from the body, allowing you to work on the break in isolation without the body's weight creating unwanted stress. The disadvantage is that bolt-on necks experience more flex at the heel junction because they're not glued; the break often initiates at the bolt holes where stress concentrates.
Wood Type: Mahogany vs. Maple vs. Exotic Species
Mahogany (African mahogany, used in Gibson necks and bodies) is relatively soft, fine-grained, and glues readily with standard adhesives. Mahogany's grain structure is fairly uniform, so breaks typically follow a predictable path. The wood is forgiving of clamping pressure, you can apply firm pressure without crushing fibers. Mahogany absorbs glue readily, so you may need slightly more adhesive than with denser woods.
Headstock Angle and Clamping Strategy
Gibson-Style Angled Headstocks (typically 13-17 degrees from vertical) create concentrated stress at the neck-to-headstock junction. The angle means that string tension pulls not just downward but also backward, creating a shearing force at the break. Clamping must counteract this shearing force by applying pressure that holds the headstock in its original angle.
Material-Specific Adhesive Selection
While aliphatic resin works for most repairs, wood type should influence your final choice:
- Mahogany: Aliphatic resin or hide glue. Both work excellently. Aliphatic resin is more forgiving for DIY work.
- Maple: Aliphatic resin or epoxy. Epoxy is preferred if the break has gaps or if maximum strength is required.
- Exotic woods: Research the specific species. Oily exotics (rosewood, cocobolo) may require epoxy. Dense exotics (ebony) work with epoxy or specialized two-part adhesives designed for exotic woods.
Frequently Asked Questions
Can I fix a clean headstock break at home?
Yes, a clean break—where the wood pieces separate without splintering—is often repairable at home if you have the right tools and patience. Success depends on proper alignment, appropriate wood glue selection, adequate clamping pressure, and sufficient curing time. A guitar neck repair jig ensures accurate alignment during the fix. However, if the break is near the truss rod or involves multiple pieces, professional repair may be safer for valuable instruments.
What kind of glue is best for a guitar neck break?
Hide glue is the traditional choice among luthiers because it allows for future disassembly if needed and creates an invisible joint. Aliphatic resin (yellow wood glue) is more forgiving for DIY repairs and sets faster. Modern epoxy works well for complex breaks but is permanent and harder to reverse. For most home repairs, aliphatic resin balances ease of use with structural strength. Always ensure the glue is rated for wood-to-wood joints and allows adequate curing time before applying string tension.
How do I clamp a guitar headstock break properly?
Use cauls (protective blocks) to distribute clamping pressure evenly across the joint without damaging the finish. Apply pressure perpendicular to the break line to push the pieces together tightly. A guitar neck repair jig simplifies this by providing pre-aligned clamping points and preventing misalignment. Clamp pressure should be firm but not excessive—over-tightening can crush wood fibers or squeeze out too much glue. Check alignment frequently during clamping and maintain pressure throughout the entire curing period.
Is a broken guitar headstock worth repairing?
The answer depends on the guitar's value, the break's severity, and your attachment to the instrument. A vintage or high-value instrument typically justifies professional repair costs. For mid-range guitars, DIY repair using proper techniques and tools is cost-effective. Even budget guitars may be worth fixing if sentimental value is high. However, if the break involves the truss rod channel, fretboard separation, or multiple fractures, professional luthier assessment is recommended before attempting home repair.
How long does a professional guitar neck repair take?
Professional luthier repairs typically take 2 to 4 weeks, depending on break complexity, finish type, and the shop's workload. Simple clean breaks may take 1 to 2 weeks, while complex repairs involving refinishing or structural reinforcement extend the timeline. Curing time for wood glue alone is 24 to 48 hours, but luthiers allow additional time for finish work, setup, and quality checks. DIY repairs follow similar curing timelines but may take longer if you're learning the process.
What is the difference between a scarf joint and a headstock break repair?
A scarf joint is a planned, angled connection where two pieces of wood are precisely cut and glued end-to-end, commonly used in neck construction and professional headstock repairs. A headstock break repair fixes an unplanned fracture in existing wood, typically a straight or irregular break line. Scarf joints are stronger and more permanent because the angled surfaces provide more glue contact area. Break repairs must restore the original grain alignment and structural integrity of existing wood. Both require proper glue, clamping, and curing, but scarf joints demand more precision woodworking.
What should I do if my guitar has a stress fracture rather than a clean break?
Stress fractures—thin cracks without complete separation—are harder to repair because glue cannot penetrate and bond as effectively. Clean the crack thoroughly with compressed air or a thin wire to remove dust and debris. Apply thin, penetrating glue (hide glue or thin epoxy) into the crack using a syringe or applicator. Clamp gently to avoid crushing wood fibers. Stress fractures may not regain full strength and often require professional assessment. If the crack is near the truss rod or headstock face, professional repair is strongly recommended.
How do I know if my repaired headstock is structurally sound?
After curing, inspect the joint for gaps, misalignment, or finish cracks. Gently flex the neck near the repair—it should feel solid with no movement at the break line. Apply normal string tension gradually over several days and monitor the repair for any signs of opening or stress. Check that intonation remains stable and the neck doesn't twist. Long-term stability testing means playing the guitar regularly for several weeks and inspecting the joint periodically. If the repair shows signs of failure, seek professional reinforcement or repair.
The Luthier's Guide to Wood Selection and Grain Alignment
Adhesive Properties and Curing Times in Musical Instrument Repair
Guitar Neck Geometry and Structural Integrity Standards