
Table of Contents
- Why the Right Guitar Repair Jig Matters
- Essential Luthier Tools for Beginners
- Universal vs. Model-Specific Repair Jigs
- How to Fix Broken Guitar Headstock: Jig Selection for Repair
- Guitar Setup and Maintenance Basics with Your Jig
- Building Your Own Repair Jig: Materials and Design
- DIY Guitar Repair Tools List and Compatibility
- Ergonomics, Workflow Efficiency, and Jig Compatibility Across Instruments
- Cost-Benefit Analysis: DIY vs. Commercial Jigs
- Conclusion
- Frequently Asked Questions
Last Updated: September 22, 2026
Why the Right Guitar Repair Jig Matters
Choosing the right guitar repair jig can mean the difference between a successful fix and permanent damage to your instrument. The headstock-neck junction is the most vulnerable point on any guitar. String tension, sometimes exceeding 130 pounds of force, constantly pulls at this joint. One drop, one rough flight, one careless storage mistake, and that junction can snap.
A proper repair jig holds everything in precise alignment while glue cures, removing guesswork and ensuring the fix holds under string tension.
Not all jigs work the same way: Gibson-style angled headstocks require different support than Fender straight headstocks. Universal jigs sacrifice precision for versatility, while DIY builds demand woodworking knowledge.
This guide covers how to select or build a guitar repair jig that matches your specific instruments and skill level. We'll walk through what separates universal designs from specialized tools, when DIY makes sense, and how to set up your workspace for reliable repairs.
Essential Luthier Tools for Beginners
Before choosing a jig, understand how instrument type determines which tools matter most.
Precision measurement tools form the foundation: a straightedge reveals neck relief, a radius block shows fret crown condition, and a feeler gauge measures action height.
Radius blocks vary by instrument: guitars range 7.25" to 16", mandolins 10" to 12", and basses 20" or more. You'll need instrument-specific gauges if you work across multiple families.
Clamping equipment must match instrument type: mandolins need padded V-blocks or specialized jigs, while bass headstocks require heavier-duty hardware than guitars. Clamp size and pressure rating must match your instrument's mass and geometry.
A clamping caul distributes pressure evenly across the headstock joint: 2 inches for guitars, 1 inch or less for mandolins, and 3 to 4 inches for basses.
Hand tools include: fret crowning file, nut slotting files, scraper, chisel set, and sandpaper (80 to 220 grit). Sizes vary by instrument, mandolin frets and nut slots are smaller; bass necks require larger chisels.
Power tools include orbital sanders, Dremels, and drill presses. Scale matters: bass bridge pin holes must be perfectly aligned to handle higher string tension (200+ pounds per string vs. 130 for guitars).
Safety equipment includes glasses, dust mask, and hearing protection. For vintage or shellac-finished instruments, add a respirator rated for organic vapors.
Instrument-specific considerations: guitars use standard kits; mandolins need smaller clamps and narrower cauls; basses require heavier-duty equipment; classical guitars need wider clamping to accommodate larger headstocks.

Universal vs. Model-Specific Repair Jigs
This choice determines whether your jig works across your entire collection or handles one instrument type perfectly.
Universal jigs accept different headstock angles through adjustable support blocks, flexible clamping arms, and modular bases. The trade-off: adjustability often sacrifices precision compared to specialized tools.
Model-specific jigs lock into one headstock angle with zero adjustment, delivering perfect alignment every time but sacrificing versatility.
Choose based on your collection: single-type collections benefit from model-specific jigs; diverse collections benefit from universal tools.
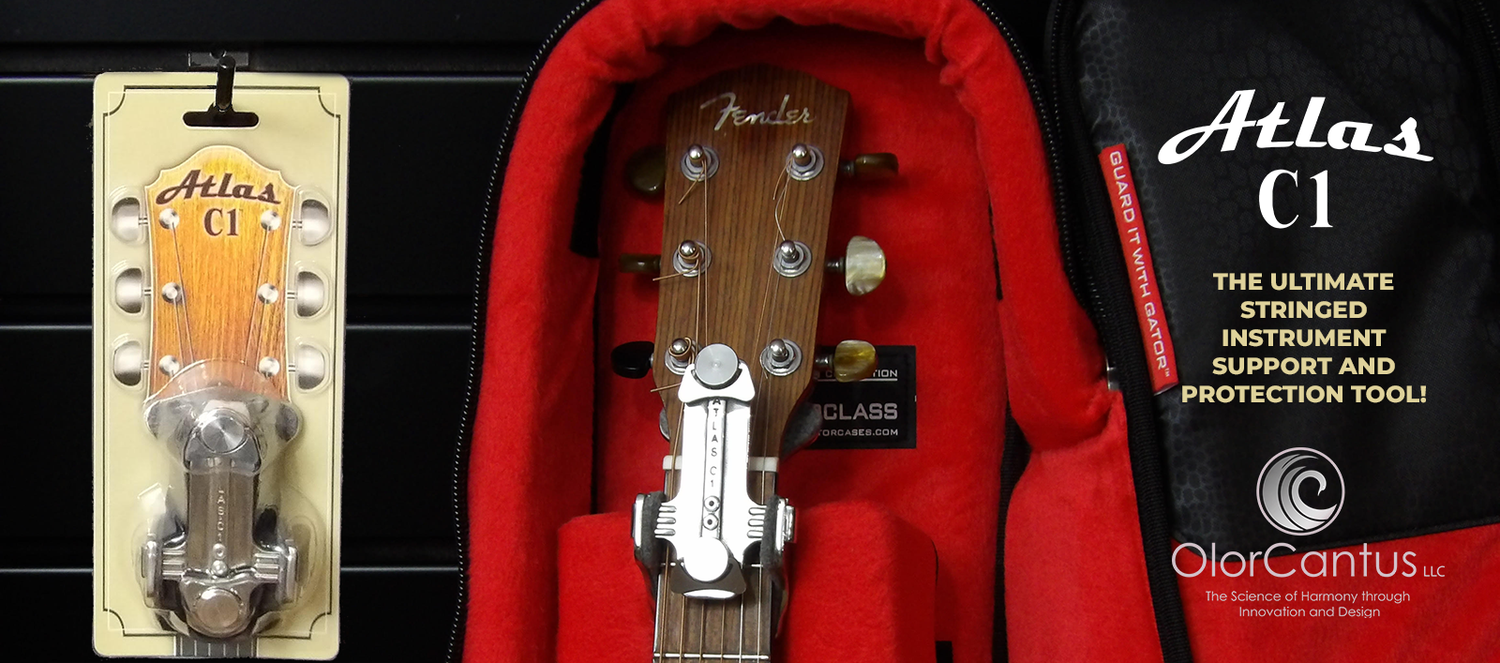
The Atlas C1 bridges this gap as a universal guitar repair jig that maintains precision across different headstock angles. Its design pre-aligns the neck junction regardless of whether you're working on a Gibson-style angled neck or a Fender straight headstock. This eliminates the adjustment guesswork that plagues many universal tools.
How to Fix Broken Guitar Headstock: Jig Selection for Repair
A broken headstock demands the right jig or your repair fails. This is where jig selection becomes critical.
Headstock breaks occur at the neck junction where string tension pulls the headstock away. Breaks are rarely clean, with splintered fibers and cracked finish that complicate realignment.
Your jig must hold pieces in exact alignment, apply even pressure across the break line, and maintain that pressure during 24-hour glue cure.
A repair jig includes a neck support, headstock cradle, clamping surfaces perpendicular to the break line, and adjustment capability for your headstock angle.
Gibson-style breaks require accounting for headstock angle to prevent crooked alignment. Fender-style breaks need even pressure distribution across the horizontal break line to avoid weak spots.
The setup process:
- Clean the break thoroughly with a chisel and compressed air
- Test-fit the pieces in your jig without glue to confirm alignment
- Apply glue to all break surfaces
- Clamp in your jig, checking alignment from multiple angles
- Wipe excess glue
- Let cure undisturbed for 24 hours minimum

Guitar Setup and Maintenance Basics with Your Jig
Once you have a guitar repair jig, use it for preventive maintenance too. This keeps small problems from becoming breaks.
Check neck relief with a straightedge: slight relief at the 7th fret is normal. Too much relief raises action; no relief causes buzz. Catch problems early.
Action height at the 12th fret determines playability. High action stresses the neck; low action causes buzz. Your jig prevents neck damage that causes action problems.
Fret condition affects tone and playability. Worn frets create dead spots; uneven frets cause buzz. Fret crowning restores the crown shape with your jig holding the neck stable.
Bridge adjustment affects action and intonation. A tilted bridge stresses the neck junction; your jig prevents damage from misalignment.
Maintenance routine: monthly neck relief and action checks, quarterly fret inspection, annual full setup, and post-travel verification.
The jig's role is support. It holds your guitar safely while you measure and adjust. It protects the headstock during work. It's preventive medicine for your instrument.
Building Your Own Repair Jig: Materials and Design
DIY jigs cost less but demand precision. A poorly built jig causes problems, not solutions.
Material selection is critical. You need wood that won't flex or warp. Hardwood like maple or oak works. Avoid softwoods like pine. The jig must be more stable than the guitar itself.
For the base, use a solid block at least 2 inches thick and 12 inches long. This prevents tipping. Drill mounting holes for clamping hardware.
The neck support cradle needs curves that match your guitar's neck profile. You can:
- Hand-carve a wooden cradle from a hardwood block
- Wrap foam around a wooden form
- Use adjustable V-blocks that accept different neck diameters
The headstock cradle is trickier. It must support the headstock at the right angle without marring the finish. Use:
- Felt or rubber pads on contact surfaces
- Adjustable blocks that pivot to different angles
- Removable foam inserts for different headstock shapes
Clamping surfaces need parallel faces perpendicular to the break line. Misaligned clamps create twist. Use hardwood pads at least 1 inch thick.
Hardware matters. Industrial-grade C-clamps and bar clamps provide reliable pressure. Cheap clamps slip under load. Spend the money here.
The jig must be rigid. Test it empty before using on a guitar. Push on the headstock cradle, it shouldn't flex. Press on the neck support, zero movement is the goal.
DIY Guitar Repair Tools List and Compatibility
When you build your own jig, ensure it works with your existing tools and guitars.
Compatibility across instruments means your jig accommodates different:
- Headstock angles (Gibson angled vs. Fender straight)
- Headstock widths (wide Les Paul headstocks vs. narrow Strat headstocks)
- Neck profiles (thick vintage necks vs. modern slim profiles)
- Break locations (some breaks are higher on the headstock than others)
A flexible design uses adjustable components:
- Pivoting support blocks for angle adjustment
- Removable foam pads for width adjustment
- Modular neck cradles for profile adjustment
- Sliding clamp mounts for break location adjustment
Test your DIY jig with each guitar before trusting it with a real repair. Dry-run the setup. Verify alignment. Check that clamps don't slip under moderate pressure.
Document your jig's specifications:
- Headstock angles it handles (e.g., 17° Gibson, 0° Fender, 12° PRS)
- Neck profiles it supports (e.g., 1.69" to 1.75" diameter)
- Maximum headstock widths it accommodates
- Clamping pressure range it safely handles
This documentation helps you remember how to use it months later. It also helps you explain to other musicians why your jig works for their guitars.
Compatibility checklist for your DIY jig:
- Tested with each guitar in your collection
- Adjusts to at least two different headstock angles
- Supports neck profiles ranging from vintage thick to modern slim
- Clamps apply even pressure without slipping
- All contact surfaces have protective padding
- Rigid construction with zero flex under clamping pressure
Ergonomics, Workflow Efficiency, and Jig Compatibility Across Instruments
A jig that's uncomfortable to use gets used less, and poor ergonomics create cumulative strain injuries that sideline repair work entirely. Efficiency matters when you're holding a guitar steady for hours, and compatibility across instruments determines whether your jig becomes a workhorse or a shelf ornament.
Workbench height and jig positioning affect everything. Your jig should position the guitar at elbow height when you're standing. Too low and you bend over, straining your lower back and shoulders. Too high and your arms tire quickly, reducing precision during detailed work like fret leveling. A 36-inch workbench works for most people of average height (5'8" to 5'10"). Taller technicians benefit from 38-inch benches; shorter technicians may prefer 34 inches. The goal is to keep your elbows at roughly 90 degrees when your hands are on the guitar.
However, workbench height alone isn't enough. Jig positioning on the bench determines whether you're working in a neutral posture or twisting your torso. Your jig should position the guitar centerline roughly 6 to 8 inches from the bench edge closest to you. This prevents you from reaching over the guitar, which creates shoulder and neck strain. The headstock should be positioned so you can view it straight-on without tilting your head. If you're constantly craning your neck to see the headstock joint, your jig positioning is wrong.
You need access to all sides of the guitar without repositioning. The jig shouldn't block your view of the headstock from the front, back, or sides. Leave room for clamps to tighten without hitting your hands or forcing you into awkward hand positions. Space for tools on either side prevents fumbling and reduces the number of times you reach across the guitar (which creates repetitive twisting strain).
Clamping ergonomics reduce fatigue and prevent injury. Clamps that require two hands to tighten tire you out and create wrist strain, especially if you're tightening multiple clamps in sequence. Quick-release clamps speed up setup and teardown. Lever clamps apply pressure with minimal effort, often requiring only thumb and forefinger pressure rather than full-hand grip strength. These cost more upfront but save time and strain over years of use. A technician who performs 50 headstock repairs per year will spend roughly 25 hours just tightening clamps; lever clamps cut that to 10 hours.
Repetitive strain prevention is critical if you repair guitars regularly. Fret leveling, nut slotting, and headstock alignment all involve sustained gripping and fine motor control. A jig that requires constant micro-adjustments forces you to grip tighter and work longer. A jig that locks in place with minimal adjustment lets your hands relax between tasks.
Consider the actual motion pattern:
- Setup phase: Position guitar, tighten clamps (should take 5-10 minutes)
- Work phase: Perform repair while maintaining hand position (30 minutes to 2 hours depending on task)
- Teardown phase: Loosen clamps, remove guitar (2-3 minutes)
If setup takes 30 minutes because your jig requires constant adjustment, you've added 25 minutes of unnecessary hand strain to every repair.
Workflow efficiency means minimizing repositioning and adjustment. Set up your jig once. Do all work without moving the guitar. Moving it risks misalignment and wastes time. A well-designed jig lets you access the headstock, neck, and body without adjustment. This is where compatibility across instruments becomes crucial.
If your jig requires 15 minutes of adjustment for each guitar type (changing support blocks, swapping foam pads, re-leveling the base), you'll avoid using it for quick repairs. You'll reach for a quick clamp instead, risking damage. A jig that handles multiple headstock angles with quick adjustments (under 2 minutes) gets used regularly and becomes your default repair method.
Compatibility across instrument families affects efficiency and ergonomics differently:
Guitars vs. mandolins: Mandolins are roughly 40% the body mass of guitars. A jig designed for guitar weight distribution will over-clamp a mandolin, creating uneven pressure and potential finish damage. You need adjustable clamping pressure or separate jigs. If you use the same jig for both, you'll spend time adjusting clamp pressure, reducing efficiency.
Guitars vs. basses: Basses are roughly 2x the body mass and headstock width of guitars. A guitar jig won't safely support a bass headstock. The base may tip. The clamping surfaces may not span the headstock width. You need a heavier-duty jig or a modular system that accepts larger support blocks.
Guitars vs. classical guitars: Classical guitar headstocks are often 1.5 to 2 inches wider than electric guitar headstocks. A standard guitar jig's clamping arms may not reach across a classical headstock. You need wider support blocks or adjustable arm spacing.
Designing for cross-instrument compatibility requires:
- Adjustable support block height (to accommodate different neck thicknesses: mandolin necks are 0.75" to 0.9" thick; guitar necks are 0.85" to 1.0"; bass necks are 1.25" to 1.5")
- Modular clamping surfaces (removable pads allow you to swap between narrow mandolin cauls and wide bass cauls)
- Adjustable arm spacing (to accommodate headstock widths from 1.5" for mandolins to 2.5" for classical guitars to 3" for basses)
- Quick-release base mounts (so you can swap between a light base for mandolins and a heavy base for basses without rebuilding the jig)
Measuring your actual workflow:
- Time setup for each guitar type. If it exceeds 5 minutes, your jig isn't efficient enough.
- Count how many times you reposition your hands during a repair. More than 10 repositions suggests poor jig design.
- Assess your posture after a 2-hour repair session. Neck pain, shoulder tension, or wrist soreness indicates ergonomic problems.
- Track clamp-tightening time. If it exceeds 3 minutes total, upgrade to lever clamps or quick-release hardware.
The Atlas C1 addresses these ergonomic factors through its design. The pre-aligned structure means setup takes minutes, not hours, reducing hand strain during adjustment. The universal compatibility eliminates adjustment time between different guitars, you can move from a Fender to a Gibson to a semi-hollow body without changing support blocks or clamping surfaces. The compact footprint leaves workspace clear for tools and clamping hardware, preventing the awkward reaching that creates shoulder strain. The lever-style quick-release clamps apply pressure with minimal hand effort, reducing fatigue during multi-clamp setups.
Cost-Benefit Analysis: DIY vs. Commercial Jigs
The decision between building and buying depends on your use case.
DIY jigs cost $50-$150 and 10-40 hours. Choose DIY if you repair regularly, have woodworking skills, need a specialized design, or enjoy building. Skip DIY if you repair rarely, lack skills, have no workshop, or value guaranteed precision.
Commercial jigs vary in capability and offer reliable results. Choose commercial if you repair occasionally but want reliable results, lack woodworking tools, need precision without a learning curve, travel frequently, or value your time. Many commercial jig providers also offer free shipping on orders and a 10% product discount for first-time buyers, making them more accessible.
Failed repairs are costly: botched glue-ups permanently damage vintage guitars, and misaligned repairs fail under string tension. A cheap jig that slips costs more than a good one. Match your jig to your instruments' value and your repair frequency.
Conclusion
Choosing a guitar repair jig starts with understanding your guitars' headstock angles and your repair frequency. A universal jig handles multiple instruments but sacrifices some precision. A specialized jig delivers perfect alignment for one headstock type. Building your own saves money but demands time and woodworking skill.
The Atlas C1 combines universal compatibility with precision alignment, eliminating the trade-off between versatility and accuracy.
Frequently Asked Questions
Can one repair jig be used for both acoustic and electric guitars?
Yes, universal repair jigs are designed to accommodate both acoustic and electric guitars. However, the fit and support depend on headstock angle and body depth. Acoustic guitars have deeper bodies, while many electric guitars have angled headstocks. A quality universal jig accounts for these differences through adjustable clamping cauls and radius blocks. Model-specific jigs provide tighter tolerances if you work primarily with one instrument family, but a well-engineered universal design eliminates the need for multiple tools.
What features should I look for in a professional guitar repair jig?
Prioritize precision measurement capability, adjustable neck support, and body stability. The jig should have calibrated clamping mechanisms to apply even pressure without damaging the finish, alignment guides for accurate headstock positioning, and compatibility with various headstock angles and neck profiles. Material durability matters for lifetime use. Look for features like pre-aligned design to simplify setup, ergonomic positioning for workshop efficiency, and the ability to accommodate different instrument families. Professional touring musicians and luthiers depend on jigs that reduce setup time while maintaining structural integrity.
How do I ensure my repair jig won't damage the instrument finish?
Use protective padding between the jig's clamping surfaces and the guitar body. High-quality commercial jigs include caul covers or recommend specific materials like felt or closed-cell foam. When building a DIY jig, apply soft padding to any contact points. Distribute clamping pressure evenly across the headstock-neck junction rather than concentrating force in one spot. Test the setup on a non-valuable instrument first. Proper calibration prevents over-tightening, which is the primary cause of finish damage during repair work.
Is a universal repair jig better than a dedicated instrument jig?
It depends on your needs. Universal jigs offer flexibility if you repair multiple instrument types and save money by eliminating the need for several specialized tools. Dedicated jigs provide tighter tolerances and faster setup for specific models like Gibson-style guitars with angled headstocks. For professional luthiers working on many instruments daily, a universal jig with excellent precision measurement and adjustability often outperforms owning multiple dedicated jigs. Casual players or collectors with one or two guitars may prefer a specialized jig for simplicity.
Protect your guitar's most vulnerable point. Get started with the Atlas C1 and keep your instruments safe through decades of playing.