
Table of Contents
- Assessing the Break: Is It Worth Fixing Yourself?
- What You'll Need Before You Start
- Choosing the Best Wood Glue for Guitar Repair
- Dry Fitting and Surface Preparation
- Gluing, Clamping, and Using a Guitar Headstock Repair Jig
- Sanding, Finish Touch-Up, and Post-Repair Stress Testing
- Professional Guitar Repair Cost vs. Doing It Yourself
- When to Call a Pro: A Risk Assessment Checklist
- Frequently Asked Questions
Last Updated: September 13, 2026
Assessing the Break: Is It Worth Fixing Yourself?
A snapped guitar headstock is one of the most common catastrophic failures on angled-neck instruments, and whether you can fix a snapped guitar headstock at home comes down to where the break sits and how clean the fracture is. Most clean breaks along the grain, where the two halves still fit together like puzzle pieces, are repairable on a workbench with the right glue, clamps, and patience. Breaks that splinter across the grain, crush the wood fibers, or expose a previous repair are a different story.
The stakes are real: string tension on a standard six-string set pulls with well over 100 pounds of force against the headstock-neck junction, which is why this area fails first in a fall. This guide from Atlas C1 walks through assessing the damage, choosing glue, building a clamping setup, and knowing when to stop and call a luthier.

Types of Headstock Breaks and What They Mean for Repair
A headstock break is a fracture in the wood where the angled headstock meets the neck, and the repair difficulty depends almost entirely on the fracture's direction and cleanliness. Three types show up most often:
- Clean grain-line break: The crack follows the wood fibers and the two halves mate cleanly. Best candidate for a home repair.
- Splintered or cross-grain break: Fibers tear across the grain, leaving missing material. Harder to align and weaker after gluing.
- Break through a prior repair or truss rod access: The most difficult category, since old glue and hardware limit how much clamping pressure the joint can take.
If you're unsure which category you're looking at, take clear photos from three angles before touching anything.
What You'll Need Before You Start
Gather everything before you open the fracture. Working fast matters once glue is applied, and hunting for a clamp mid-repair costs you open time.
Core supplies:
- Wood glue (see the next section for which type)
- Wax paper and blue painter's tape
- 3-5 clamps: bar clamps, spring clamps, or a purpose-built guitar headstock repair jig
- A damp rag and a dry rag
- 220, 320, and 600-grit sandpaper
- A small brush or glue syringe for reaching inside the crack
- Nitrile gloves
A pre-aligned repair jig is worth having on hand because it holds the headstock at the correct angle while the glue cures, which is the single hardest part of a home repair to get right freehand. If you're ordering supplies for the job, it's worth checking whether the brand offers free shipping, since clamps and jigs add weight fast. Atlas C1 offers free shipping.
Choosing the Best Wood Glue for Guitar Repair
The best wood glue for guitar repair is a high-quality aliphatic resin glue such as Titebond Original, because it bonds strongly to wood, cleans up with water, and releases with heat if the repair ever needs to be redone. That last property matters more than most guides admit.
Hide glue versus epoxy resin: Hide glue is traditional and reversible, which vintage collectors value, but it needs a glue pot and a fast, confident application. Epoxy resin fills gaps well and works on splintered breaks where material is missing, but it's permanent and difficult to reverse. For a first home repair on a clean break, aliphatic resin is the safest choice.
Dry Fitting and Surface Preparation
Dry fit the break before any glue touches the wood. Press the two halves together and check alignment: the fretboard edge should be flush, the headstock angle should match the opposite side, and no fibers should block the joint from closing completely.
Clean the fracture with a dry brush to remove dust and loose splinters. Do not sand inside the crack. If old glue is present from a previous repair, scrape it out carefully with a thin blade, then vacuum the channel.
Test your clamping setup now. Clamp the dry-fitted break and watch for the joint shifting under pressure. If it slides, you need more support points or a jig before you commit to glue.
Gluing, Clamping, and Using a Guitar Headstock Repair Jig
Apply glue to both faces of the fracture, working it into the wood fibers with a brush or syringe. You want visible squeeze-out along the entire seam when you clamp, since squeeze-out confirms glue reached the full joint. If a section of the seam stays dry after clamping, release the pressure, add glue, and reclamp.

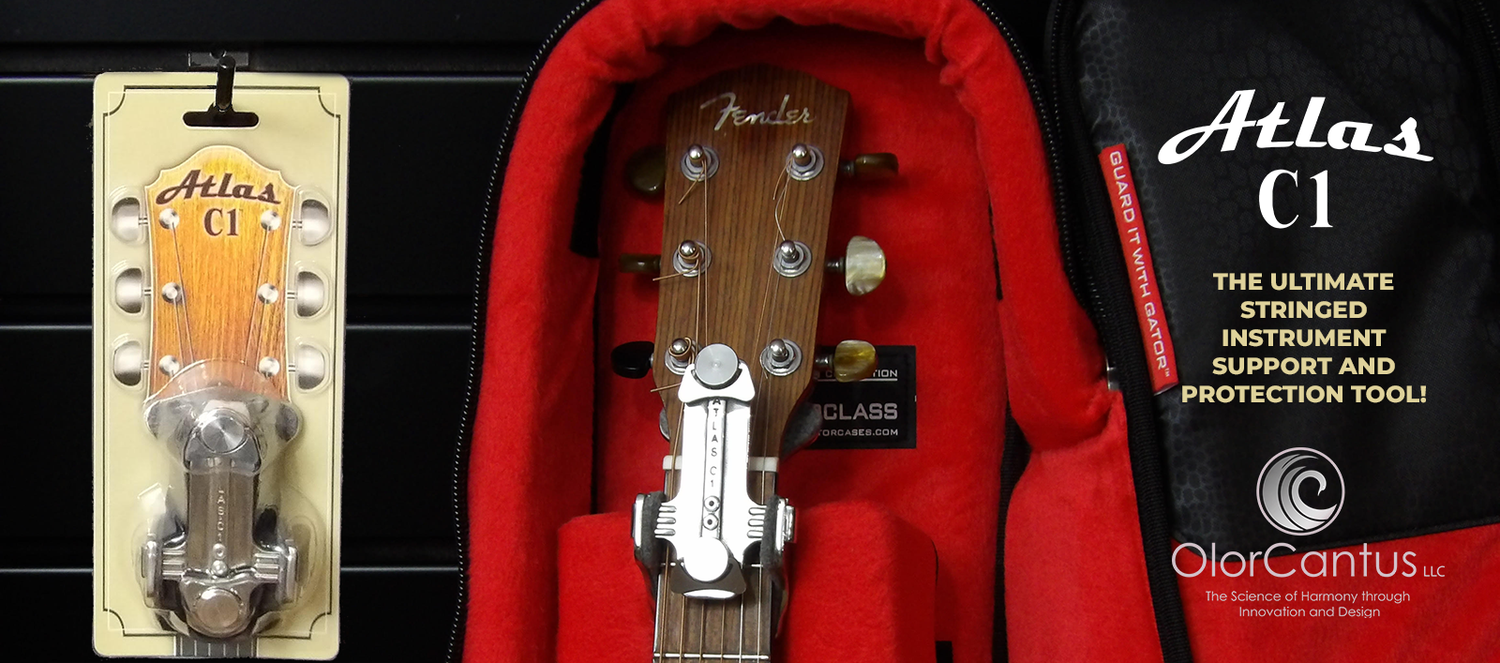
Why alignment matters more than pressure. The headstock sits at an angle to the neck, commonly around 13 to 17 degrees on many steel-string designs. If the two halves cure even two or three degrees off from their original relationship, the string path changes, the nut slot geometry shifts, and the instrument will not hold tune cleanly. This is the failure mode that sends most home repairs to a luthier after the fact. A pre-aligned jig like the Atlas C1 holds the headstock at its correct angle while clamps apply even pressure across the fracture, which removes the guesswork from the step most likely to go wrong.
Clamping pressure: firm, not crushing. Wood fibers compress permanently under excessive force, and a starved joint, where glue squeezes out entirely, is weaker than no repair at all. Aim for enough pressure to close the joint fully and produce a thin, even bead of squeeze-out along the seam. Use cauls, small blocks of wood between the clamp jaw and the instrument, to spread pressure and protect the finish. Pad the cauls with cork or leather where they contact a finished surface.
Clamp placement. Distribute clamps along the length of the fracture rather than stacking them at one point. A common pattern is one clamp near the nut, one at the center of the break, and one toward the headstock face, adjusting until the seam closes evenly with no gap at either end. Check the fretboard edge and the back of the neck for flush alignment before the glue sets.
DIY Clamping Jig Fabrication
You can build a simple alignment jig from scrap hardwood and two bolts. Cut a V-block that matches the headstock angle, line it with cork or leather, and drill two holes for bolts that pass through to a base board. Clamp the base board to your bench, then tighten the bolts to hold the headstock steady while bar clamps close the fracture.
Dimensions that work for most steel-string headstocks:
- Base board: roughly 12 inches long by 4 inches wide by 3/4 inch thick
- V-block: cut to match your instrument's headstock angle, with the V opening wide enough to cradle the headstock without rocking
- Bolts: two 1/4-inch carriage bolts long enough to pass through the base and accept a wing nut
- Lining: cork or leather glued to the V faces to prevent finish marring
Curing time. Aliphatic resin reaches most of its strength within an hour but continues to cure for a full 24 hours at room temperature. Leave it clamped the full period. Removing clamps early is the most common reason home repairs fail, because the joint may look and feel solid long before the glue has fully set.
Once the clamps come off, inspect the seam under good light before moving on. A hairline gap that runs the full length of the joint means the repair should be redone rather than sanded over.
Sanding, Finish Touch-Up, and Post-Repair Stress Testing
Once cured, remove the clamps and scrape off squeeze-out with a sharp blade held at a shallow angle, then sand progressively with 320, 600, and 1000-grit paper. Feather the sanding into the surrounding finish rather than concentrating on the repair line.
Finish touch-up: Matching a factory finish is the hardest part of any visible repair. For a clear or natural finish, a drop of thin cyanoacrylate polished with fine compound blends well. For tinted finishes, expect a visible scar unless you have experience mixing lacquer.
Post-repair stress testing: Restring with the lightest gauge you normally use and bring the instrument up to pitch slowly over 24 hours. Check the repair line after each tuning pass. If the joint creeps or you hear cracking, stop and take it to a professional.
Professional Guitar Repair Cost vs. Doing It Yourself
Professional guitar repair cost for a headstock break typically runs a few hundred dollars at most shops, and vintage or high-value instruments can run considerably more once finish matching and structural reinforcement are factored in. Splines, volutes, and refinishing add labor, and shops with long waitlists may hold your instrument for weeks.
Doing it yourself costs far less in materials, but the trade-off is risk: a botched repair on a valuable instrument can reduce its resale value significantly. For a workhorse guitar with a clean break, home repair makes sense. For a collector's piece, the professional route usually pays for itself.
| Situation | DIY Repair | Professional Repair |
|---|---|---|
| Clean grain-line break, mid-range guitar | Good fit | Unnecessary |
| Splintered break with missing wood | Risky | Recommended |
| Vintage or high-value instrument | Not advised | Strongly recommended |
| Break through a prior repair | Not advised | Required |
When to Call a Pro: A Risk Assessment Checklist
Most guides treat this as a simple yes/no list, but the real decision is a weighted one. A single severe factor, like an exposed truss rod, can outweigh three mild ones. Work through the checklist below, then apply the scoring logic that follows.
Red-flag factors (any one of these is a strong signal to stop):
- The truss rod is exposed, bent, or damaged at the fracture line
- The break runs through a previous repair that already failed
- Wood fibers are crushed or missing across more than about a quarter of the joint face
- The break crosses the grain at a steep angle rather than following the fibers
- The instrument is vintage, collectible, or insured for a value you would not comfortably replace
Yellow-flag factors (two or more together tip the decision toward a pro):
- The finish is tinted, metallic, or a burst that will be hard to blend invisibly
- You do not own clamps capable of holding the headstock at its correct angle
- You cannot leave the instrument clamped and undisturbed for a full 24 hours
- The fracture extends down into the neck shaft below the nut
- You have never glued a structural wood joint before
How to read your results:
- Zero red flags, zero to one yellow flag: A careful home repair is reasonable. Proceed with the gluing and clamping steps above.
- Zero red flags, two or more yellow flags: Repair is possible, but only if you build or buy an alignment jig first and accept that the finish may show a scar. If either condition is unacceptable, call a pro.
- One or more red flags: Stop. The risk of a failed repair that reduces the instrument's value exceeds the cost of professional service.
Why grain direction drives the decision. Wood is strongest along the grain and weakest across it. A break that follows the grain presents two long, interlocking surfaces that glue can bond across a large area. A break that crosses the grain exposes short, end-grain fibers that absorb glue poorly and form a weak bond even under ideal clamping. This single factor explains most repair failures, and it is the one most home guides gloss over.
For everyone else, a careful home repair with proper glue, alignment, and clamping pressure produces a strong, playable result, and if you're picking up the Atlas C1 jig or any other supplies for the job, a 10 % product discount takes some of the sting out of the parts list. The Atlas C1 is an essential, lifetime-use investment for any guitarist looking to safeguard their valuable gear.
Frequently Asked Questions
Can a broken guitar headstock be fixed?
Yes, most headstock breaks can be repaired successfully. The key is clean alignment and the right adhesive. Hide glue or a quality wood glue like Titebond creates a bond stronger than the surrounding wood fibers when applied correctly. If the break is clean and you can dry-fit the pieces back together with minimal gaps, a home repair is realistic. Splintered or crushed breaks may need professional attention.
How much does professional guitar repair cost for a headstock break?
Professional guitar repair cost for a headstock break varies based on the luthier's rates, the severity of the fracture, and whether finish touch-up is needed. A straightforward glue-and-clamp repair typically costs less than one involving splines or refinishing. A repair jig like the Atlas C1 helps you handle the alignment yourself, which can reduce what you pay a pro to only the finishing work.
What is the best glue to use for repairing a guitar headstock?
Hide glue is the traditional choice because it dries hard and transmits vibration well, but it requires a glue pot and careful temperature control. Titebond wood glue is a practical alternative for home repairs because it has a longer open time and cleans up with water. Avoid polyurethane glues like Gorilla Glue for structural headstock repairs. They expand during curing, which can push the fracture apart and ruin your alignment.
How long does a guitar headstock repair take to cure?
Most wood glues reach full structural strength in 24 hours, though you should leave clamps on for at least 12 hours before handling the instrument. Hide glue sets faster, often within a few hours, but still benefits from an overnight cure. Do not string the guitar up immediately after removing clamps. String tension puts around 130 pounds of pull on the headstock, which can reopen a joint that has not fully cured.