
Table of Contents
- Why Headstock Damage Demands the Right Tools
- Essential Luthier Tools for Headstock Repair at a Glance
- Hand Tools for Disassembly and Inspection
- Guitar Repair Clamps: Alignment and Pressure
- Wood Glue for Guitar Repair: Bonding the Break
- Headstock Repair Jig: Pre-Aligned Support During Glue-Up
- Neck Support and Workholding Essentials
- Tool Selection by Repair Stage: What You Actually Need
- Common Mistakes to Avoid During Headstock Repair
- When to DIY and When to Consult a Professional
- Frequently Asked Questions
Last Updated: October 10, 2026
Why Headstock Damage Demands the Right Tools
A broken headstock can turn a cherished guitar into a costly repair project. The headstock-neck junction is one of the most vulnerable areas on any stringed instrument, bearing constant tension from string pressure that can exceed 130 pounds. When damage occurs, whether from travel mishaps, storage accidents, or impact, having the right tools makes the difference between a successful repair and permanent damage.
Essential luthier tools for headstock repair aren't just nice to have, they're critical for protecting instruments worth thousands of dollars. This guide covers the specific tools you need, when to use them, and how to avoid the mistakes that turn minor damage into major problems.
Essential Luthier Tools for Headstock Repair at a Glance
Essential luthier tools for headstock repair fall into five categories: hand tools for disassembly, clamps for pressure, adhesives for bonding, alignment jigs for precision, and support systems for stability. Success depends on alignment, pressure, and time, tools that hold the break straight while glue cures, prevent finish damage, and work without years of luthier experience.
Quick Tool Comparison
| Tool Type | Primary Purpose | When You Need It | Cost Range |
|---|---|---|---|
| Hand tools | Disassembly, inspection, hardware removal | First stage of repair | $20-$80 |
| Repair clamps | Applying consistent pressure | During glue-up and curing | $40-$150 |
| Wood glue | Bonding broken wood | Core repair material | $8-$20 |
| Headstock repair jig | Pre-aligned support during curing | Complex breaks requiring precision | $200-$400+ |
| Neck support | Preventing stress during repair | Throughout the process | $50-$200 |
Hand Tools for Disassembly and Inspection
Hand tools let you disassemble hardware, inspect the break pattern, and prepare surfaces for bonding. A precision screwdriver set prevents stripping tuning machine screws. Needle-nose and standard pliers remove hardware safely. Wire cutters handle string removal. A straight edge reveals break alignment and shows how much correction is needed.
A magnifying glass or jeweler's loupe reveals hairline cracks, splintering, and old glue residue. Identifying the break type, clean break, splintered edge, or compression fracture, determines the repair approach.
If a screw won't budge, apply heat with a soldering iron to the screw head for 10 seconds to free it. Forcing removal strips screws and creates additional damage.
Guitar Repair Clamps: Alignment and Pressure
Clamps determine repair success. Consistent, even pressure closes the break while glue cures. Too little pressure leaves gaps; too much crushes wood or shifts alignment. Clamp placement, number, and pressure direction must match the break pattern and headstock geometry.
Understanding Break Type and Clamp Strategy
Not all headstock breaks require the same clamping approach. The break location and grain direction determine how many clamps you need and where to position them.
Clean, straight breaks along the grain need two clamps on opposite sides of the break, perpendicular to the break line. A single clamp twists the headstock; two clamps distribute pressure evenly and prevent rotation.
Angled breaks (common on Gibson-style headstocks) require clamps parallel to the headstock face. Perpendicular clamping shifts the headstock sideways instead of closing the break.
Splintered or crushed breaks need gentler pressure over a wider area. A bar clamp with large pads distributes force and reduces crushing risk. Clean breaks tolerate higher point pressure.
Clamp Types and Pressure Control
Bar clamps and C-clamps are the workhorses of headstock repair, but they serve different purposes.
Bar clamps offer fine pressure control and reach. A 12-18-inch bar clamp handles most headstock breaks. Tighten in quarter-turn increments, checking alignment with a straight edge after each turn. This slow approach lets glue wet surfaces and prevents shifting.
C-clamps provide high pressure in a compact footprint for secondary clamping. Always use clamp pads (soft wood blocks or leather) to distribute force and prevent finish marks.
Quick-grip clamps speed up setup and position the break before final clamping, but lack fine pressure control. Use them for rough positioning, then switch to bar clamps for final pressure.
Pressure Magnitude and Clamp Pad Design
Tighten clamps until glue squeezes out from the break line, then stop. If the headstock flexes or creaks, you've applied too much pressure. Back off slightly.
Clamp pads prevent finish marks and dents. Use soft wood blocks or leather pads between clamp and guitar. For angled headstocks, cut pads to match the angle so they sit flush. A rocking pad applies uneven pressure.
Clamp Placement: The Critical Detail
Position clamps as follows: (1) Primary clamp centered on the break line, perpendicular to break direction; (2) Secondary clamp on the opposite side, also perpendicular, to prevent twisting; (3) Optional tertiary clamp for complex breaks with multiple pieces. For angled headstocks, rotate clamps parallel to the headstock face.
Common Clamping Mistakes
Single clamp on a straight break causes rotation and weak joints. Mismatched clamp pads apply uneven pressure. Sequential tightening shifts alignment, tighten all clamps in small increments, alternating. Premature clamping traps air bubbles, wait 30-60 seconds after glue application. Over-tightening crushes fibers, if the break doesn't close with moderate pressure, clean surfaces and retry.
Wood Glue for Guitar Repair: Bonding the Break
Titebond Original Wood Glue is the standard for most headstock breaks. It bonds wood reliably, cures hard, and tolerates string tension. Apply an even coat to both surfaces, clamp, and wait 24 hours for full strength.
Sand both surfaces lightly with 120-grit sandpaper to remove finish, old glue, or debris. Wipe with a damp cloth and dry completely before applying glue.
Glue squeeze-out indicates good contact. Apply masking tape around the repair area before clamping, or wrap the headstock in plastic to catch excess glue.
Headstock Repair Jig: Pre-Aligned Support During Glue-Up
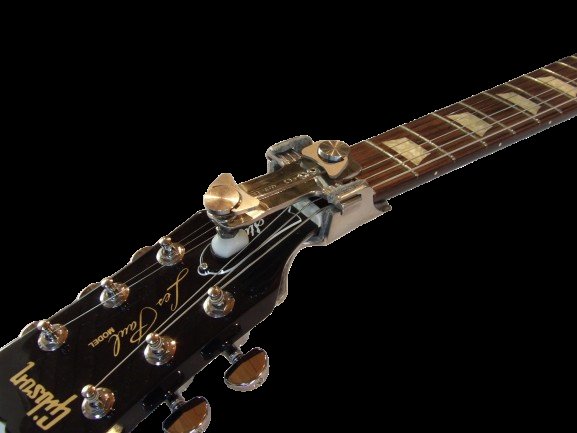
A headstock repair jig holds a broken headstock in perfect alignment while glue cures. Unlike improvised clamp setups, a pre-aligned jig removes guesswork and ensures consistent results. However, repair jigs aren't always necessary, understanding when they're worth the investment separates smart tool buying from unnecessary expense.
How Repair Jigs Work
A repair jig cradles the headstock in a fixed position using a V-block or angled support. Its value lies in three areas: (1) Alignment consistency, removes manual positioning and repeated alignment checks; (2) Complex-break support, holds multiple pieces or splintered fragments that clamps alone can't manage; (3) Reduced clamping complexity, simplifies clamp placement and reduces misalignment risk.
When a Repair Jig Is Worth the Investment
Repair jigs pay for themselves when: (1) Multiple repairs, if you repair 2-3+ headstocks per year, time savings justify the cost; (2) High-value instruments, reduces misalignment risk on guitars worth $1,000+; (3) Complex breaks, handles multiple pieces or severe splintering; (4) Frequent travelers, doubles as protective transport; (5) Unusual headstock geometries, ensures proper pressure on non-standard shapes.
DIY Alternatives to Commercial Repair Jigs
If a commercial jig isn't in your budget, several DIY approaches work for straightforward breaks:
Clamp and block method: Position the headstock on a padded workbench or in a padded vise, then apply bar clamps perpendicular to the break. Use soft wood blocks as spacers to ensure clamps sit parallel to the break line. This works well for clean, straight breaks on flat-faced headstocks (e.g., Fender-style). Cost: $0 if you already own clamps; $50-$100 if you need to buy clamps.
Sandbag and foam support: Cradle the neck in sandbags or foam blocks to prevent movement, then apply clamps to the headstock. This approach works for breaks where the headstock needs support but clamps can't reach easily. Cost: $20-$50 for sandbags and foam.
Custom wooden jig: Build a simple V-block or angled cradle from wood that matches your headstock's angle. Clamp the headstock into the cradle, and the cradle holds alignment while you apply pressure clamps. This is practical if you repair the same headstock shape repeatedly. Cost: $30-$80 in materials and a few hours of work.
These DIY approaches work for simple, clean breaks on guitars worth $300-$800. For complex breaks or high-value instruments, a commercial jig's precision and reliability are worth the investment.
Repair Jig Features to Evaluate
If you decide to buy a repair jig, look for these features:
Headstock-shape compatibility: The jig should match your headstock's angle and geometry. A universal jig works for multiple headstock shapes; a specialized jig works only for one shape but may offer better support.
Clamp-friendly design: The jig should have clear mounting points or surfaces where you can position clamps without the jig getting in the way. Some jigs are designed to work with specific clamp sizes or types.
Padding and protection: The jig should have soft padding (leather, rubber, or felt) where it contacts the finish, preventing marks or dents during repair or transport.
Stability: The jig should sit flat and stable on a workbench without rocking. A wobbly jig transfers vibration to the repair, potentially weakening the glue bond.
Dual-purpose design: Some jigs double as protective transport cases or storage cradles. This adds value if you travel frequently or store guitars long-term.
Neck Support and Workholding Essentials
Proper neck support prevents additional stress on the repair during glue-up and curing. A neck rest cradles the guitar body while the headstock is being worked on, keeping the entire instrument stable and preventing the neck from flexing.
A simple neck rest can be a padded block or a purpose-built guitar neck cradle. The goal is to support the neck without applying pressure that might shift the headstock repair. Many luthiers use a combination of sandbags and foam blocks to create a custom support that matches the guitar's body shape.
The workbench itself matters. A sturdy, flat surface prevents vibration that could disrupt clamp pressure or glue-up alignment. Vibration during the first few hours of curing, when the glue is still setting, can create micro-movements that weaken the final bond.
Height also affects workflow. A workbench at elbow height allows you to apply clamp pressure and check alignment without straining your back or arms. This detail becomes critical when you're working on multiple repairs or spending hours on a single complex break.
Tool Selection by Repair Stage: What You Actually Need
The tools you need depend on where you are in the repair process. Understanding this prevents buying tools you'll never use and ensures you have what matters for each stage.
Stage 1: Assessment and Disassembly (Hand Tools) Start with screwdrivers, pliers, wire cutters, and a straight edge. These reveal the break type and let you remove hardware safely. Budget: $40-$80 for a basic set.
Stage 2: Surface Preparation (Sandpaper and Cleaning) Light sanding with 120-grit paper and a damp cloth prepare the break surfaces. Standard supplies from any hardware store work fine here. Budget: $10-$20.
Stage 3: Glue Application (Adhesive and Applicators) Titebond Original Wood Glue and small brushes or applicator bottles apply the adhesive. Budget: $15-$25.
Stage 4: Clamping and Alignment (Clamps and Support) Bar clamps, C-clamps, clamp pads, and a neck rest hold everything in position. This is where precision matters most. Budget: $100-$300 depending on clamp quality.
Stage 5: Curing (Time and Stability) The repair needs 24 hours of undisturbed curing. A stable workbench and protection from vibration are essential. No additional tools needed.
Stage 6: Finishing (Inspection and Touch-Up) Once cured, inspect the repair, remove clamps carefully, and address any finish damage. Fine sandpaper (220-grit) and touch-up finish may be needed. Budget: $20-$50.
Many musicians and luthiers buy everything at once, but you can start with Stage 1 and Stage 2 tools, then invest in clamps and a repair jig only if you're doing multiple repairs or working on high-value instruments.
Common Mistakes to Avoid During Headstock Repair
Headstock repairs fail most often due to preventable errors that happen during glue-up or curing. Knowing these mistakes helps you avoid them.
Misalignment during clamping is the most common failure. The break looks aligned by eye, but once clamps are tightened, the headstock shifts. Always check alignment with a straight edge before applying full pressure, and recheck after each clamp is tightened.
Insufficient clamp pressure leaves gaps in the break. The glue hardens with voids inside the joint, creating a weak repair that fails under string tension. If you're unsure about pressure, err on the side of more rather than less, as long as you're not crushing the wood.
Applying glue to only one surface reduces bond strength. Both surfaces of the break must have an even coat of glue. A thin film on each side is better than a thick coat on one side.
Clamping too quickly doesn't allow glue to wet the surfaces properly. Apply glue, wait 30 seconds for it to begin setting, then apply clamps gradually. Rushing this step traps air bubbles in the joint.
Disturbing the repair during curing is fatal. Don't move the guitar, adjust clamps, or check the repair until glue is fully cured. The first 24 hours are critical. Even vibration from workshop activity nearby can weaken the bond.
Using the wrong glue for the break type matters. Hide glue, epoxy, and polyurethane glue each have different properties. Titebond Original is the standard for most breaks, but consulting a professional luthier about unusual break types is wise.
When to DIY and When to Consult a Professional
Not every headstock break is suitable for DIY repair. Understanding your limits prevents turning a fixable break into a total loss.
DIY is reasonable when:
- The break is a clean, simple split along the grain
- The headstock isn't splintered or crushed
- You have access to clamps and a stable workbench
- The guitar is worth the time investment (typically $300+)
- You're comfortable following a step-by-step process carefully
Consult a professional luthier when:
- The break is complex, with multiple pieces or severe splintering
- The headstock is crushed or compressed (glue won't restore strength)
- The break involves the headstock face (where tuning machines mount), misalignment here affects playability
- The guitar is a high-value vintage or collectible instrument
- You've attempted a repair and it failed
Professional luthiers have specialized jigs, experience with unusual break patterns, and the ability to restore finish and hardware alignment that DIY repairs often miss. For guitars worth $1,000 or more, professional repair typically costs $200-$400 but preserves value and playability.
Protecting your guitar's headstock requires the right combination of tools, technique, and patience. The hand tools, clamps, glue, and support systems covered here handle the vast majority of common headstock breaks. But having the tools is only half the battle, using them correctly, with proper alignment and pressure, determines whether your repair succeeds or fails.
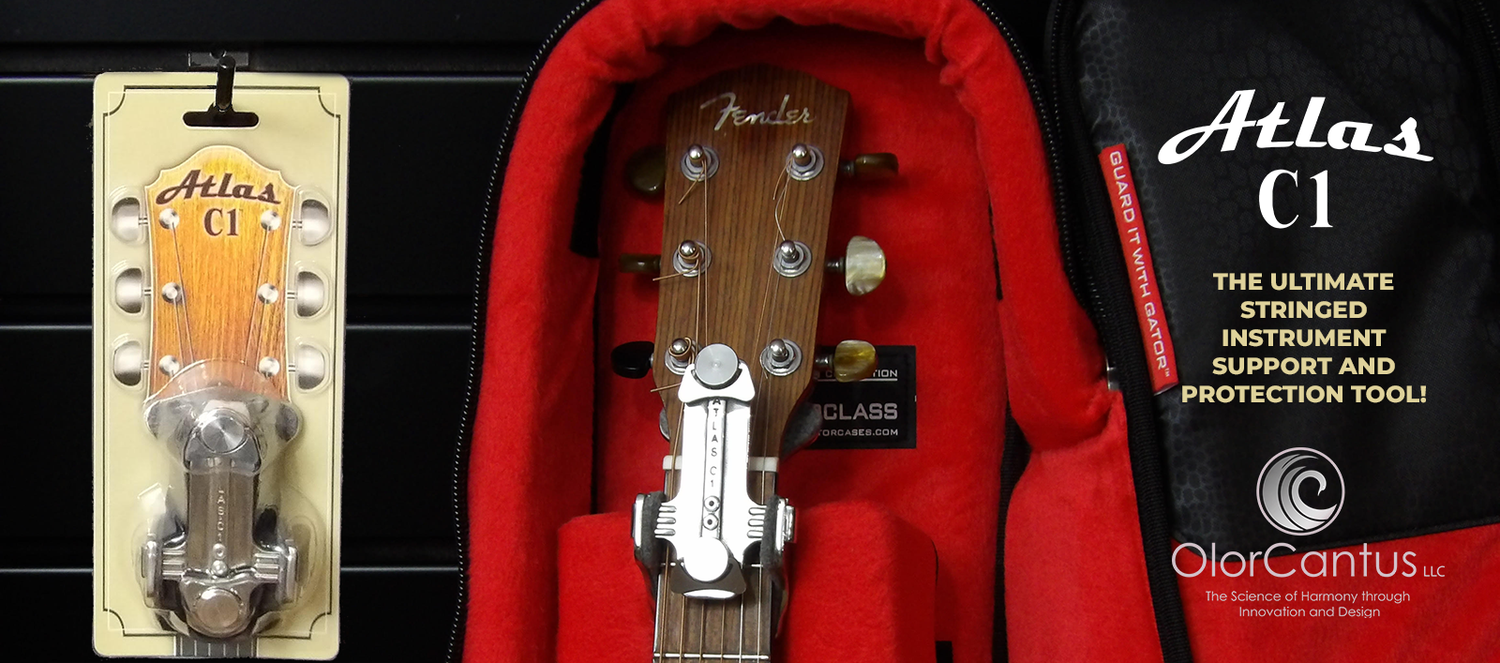
For musicians who travel frequently or own high-value instruments, prevention is more cost-effective than repair. Investing in quality repair tools now means you're prepared when breaks happen. When ordering your clamps, glue, and support equipment, take advantage of the 10% product discount and free shipping available to help you build a complete repair toolkit without breaking the bank. With the right tools and approach, a broken headstock doesn't have to mean a broken budget. The Atlas C1 is an essential, lifetime-use investment for any guitarist looking to safeguard their valuable gear.
Frequently Asked Questions
What tools do you need to repair a broken guitar headstock?
A complete headstock repair requires hand tools (screwdrivers, pliers, wire cutters), a straight edge or notched straight edge for alignment, clamps to hold pressure during glue-up, wood glue suitable for guitar repair, a headstock repair jig for pre-alignment, and neck support to stabilize the instrument. The specific tools depend on whether the break is a clean fracture, a splintered break, or involves hardware. A headstock repair jig simplifies alignment and reduces the risk of misalignment during curing.
What is the best clamp for a guitar headstock repair?
The best clamp depends on the break location and your access. Bar clamps and pipe clamps distribute pressure evenly across larger surfaces, while C-clamps work for tighter spaces. Clamp placement matters: position them to pull the break closed without bending the headstock or neck. Aim for even clamping pressure on both sides of the break. A headstock repair jig guides clamp placement and prevents the common mistake of over-tightening, which can crush wood fibers and weaken the repair.
What glue do luthiers use for headstock repairs?
Titebond Original Wood Glue is the standard choice for most headstock breaks because it bonds wood reliably, allows time for alignment, and creates a joint as strong as the surrounding wood when cured properly. The glue requires clamping pressure and adequate cure time (typically 24 hours for full strength). Surface preparation is critical: clean the break surfaces of dust and old finish to ensure good adhesion. Some luthiers prefer epoxy for breaks involving non-wood materials or when extra gap-filling is needed.
Can you repair a broken guitar headstock at home?
Yes, clean breaks and some splintered breaks can be repaired at home with the right tools and patience. Success depends on the break type, your access to clamps and a headstock repair jig, and your ability to maintain alignment during glue-up. Simple fractures perpendicular to the grain are more forgiving than angled breaks or those involving the truss rod. If the break is near hardware, involves the truss rod cavity, or is severely splintered, consulting a professional luthier is safer and often more cost-effective than risking further damage.
How do you keep a headstock aligned while gluing it?
Alignment starts with a straight edge or notched straight edge to verify the break surfaces are square and flush before clamping. A headstock repair jig holds the headstock in the correct plane and prevents rotation or side-to-side movement during glue-up. Position clamps symmetrically on both sides of the break, applying even pressure gradually. Dry-fit the repair (without glue) first to confirm alignment and clamp placement. Tighten clamps slowly over several minutes to allow the break to settle and the glue to distribute evenly without squeezing out excessively.