
Table of Contents
- What Is a Guitar Headstock Repair Jig?
- Quick Comparison: Top Headstock Repair Solutions
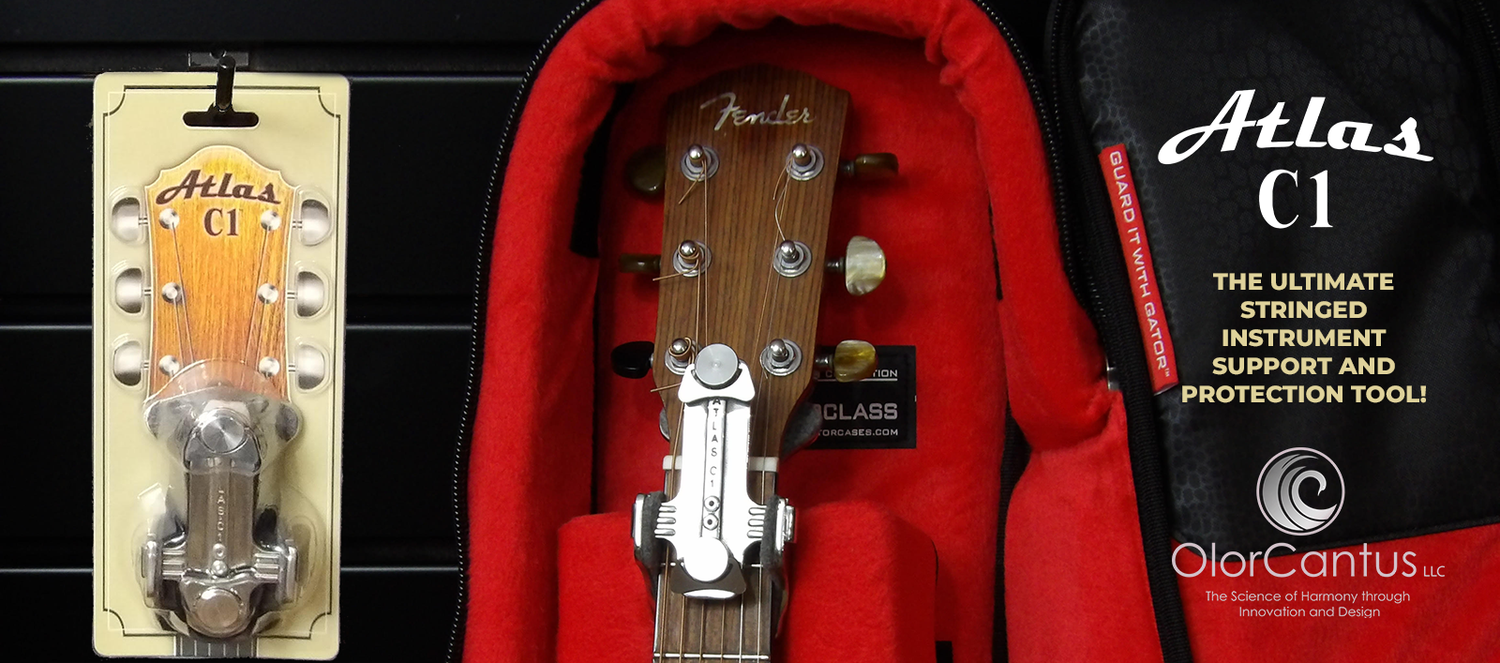
- Atlas C1: Universal Multi-Function Protection and Repair
- How to Fix a Broken Guitar Headstock with a Repair Jig
- Guitar Repair Clamps: Pressure and Placement
- Guitar Headstock Protection for Shipping and Travel
- When to Use a Jig vs. Professional Repair
- Common Mistakes to Avoid During Headstock Repair
- Frequently Asked Questions
Last Updated: October 10, 2026
What Is a Guitar Headstock Repair Jig?
A guitar headstock repair jig is a precision tool designed to support and align the vulnerable headstock-neck junction during repair work or transportation. The headstock endures tremendous stress from string tension, over 130 pounds of pressure in many cases, and a break at this junction is one of the most costly repairs a guitarist can face. A repair jig holds the broken pieces in perfect alignment while adhesive cures, ensuring the repair is both structurally sound and cosmetically clean.
Beyond repair, modern jigs like the Atlas C1 serve a dual purpose: they protect instruments during travel and shipping by cradling the headstock-neck junction, the point most vulnerable to impact damage. This multi-function approach makes a quality jig an essential tool for touring musicians, collectors, and anyone who wants to prevent a catastrophic break before it happens.
The best repair jigs work universally across different headstock angles and neck profiles. Whether you own a Gibson-style angled headstock or a Fender straight design, the jig should accommodate your instrument without modification. This universality is what separates a true repair solution from a one-trick specialty tool.
Quick Comparison: Top Headstock Repair Solutions
| Solution | Primary Use | Best For | Key Advantage |
|---|---|---|---|
| Atlas C1 | Protection + Repair alignment | All headstock types | Pre-aligned, universal fit, lifetime use |
| DIY wooden jig | Repair alignment only | Budget-conscious builders | Low cost, customizable |
| Neck spline reinforcement | Structural reinforcement | Severe breaks | Adds permanent strength |
| Protective case padding | Transport protection only | Casual players | Simple, familiar method |
Atlas C1: Universal Multi-Function Protection and Repair
The Atlas C1 stands apart because it solves two problems with one tool. Most musicians either wrap their guitars in extra padding or build a custom jig when a break happens. The Atlas C1 eliminates that choice: it protects your instrument every time you travel, and it's ready to work as a repair jig the moment you need it.
Key Features and Design
The Atlas C1 is engineered with a U.S. patent-protected design that addresses the specific geometry of guitar headstocks. It provides targeted support at the headstock-neck junction, the exact point where breaks occur. The tool counteracts the 130+ pounds of string pressure tension that creates stress at this junction, making it effective for both protection and repair alignment.
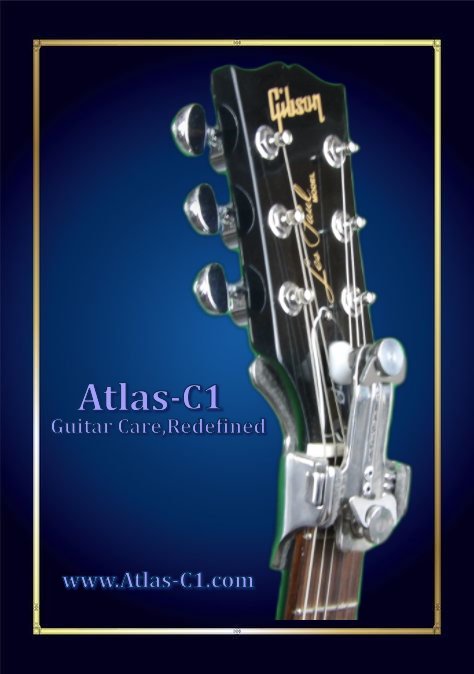
The universal design means you don't need different jigs for different guitars. Whether your instrument has an angled headstock like a Gibson Les Paul or a straight headstock like a Fender Telecaster, the Atlas C1 accommodates both without adaptation. This versatility matters when you own multiple guitars or play borrowed instruments.
The pre-aligned repair jig function means when a break does happen, the tool positions the pieces correctly without guesswork. Proper alignment is critical: a misaligned repair looks wrong and compromises playability. The Atlas C1 removes that risk by handling alignment for you.
Best For
The Atlas C1 is the right choice for touring musicians who transport guitars frequently, collectors protecting high-value vintage instruments, professional luthiers who need reliable alignment every time, and any guitarist who wants to prevent a headstock break rather than pay for a repair after the fact. If your guitar is worth protecting, the Atlas C1 is worth having.
How to Fix a Broken Guitar Headstock with a Repair Jig
A headstock break is fixable, but success depends on proper diagnosis, careful alignment, and patience during the cure phase. A repair jig handles the alignment problem, but you need to understand the other steps to avoid common mistakes.
Diagnosis and Preparation
Before you reach for the jig, understand what you're dealing with. A clean break, where the wood separates along the grain without splintering, is the easiest repair. A splintered break with missing wood or a break that runs through the truss rod channel is more complex. If the break involves the truss rod, consider consulting a professional luthier; a repair jig alone won't solve that problem.
Clean the break surfaces carefully. Remove old finish, dirt, and debris from both sides of the break. Use a straightedge to check that the surfaces fit together without gaps. If the break is jagged, you may need to carefully sand the surfaces flat so they mate completely. This step determines whether your repair will be invisible or visible from across the room.
Gather your adhesive before you start. For guitar repairs, traditional hide glue or modern epoxy both work well. Hide glue is reversible, a future repair person can undo it if needed, making it the choice of many luthiers. Epoxy is stronger and more forgiving of imperfect surfaces. Choose based on your comfort level and the guitar's value.
Setup and Alignment
Position the jig so it cradles the headstock-neck junction exactly. The break should sit at the center of the jig's support. Tighten the clamps gradually and evenly, never crank one side tight and then the other. Uneven clamping pressure will twist the headstock out of alignment, ruining the repair.
Check alignment from multiple angles before you apply adhesive. Sight down the headstock from the front, side, and back. The headstock should sit perfectly centered relative to the neck. If it's twisted, loosen the clamps and reposition. This takes time, but it's the difference between a professional repair and a botched one.
Apply adhesive to both break surfaces and reassemble. Clamp firmly but not aggressively. Too much pressure can squeeze out all the adhesive, creating a weak joint. Moderate, even pressure is ideal. Wipe away excess adhesive with a damp cloth before it hardens.
Curing and Post-Repair Checks
Leave the clamps in place for the full cure time. Hide glue typically needs 24 hours; epoxy varies by brand but often requires 24 to 48 hours. Don't rush this step. A premature removal can cause the joint to slip or crack.
After cure, remove the clamps slowly and check the joint. The break should be nearly invisible if you prepared and aligned correctly. Run your finger over the joint, it should feel smooth with no step or offset. If the headstock is twisted or misaligned, you've caught a problem early enough to address it.
Refinish the repair area if needed. Most breaks leave visible wood at the joint. Sand the area smooth and apply finish to match the rest of the headstock. This is cosmetic work, but it's what separates a quality repair from a visible band-aid.
Guitar Repair Clamps: Pressure and Placement
Clamps are the unsung heroes of headstock repair. The right clamps, positioned correctly, hold everything steady while adhesive cures. Poor clamp selection or placement can twist the headstock, create uneven pressure that weakens the repair, or damage the finish. Understanding clamp types, pressure application, and placement geometry is the difference between a professional repair and a failed one.
Clamp Types for Headstock Repair
Bar clamps are the workhorse of woodworking and guitar repair. A bar clamp consists of a long steel bar with a fixed jaw on one end and a sliding jaw that you tighten with a screw. Bar clamps come in lengths from 12 inches to 48 inches. For headstock repair, a 12-inch to 18-inch bar clamp is ideal. The advantage of bar clamps is even pressure distribution across a wide area and the ability to apply precise, controlled pressure. The disadvantage is that they require space and can be awkward to position on a guitar headstock.
C-clamps are smaller and more compact. A C-clamp has a C-shaped frame with a screw in the middle. C-clamps are quick to tighten and untighten, making them useful for test-fitting. However, C-clamps apply pressure at a single point, which can create uneven stress on the break. For final repair clamping, C-clamps are less ideal than bar clamps unless you use multiple clamps to distribute pressure.
Specialized guitar repair clamps are designed specifically for headstock repair. These clamps often feature padded jaws, angled arms that follow the headstock geometry, and mechanisms that apply even pressure across the break. If you plan to repair multiple guitars or want a tool optimized for the job, a specialized guitar repair clamp is worth the investment. However, for a one-time repair, a bar clamp or C-clamp works fine.
Handscrew clamps (also called wooden clamps) have two wooden jaws connected by two screws. Handscrews distribute pressure evenly and are gentle on finished wood. They are slower to tighten than bar clamps but excellent for protecting the guitar's finish. Many luthiers prefer handscrews for final clamping because they are less likely to leave marks.
Pressure Application and Magnitude
A common mistake is over-tightening clamps, thinking more pressure means a stronger repair. In reality, excessive pressure squeezes out adhesive and can actually weaken the joint. The goal is moderate, even pressure that holds the break surfaces together without forcing them apart.
For hide glue, apply enough pressure to close the joint completely but not so much that you squeeze out all the glue. You should see a thin bead of glue squeeze out around the joint edges. If no glue squeezes out, pressure is too light. If glue floods out, pressure is too heavy. This balance takes practice but becomes intuitive quickly.
For epoxy, apply slightly more pressure than you would with hide glue. Epoxy is thicker and benefits from moderate clamping force to ensure good contact between surfaces. However, the principle remains the same: moderate pressure, not maximum.
A practical approach is to tighten each clamp until you feel resistance, then turn the screw an additional quarter turn. This applies consistent pressure without over-tightening. Avoid the temptation to crank clamps as tight as possible.
Clamp Placement and Geometry
Position clamps perpendicular to the break surface. The clamp should apply force directly across the break, not at an angle. If the break runs horizontally across the headstock-neck junction, position the clamp so it pushes the two pieces together horizontally. If the break is at an angle, position the clamp perpendicular to that angle.
Use clamps on opposite sides of the break for balanced support. If you clamp only one side, the other side will shift or rotate. Think of it like supporting a bridge: you need support on both ends. For a typical headstock break, position one clamp on the front of the headstock and one on the back, or one on each side of the neck. This creates balanced pressure that holds the break straight.
Avoid clamping directly on the break point. Position clamps slightly away from the break so pressure is distributed across a wider area. Clamping directly on the break can crush wood fibers or create a stress concentration that weakens the repair. A general rule is to position clamps within 1 to 2 inches of the break, not directly on it.
For angled headstocks (like Gibson-style), angle the clamps to match the headstock angle. An angled headstock requires clamps that apply force along the angle, not perpendicular to the guitar body. This is where specialized guitar repair clamps shine, but you can achieve this with bar clamps by positioning them carefully.
Protect the guitar's finish by placing cloth or leather between the clamp and the instrument. Metal clamps against finished wood leave marks, dents, or scratches. A simple piece of cloth, leather, or thin rubber between the clamp jaw and the guitar prevents cosmetic damage. This is especially important on the front of the headstock where marks are visible.
Tightening Sequence and Checking Alignment
Tighten all clamps gradually and evenly, never crank one side tight and then the other. Uneven clamping pressure will twist the headstock out of alignment, ruining the repair. The correct sequence is:
- Position all clamps loosely, holding the break roughly in place.
- Tighten each clamp a quarter turn in sequence, moving from one clamp to the next.
- After each full cycle through all clamps, check alignment from multiple angles.
- Repeat until all clamps are snug but not over-tight.
Check alignment from the front, side, and back of the headstock. Sight down the headstock from each angle to ensure it sits perfectly centered relative to the neck. If the headstock is twisted or misaligned, loosen the clamps and reposition. This takes time, but it's the difference between a professional repair and a botched one.
Common Clamping Mistakes
Twisting the headstock by uneven clamping is the most common mistake. Tightening one clamp fully before addressing others causes the headstock to rotate. Always tighten gradually and evenly.
Clamping too close to the break point concentrates pressure on a small area, potentially crushing wood fibers. Position clamps slightly away from the break for distributed pressure.
Using clamps that are too small or weak for the job. A C-clamp might not apply enough pressure to hold a large headstock break. Use bar clamps or specialized guitar clamps for better control and pressure distribution.
Forgetting to protect the finish results in clamp marks that are visible after repair. Always use cloth or leather between the clamp and the guitar.
Leaving clamps on too long can cause the wood to compress or the adhesive to over-cure in a way that makes removal difficult. Follow the adhesive cure time and remove clamps promptly after curing is complete.
Guitar Headstock Protection for Shipping and Travel
Prevention is always cheaper than repair. A headstock break during travel is devastating, not just financially, but emotionally. The good news is that proper protection makes breaks extremely rare.
Hard cases provide basic protection, but the headstock-neck junction still absorbs impact. Extra padding in this specific area makes a real difference. Many musicians add foam or bubble wrap around the headstock inside the case. This works, but it's temporary and inconsistent.
A dedicated headstock protection tool like the Atlas C1 offers consistent, reliable protection every time you travel. The tool cradles the vulnerable junction and absorbs impact that would otherwise damage the instrument. For musicians who fly with guitars, tour frequently, or ship instruments to venues, this level of protection is essential. Plus, when you order the Atlas C1, you'll benefit from free shipping, making it even more convenient to get your instrument protection in place.
When shipping a guitar, secure the protection tool inside the case and surround it with additional padding. The combination of the tool's support and extra padding creates a protective envelope around the headstock. This approach has prevented countless breaks.
When to Use a Jig vs. Professional Repair
A repair jig is a powerful tool, but it has limits. Clean, simple breaks, where the wood separates cleanly without splintering, are ideal for DIY repair with a jig. The jig handles alignment, and you handle the rest.
Complex breaks are another story. If the break involves the truss rod channel, if wood is missing, if the headstock is splintered, or if the break is at an unusual angle, a professional luthier is the better choice. A luthier has the experience and specialized tools to handle complications that a standard jig cannot address.
Consider also your comfort level and the guitar's value. A $300 beginner guitar and a $3,000 vintage instrument require different approaches. For high-value guitars, professional repair is often worth the cost. For affordable instruments, a DIY repair with a jig is reasonable.
Time is another factor. A professional repair takes days or weeks. A DIY repair with a jig takes an evening of setup and a day or two of cure time. If you need the guitar playable quickly, DIY is faster. If you can wait and want professional quality, a luthier is the answer.
Common Mistakes to Avoid During Headstock Repair
The most common mistake is rushing the alignment phase. Musicians want to apply adhesive and clamp immediately. Resist this urge. Spend 10 minutes ensuring perfect alignment before you touch adhesive. This single step prevents 90% of failed repairs.
Another mistake is using too much adhesive. More glue does not mean a stronger joint. Excess adhesive squeezes out under clamp pressure and weakens the bond. Use just enough to coat both surfaces. A thin, even layer is ideal.
Uneven clamping pressure is another culprit. Tightening one clamp fully before addressing others causes the headstock to twist. Tighten all clamps gradually, checking alignment after each turn. This takes patience but ensures a straight repair.
Removing clamps too early is tempting when you're eager to play the guitar again. Resist. Follow the adhesive manufacturer's cure time exactly. A repair that cures for only 12 hours instead of 24 is weak and prone to failure.
Finally, don't attempt a repair if you're unsure about the break type or your ability to align it properly. A botched DIY repair is harder and more expensive to fix than the original break. When in doubt, consult a professional luthier.
A broken guitar headstock doesn't have to mean a trip to the repair shop or a permanently damaged instrument. With the right approach, proper diagnosis, careful alignment, and the right tools, you can repair a headstock break yourself and prevent future damage through protection.
The Atlas C1 is designed specifically for this challenge. It protects your instrument during travel and shipping, and it's ready to serve as a pre-aligned repair jig when you need it. For touring musicians, collectors, and anyone who values their guitar, the Atlas C1 offers peace of mind and a reliable solution for instrument care. Safeguard your investment for a lifetime of playing.
Frequently Asked Questions
What is a guitar headstock repair jig?
A guitar headstock repair jig is a specialized tool that holds a broken headstock in precise alignment while adhesive cures. It supports the vulnerable headstock-neck junction and counteracts the tension from strings, which can exceed 130 pounds of pressure. A repair jig simplifies alignment, reduces the risk of misalignment during curing, and works for both straight and angled headstocks. Many modern jigs, like the Atlas C1, also function as protective supports during travel and storage.
Can a headstock repair jig work with different guitar headstock shapes?
Yes, universal repair jigs are designed to accommodate both straight headstocks (Fender-style) and angled headstocks (Gibson-style). The Atlas C1, for example, is engineered as a multi-function tool that adapts to various headstock angles and neck geometries. However, specialized spline-reinforcement jigs may target specific break types on angled headstocks. Check the jig's design specifications to confirm compatibility with your instrument type before purchasing.
How do you keep a guitar neck aligned during a headstock repair?
Alignment begins with a straight edge placed along the frets to establish a baseline reference. A pre-aligned repair jig positions the headstock and neck body in the correct plane, and clamps apply consistent pressure without forcing misalignment. Place clamps strategically at the break point and on the body to prevent twisting. Monitor alignment throughout curing, and use a notched straight edge or alignment tool to verify that the frets remain straight. Many luthiers use a neck rest or support block to prevent the neck from sagging during the curing period.
Is a headstock repair jig suitable for a beginner?
Yes, a well-designed repair jig significantly reduces the skill required for a successful headstock repair. Pre-aligned jigs like the Atlas C1 remove the guesswork from positioning, making them accessible to guitarists without luthier experience. However, beginners should still understand basic adhesive application, curing times, and clamp pressure. Start with a simple headstock break (a clean break without splinters) and follow the jig's instructions carefully. If you are uncertain about the break severity or your ability to execute the repair, consulting a professional luthier remains the safest option.
When should a broken guitar headstock be repaired by a luthier instead of DIY?
Seek professional repair if the break is complex (multiple fractures, missing wood, severe splintering), if the headstock has already been repaired, or if the guitar is a high-value vintage or collector's instrument. Luthiers have specialized tools, experience with difficult angles, and insurance for costly mistakes. A DIY repair using a jig works best for clean, single breaks on mid-range guitars. If you lack confidence in your ability to align the headstock correctly or apply adhesive properly, a luthier's expertise is worth the investment.