
Table of Contents
- Why Guitar Repair Jigs Matter for Home Luthiers
- Essential Guitar Repair Tools for Beginners
- Fretboard Radius and Slotting Jigs
- Neck Shaping and Carving Fixtures
- How to Fix Broken Guitar Headstock Damage
- Bridge Gluing and Clamping Jigs
- Nut Shaping and Slotting Tools
- DIY Jig Construction and Material Selection
- Calibration, Accuracy, and Workspace Setup
- Frequently Asked Questions
Last Updated: September 25, 2026
Why Guitar Repair Jigs Matter for Home Luthiers
A broken headstock can turn a cherished instrument into a costly repair problem. For musicians who invest thousands in their gear, the headstock represents the most vulnerable point during transport, storage, or an accidental bump. This is where guitar repair jigs become essential.
Home luthiers and serious guitarists face a real choice: pay a professional for a headstock repair, or invest in the right tools to handle it yourself. The difference comes down to precision. A proper jig holds the broken pieces in exact alignment while glue sets, ensuring the repair is structurally sound and cosmetically clean. Without one, even experienced woodworkers struggle to maintain the correct angle and pressure.
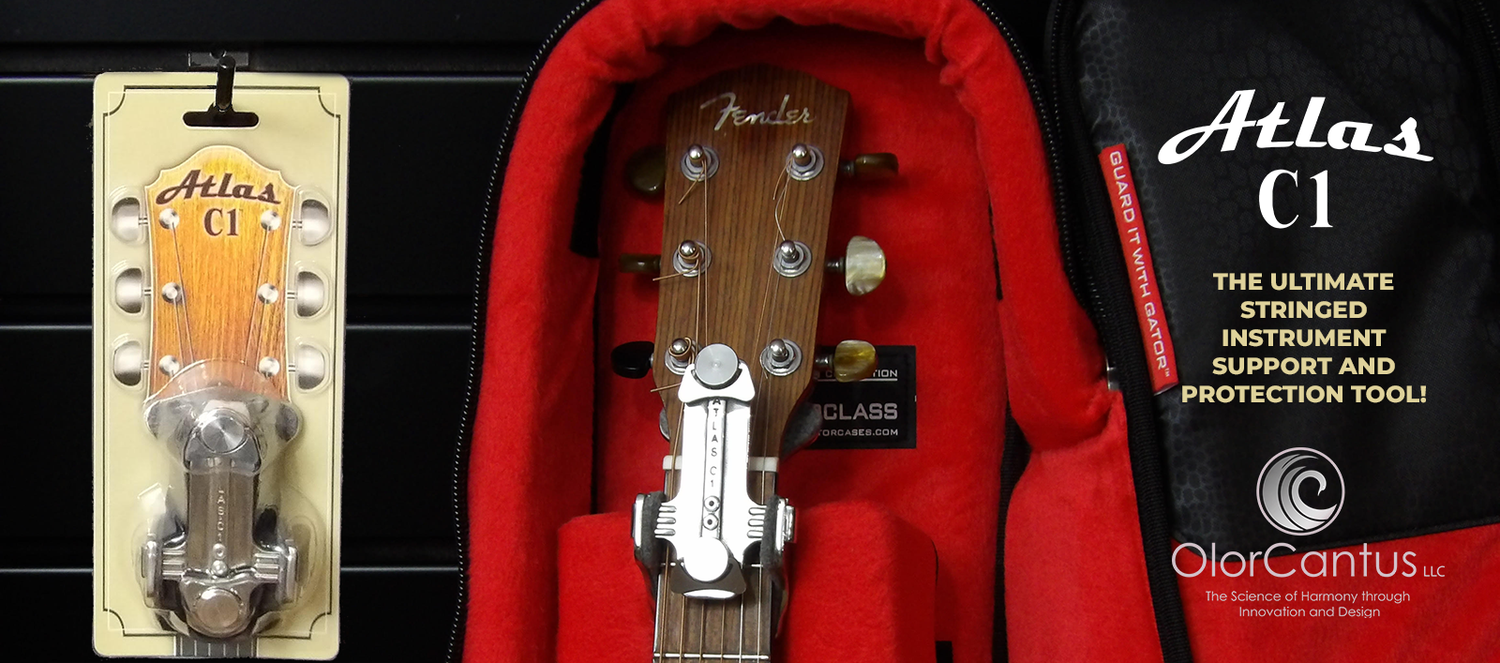
The Atlas C1 represents a shift in how musicians approach this problem. It's designed as both a protective travel tool and a pre-aligned repair jig, eliminating the need to choose between prevention and repair capability. Below, we'll walk through seven essential approaches to guitar repair jigs, from commercial solutions to DIY builds, and show you how to set up a workspace that actually works.
Essential Guitar Repair Tools for Beginners
Before diving into specialized jigs, understand what every beginner needs. A basic toolkit includes clamps, radius blocks, and alignment guides. These form the foundation of any repair work.
The most common mistake beginners make is underestimating the importance of clamping pressure. String tension on a guitar neck creates forces exceeding 130 pounds. Any repair jig must counteract that tension during the glue-cure period. Without adequate pressure, the joint fails silently, the break appears healed until the strings go back on.
Start with these fundamentals:
- C-clamps or bar clamps for applying consistent pressure
- Cauls (protective wood blocks) to distribute clamping force evenly
- Radius blocks to maintain proper neck curve during repair
- Alignment guides to ensure the headstock sits at the correct angle to the neck
Many home luthiers begin with improvised solutions using bar clamps and wood scraps. This works, but introduces variables. A purposeful jig removes guesswork and ensures repeatable results every time.
Fretboard Radius and Slotting Jigs
The fretboard radius jig is one of the most useful tools a home luthier can own or build. It maintains consistent curve across the playing surface and is essential for both new builds and refret work.
A fretboard radius is the slight curve running the length of the board. Most guitars use a radius between 7.25 and 16 inches, depending on the style. Slotting jigs cut fret slots at precise depths and spacing, preventing the uneven frets that cause buzzing.
The jig works by holding the fretboard in a fixture while a router or handsaw follows a template. The template ensures every slot is parallel and at identical depth. Without this precision, individual frets sit at different heights, and no amount of leveling fixes the underlying problem.
A radius block, the simplest version, is just a curved piece of hardwood matching your target radius. You sand the fretboard against it to achieve the curve. More advanced setups use spindle sanders or router jigs for faster, more consistent results.
For home builders, a DIY fretboard radius jig can be made from plywood and hardwood. The key is ensuring the template is accurate. Many luthiers use 3D-printed templates now, which can be calibrated to exact specifications.
Neck Shaping and Carving Fixtures
Neck carving is where jigs save hours of hand work. A neck carving fixture holds the neck blank at a comfortable working angle while you shape it with chisels, rasps, or power tools.
The fixture typically clamps the headstock and body end, leaving the middle section accessible. This keeps your hands free and prevents the blank from rolling or shifting. Proper precision alignment during clamping ensures the neck blank stays centered, preventing asymmetrical carves.
Many fixtures use adjustable arms or V-blocks to accommodate different neck profiles. Some luthiers build simple wooden frames with padded clamps. Others use metalworking vises adapted for woodworking. The principle is the same: immobilize the workpiece and position it for efficient tool access.
A common setup involves mounting the fixture to a sturdy workbench, allowing you to work from multiple angles. The fixture should hold the neck firmly enough that you can apply moderate force without movement, but not so tight that it damages the wood.
How to Fix Broken Guitar Headstock Damage
A broken headstock requires immediate attention. The longer you wait, the more difficult the repair becomes as glue residue hardens and the break settles into misalignment.

The repair process has five critical steps:
-
Clean the break, Remove old glue, dirt, and loose splinters from both surfaces. A sharp chisel or sandpaper works. The surfaces must be clean for new glue to bond properly.
-
Align the headstock, Position the broken pieces so the headstock sits at its original angle to the neck. This is where a jig proves invaluable. The jig holds alignment while you work.
-
Apply glue, Use a wood glue rated for instrument repair. Spread it evenly on both surfaces. Don't oversaturate; excess glue creates squeeze-out that's difficult to clean.
-
Clamp and verify, Tighten clamps gradually, checking alignment as you go. The headstock should sit flush against the neck with no gaps. Wipe excess glue immediately with a damp cloth.
-
Cure time, Most wood glues require 24 hours. Don't rush this step. The joint's strength depends entirely on complete cure.
The Atlas C1 simplifies this process by providing pre-aligned clamping geometry. The jig positions the headstock at the correct angle automatically, eliminating the guesswork that causes failed repairs.
Bridge Gluing and Clamping Jigs
Bridge clamping presents a different challenge than headstock work. The bridge sits at an angle on a curved soundboard, making even pressure nearly impossible without a specialized jig.
A bridge clamping jig uses shaped cauls that match the bridge footprint and the soundboard curve. This distributes clamping pressure evenly across the entire glue joint. Without it, you risk crushing the bridge or creating gaps that weaken the bond.
Many luthiers use cauls made from hardwood, shaped to match their specific guitar model. Some build adjustable jigs using threaded rods and wooden blocks. The goal is consistent pressure across the entire joint surface.
Setup typically takes 15-20 minutes. You position the cauls above and below the bridge, thread clamps through, and tighten gradually while checking alignment. The bridge should sit flush with no rocking.
For home builders, a basic bridge clamping jig can be made from hardwood scraps and standard clamps. The critical element is matching the caul shape to your guitar's soundboard curve. Inaccurate cauls cause uneven pressure and weak joints.
Nut Shaping and Slotting Tools
The nut is a small component with outsized importance. It guides strings at the correct height and spacing, affecting playability and tone. Nut shaping requires precision that hand tools alone rarely achieve.
A nut slotting jig holds the nut blank in position while you cut string slots at precise angles and depths. Slots that are too deep cause buzzing. Slots that are too shallow restrict string movement. The difference between good and bad is often just a few hundredths of an inch.
Most jigs use a router with a template guide or a specialized nut slotting file. The jig holds the nut at the correct height and angle relative to the tool. This ensures all slots are parallel and at identical depth.
Nut shaping, rounding the top to match the fretboard radius, requires a curved file or sanding block. A jig holds the nut at the right angle while you work, preventing the uneven shaping that creates dead spots or high frets.
For home luthiers, nut work is often the most intimidating task. A proper jig removes much of the anxiety by handling alignment while you focus on the actual shaping work.
DIY Jig Construction and Material Selection
Building your own jigs saves money and teaches you the principles behind professional tools. The best DIY jigs use materials that balance affordability, durability, and precision, but each choice carries trade-offs that affect long-term reliability.
Hardwood vs. Plywood vs. MDF: Durability and Accuracy
Hardwood (oak, maple, ash) is the standard choice for jigs that experience repeated clamping stress. It resists warping under humidity changes and maintains dimensional stability over years of use. The downside: cost and slower shaping. Hardwood excels for radius blocks, carving fixtures, and any jig where precision must remain constant across dozens of repairs.
Plywood offers a middle ground. Baltic birch (the luthier standard) is more stable than construction plywood. It works well for fretboard slotting templates and bridge clamping cauls because the laminated layers resist cupping. However, plywood edges splinter under repeated clamping, and the glue layers can delaminate if exposed to moisture. Plan to seal edges with epoxy or edge banding if building jigs for a humid workshop.
MDF (medium-density fiberboard) is cheap and machines beautifully, making it ideal for prototyping. But MDF absorbs moisture and swells unpredictably. A radius block made from MDF will drift out of tolerance within 6-12 months in a typical workshop. Use MDF only for temporary jigs or as a base layer under hardwood facing.
3D-Printed Components and Hybrid Jigs
Modern home luthiers increasingly use 3D-printed templates and guides paired with traditional wooden frames. A 3D-printed fretboard radius template can be calibrated to exact specifications (within 0.01 inch) and mounted to a hardwood base. This hybrid approach combines digital precision with mechanical durability.
Resin-based 3D prints (like SLA or DLP) are more durable than FDM (filament) prints for jig work. They resist warping under clamping pressure and don't degrade as quickly. For precision-critical templates, the investment pays off in accuracy that lasts.
Practical Build Recommendations
For a headstock alignment jig, use hardwood for the main frame and 3D-printed guides for the positioning arms. The hardwood handles clamping stress; the printed guides ensure repeatability.
For a fretboard radius block, solid hardwood is non-negotiable. A 1-inch-thick maple block shaped to your target radius (7.25", 9.5", 12", 16") will outlast your career.
For bridge clamping cauls, use Baltic birch with hardwood facing strips. The birch core resists warping; the hardwood facing distributes pressure evenly. Seal all edges with epoxy to prevent moisture absorption.
For neck carving fixtures, 2x4 lumber and adjustable clamps work fine. The fixture doesn't need precision, it just needs to hold the blank steady. Reinforce joints with bolts rather than screws, which loosen over time.
Long-Term Maintenance
Store jigs in a climate-controlled space. Humidity swings cause wood movement; temperature extremes can crack glued joints. A simple wall-mounted rack keeps jigs organized and accessible while protecting them from dust and accidental damage.
Inspect wooden jigs annually for warping, cracks, or delamination. A radius block that's drifted 1/32 inch out of true will produce buzzing frets. Replace or refinish jigs as needed. The cost of maintaining a jig is far less than the cost of ruining a guitar neck.
Calibration, Accuracy, and Workspace Setup
A jig is only as good as the workspace around it, and only if you verify accuracy before using it on a real instrument. This is where most home luthiers fail. They build or buy a jig, assume it's correct, and discover the mistake after ruining a guitar neck.
Verification Before First Use
Every new jig requires a calibration test on scrap wood. This is non-negotiable.
For a radius block, place it on a flat surface and check the curve with a straightedge. The straightedge should touch only at the ends; the middle should gap by a measured amount. For a 9.5-inch radius, the gap at the center of a 24-inch-long block should be approximately 0.6 inches. Measure with calipers or a depth gauge. If the gap is off by more than 0.05 inch, the block is out of spec and will produce buzzing frets.
For a fretboard slotting jig, test it on a piece of scrap fretboard or hardwood. Cut a slot and measure the depth with a caliper at three points: start, middle, and end. All three should match within 0.01 inch. If they don't, the template is warped or the router base is tilted. Adjust before proceeding.
For a headstock alignment jig, clamp a piece of scrap wood in the jig and measure the angle with a protractor or digital angle gauge. The headstock should sit at its original angle (typically 13-17 degrees, depending on the guitar). If the angle is off by more than 1 degree, the jig's geometry is incorrect.
For a bridge clamping jig, test clamping pressure distribution using carbon paper. Place carbon paper under the cauls, clamp the jig, and check the impression. The entire caul surface should show even contact. Dark spots indicate high pressure; light spots indicate gaps. Adjust caul shape or clamping geometry until pressure is uniform.
Measurement Tools and Precision Standards
You need three tools for jig verification:
- Digital calipers: Measure slot depth, gap width, and component thickness to 0.01 inch.
- Straightedge: A 24-inch precision straightedge reveals warping in radius blocks and templates.
- Digital angle gauge: Verify headstock angles and carving fixture orientation.
These are not optional. Guessing at accuracy is how jigs fail silently.
Workspace Layout for Precision
Your workspace should be organized around the precision requirements of each task:
- Clamping station: A sturdy bench (at least 2 inches thick, preferably 3) that won't flex under pressure. Flex introduces misalignment. Mount a bench vise at one end for holding components during assembly.
- Measurement zone: A clean, flat surface away from dust and vibration. This is where you verify jig accuracy and check alignment during repairs.
- Carving area: A separate bench or workbench section for neck shaping and body work. Dust from carving contaminates precision surfaces.
- Finishing zone: Isolated from the main workshop to prevent dust from settling on fresh glue or finishes.
- Jig storage: Wall-mounted racks or a dedicated cabinet. Jigs stacked on shelves warp under their own weight. Vertical storage preserves accuracy.
Lighting is critical. Install task lighting (LED work lamps, 4000K color temperature) above the clamping station and measurement zone. Poor lighting causes alignment errors that aren't visible until the glue dries.
Humidity and Temperature Control
Wood movement due to humidity changes is the silent killer of jig accuracy. A radius block that's accurate at 45% humidity may drift 0.05 inch at 65% humidity. This is enough to cause fret buzz.
If possible, maintain your workshop at 45-55% relative humidity and 65-75°F. A simple hygrometer tells you when conditions are drifting. If humidity swings are unavoidable, store jigs in sealed containers with desiccant packs.
Verification Schedule
Check critical jigs every 6 months:
- Radius blocks: Measure the curve with a straightedge.
- Slotting templates: Cut a test slot on scrap wood and measure depth.
- Alignment jigs: Verify angle with a digital gauge.
- Clamping cauls: Check for warping with a straightedge.
If any jig has drifted more than 0.05 inch, refinish or replace it. The cost of a new radius block is trivial compared to the cost of a refret job gone wrong.
The Atlas C1 Approach to Accuracy
Commercial jigs like the Atlas C1 come pre-calibrated and verified by the manufacturer. This eliminates the guesswork for home luthiers who lack measuring experience. The trade-off is reduced customization compared to DIY builds. For beginners, a verified commercial jig is worth considering. As you gain experience, you can build custom jigs with confidence that you know how to verify them. Many luthiers also take advantage of free shipping when ordering quality tools and jigs, and a 10% product discount can help offset the investment in precision equipment that will serve your workshop for years.
Frequently Asked Questions
What are the essential guitar repair tools for beginners starting out?
Beginners need a fretboard radius block, basic clamping cauls, a straightedge for fret leveling, and precision measurement tools. A headstock support jig is critical if you work on instruments with angled necks. Start with these core tools before investing in specialized fixtures like cavity routing templates or spindle sanders. Most home luthiers build their toolkit gradually as they tackle different repair types.
How do you stabilize and properly align a broken guitar headstock during repair?
Stabilization requires clamping pressure applied perpendicular to the break line, with support blocks preventing the headstock from twisting. A pre-aligned repair jig holds the neck and headstock in their correct relationship while glue cures, counteracting the 130+ pounds of string tension that pulls on the joint. Precision alignment ensures the headstock returns to its original angle and position, which is critical for playability and preventing future breaks at the same spot.
Can home luthiers build their own guitar repair jigs, or should they buy professional ones?
Many DIY jigs work well for fret slotting, radius blocks, and body forms if you have woodworking skills and access to precision tools. However, headstock repair jigs demand high accuracy because misalignment causes playability problems. Material selection matters: hardwoods like maple or birch resist warping under clamping pressure. For critical repairs on valuable instruments, a professionally engineered jig provides the tolerance and reliability that DIY versions often cannot match.
What makes a guitar repair jig worth the investment compared to paying a luthier for repairs?
A quality repair jig pays for itself after one or two professional repairs, especially for valuable instruments. It also gives you control over the repair timeline and lets you maintain your own guitars long-term. For touring musicians and collectors, having the right jig on hand prevents emergency shipping costs and downtime. The Atlas C1, for example, doubles as both a protection tool and a pre-aligned repair jig, making it a lifetime investment for instrument care.