
Table of Contents
- How Long Does Guitar Neck Repair Take With a Jig
- Assessing the Damage Before You Begin
- How to Fix a Broken Guitar Headstock: Preparation Phase
- Clamping Techniques and Pressure Application
- Guitar Neck Glue Cure Time: What to Expect
- DIY Guitar Headstock Repair Jig: Setup and Calibration
- Reinforcement Splines and Structural Integrity
- Headstock Alignment and Truss Rod Tension
- Restringing and Finish Touch-Up After Repair
- Common Mistakes to Avoid During Jig Repair
- Frequently Asked Questions
Last Updated: September 21, 2026
How Long Does Guitar Neck Repair Take With a Jig
A guitar neck repair jig typically enables completion in 24 to 48 hours from start to finish, though the actual hands-on work spans just a few hours. The majority of time goes to curing, letting the wood glue set and develop full structural integrity. Understanding this timeline helps you plan repairs without rushing the process or leaving your instrument vulnerable.
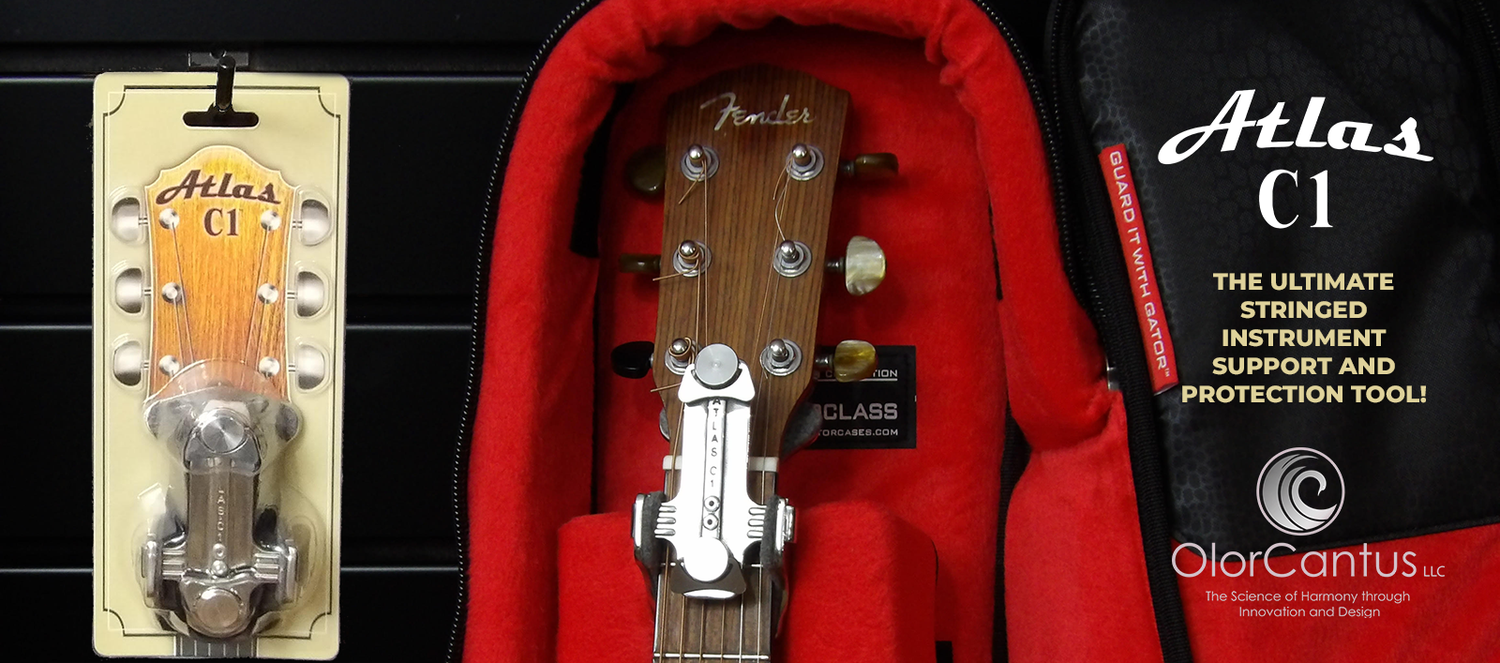
The key variables affecting timeline are glue choice, clamping pressure, environmental conditions, and whether you're using a precision repair jig like the Atlas C1.
Assessing the Damage Before You Begin
Before clamping, assess the break type: clean breaks along the grain are easiest to repair, while splintered or old breaks with contamination require different approaches.
Inspect the break closely. Look for these damage patterns:
- Clean breaks along the wood grain (easiest to repair)
- Splintered or crushed wood at the break point (requires reinforcement)
- Multiple cracks radiating from the break (more complex alignment needed)
- Old breaks with finish damage or previous repair attempts
Feel how the pieces fit together, better fit means stronger joint. Gaps larger than 1/16 inch signal misalignment that a jig must correct.
Check headstock angle: Gibson-style angled headstocks place more stress on the neck junction than Fender-style straight ones, affecting clamping pressure and reinforcement needs.
How to Fix a Broken Guitar Headstock: Preparation Phase
Preparation determines whether your repair holds or fails. Rushing this phase is the most common mistake.
Surface Preparation and Grain Orientation
Clean break surfaces thoroughly with a stiff brush or compressed air to remove dust and old glue residue, which prevents proper bonding.
Inspect grain orientation, breaks perpendicular to the grain are weaker and require extra clamping pressure or reinforcement splines.
Sand lightly with 120-grit sandpaper to open the grain for glue penetration; avoid oversanding, which removes material and creates gaps.
Wipe the surfaces with a damp cloth and let them dry completely. Any moisture left behind weakens the glue bond.
Dry Fit and Alignment Testing
Perform a dry fit before gluing to reveal alignment problems and adjust jig setup.
During dry fit, verify fretboard alignment is flush, headstock angle matches the original, neck is straight, and there's no twisting at the break.
If alignment is off, adjust your jig now. The Atlas C1 comes pre-aligned, saving troubleshooting time.
Measure the break gap, under 1/16 inch is ideal; larger gaps require shims or cauls.
Clamping Techniques and Pressure Application
Clamping pressure is critical. Too little pressure and the glue joint stays weak. Too much pressure crushes the wood fibers and weakens the bond.

Apply pressure gradually, tightening clamps in small increments on alternating sides to distribute force evenly and prevent slipping.
Watch for glue squeeze-out: a thin, continuous bead indicates adequate pressure; excessive squeeze-out signals over-clamping; minimal squeeze-out means under-clamping.
Use cauls (wooden blocks between clamp and headstock) to distribute pressure and prevent denting.
For angled headstocks, the Atlas C1 jig accounts for angle automatically, eliminating guesswork.
Monitor the joint for the first 30 minutes; if it shifts, loosen and reposition clamps immediately.
Guitar Neck Glue Cure Time: What to Expect
Cure time is where most repairs fail, musicians restring too early. Cure time varies with glue type, temperature, humidity, and jig use.
Active Repair Time vs. Structural Curing
Active repair time (cleaning, clamping, adjusting) typically takes 1-2 hours. Structural curing is much longer: wood glue reaches handling strength in 2-4 hours but needs 24 hours for full strength. String tension (130+ pounds) can fail a partially cured joint, so wait the full cure time before restringing.
Environmental Variables That Dramatically Affect Curing
Temperature and humidity are critical variables affecting cure time, they determine whether a repair holds or fails under string tension.
Temperature effects on cure time:
Wood glue cures through water evaporation and chemical cross-linking; temperature directly controls both rates.
- 65°F to 75°F (ideal range): Standard cure time applies. Titebond II cures to handling strength in 2-4 hours, full strength in 24 hours.
- 50°F to 65°F (cool workshop): Cure time doubles or triples. At 50°F, expect 6-8 hours to handling strength, 48 hours to full strength.
- Below 50°F: Glue cures very slowly. Cure time can extend to 72 hours. Some glues (like hide glue) may not cure properly below 45°F.
- Above 85°F: Cure accelerates, but excessively fast curing can trap moisture inside the joint, weakening it. Avoid direct sunlight on the repair.
In cold workshops, use a space heater to raise temperature to 70°F, which cuts cure time significantly.
Humidity effects on cure time:
Humidity affects cure because water must evaporate for glue to set: high humidity slows evaporation; low humidity accelerates it.
- 30% to 50% relative humidity (ideal): Standard cure time applies.
- 50% to 70% relative humidity (moderate): Cure time extends by 25-50%. A 24-hour cure becomes 30-36 hours.
- Above 70% relative humidity (damp): Cure time can double. In a humid climate or during rainy season, expect 48 hours minimum, often 60+ hours for full strength.
- Below 30% relative humidity (very dry): Glue can cure too fast, trapping air pockets in the joint. This is less common but can happen in heated, dry workshops in winter.
In humid climates, plan for extended cure times. A dehumidifier helps, but waiting longer before restringing is the safest approach.
Combined temperature and humidity impact:
Temperature and humidity interact: cool, humid conditions (50°F, 75% humidity) create slowest cure; warm, moderate conditions (72°F, 40% humidity) create fastest safe cure.
Use this practical guide:
| Temperature | Humidity | Handling Strength | Full Structural Strength |
|---|---|---|---|
| 72°F | 40% | 2-4 hours | 24 hours |
| 72°F | 70% | 4-6 hours | 36-48 hours |
| 55°F | 40% | 6-8 hours | 48 hours |
| 55°F | 70% | 8-12 hours | 60+ hours |
| 85°F+ | 30% | 1-2 hours | 12-18 hours |
Glue Selection and Cure Time Trade-offs
Different glues cure at different rates. Your choice affects the total repair timeline:
Titebond II (most common): 2-4 hours handling strength, 24 hours full strength; easy to sand and reversible. Titebond III (waterproof): same timing, better for humid climates. Hide glue (traditional): 4-8 hours handling, 48 hours full strength; requires 55°F+ temperature. Epoxy (fast): 1-2 hours handling, 6-12 hours full strength; harder to reverse but less temperature-dependent.
Plan 24 hours minimum curing in ideal conditions (70°F, 40% humidity); add 12-24 hours in cool or humid workshops.
Monitoring Cure Progress
Don't just set a timer and walk away. Monitor the repair during curing:
First 30 minutes: Watch for slippage; reseat if needed. 2-4 hours: Check pressure; loosen slightly if squeeze-out has dried. 12 hours: Inspect for gaps; if present, repair has failed. 24 hours: Remove clamps and test gently; if movement exists, clamp 12-24 hours longer. 48 hours: Full strength reached; restring safely.
Accelerating Cure (When You Must)
To accelerate cure safely: raise temperature to 75-80°F (cuts time 25-40%), lower humidity below 50%, or use epoxy (6-12 hours). Combining all three achieves 6-8 hour full cure, as professional shops do.
DIY Guitar Headstock Repair Jig: Setup and Calibration
A proper guitar neck repair jig holds alignment, applies consistent pressure, and removes guesswork, but only if calibrated correctly for your headstock geometry. Mismatched setup is where most DIY repairs fail.
Understanding Headstock Angle and Jig Calibration
Guitar headstocks come in two primary designs, each with different stress profiles and clamping requirements:
Gibson-style headstocks (13-17° angle) concentrate stress at the neck junction; clamping must account for this angle. Fender-style headstocks (0-5° angle) distribute stress more evenly but require equal alignment precision.
Identify your headstock type by measuring angle with a straightedge. This angle must be replicated in jig setup, or permanent misalignment results.
Pre-Aligned Jig Calibration
If your jig is pre-aligned (like the Atlas C1), verify calibration before use:
Step 1: Place jig on flat, level surface; use machinist's level to confirm base is true; check neck support rail is perpendicular within 1/32 inch. Step 2: Confirm headstock holder aligns with neck axis; set adjustable blocks for your headstock angle. Step 3: Operate clamp through full range; pressure should increase smoothly with no binding. Step 4: Dry-fit your guitar; apply light pressure and verify fretboard is flush, headstock doesn't rotate, neck doesn't shift, and no gaps appear.
If any of these checks fail, your jig calibration is off. Loosen clamps and adjust the headstock holder position or angle until alignment is perfect. This is the most critical step, a jig that's even slightly misaligned will produce a repair that looks and plays wrong.
Jig vs. No-Jig Comparison
Repairing a headstock without a jig is possible but introduces multiple failure points. Here's the structural and practical trade-off:
| Aspect | With Calibrated Jig | Without Jig |
|---|---|---|
| Alignment accuracy | Repeatable within 1/32 inch | Manual estimation, ±1/16 inch error common |
| Headstock angle preservation | Automatic (jig-matched) | Must be calculated and verified manually |
| Clamping pressure distribution | Even across entire joint line | Uneven, concentrated at clamp points |
| Risk of rotational misalignment | Minimal (jig prevents twist) | High (requires constant monitoring) |
| Repair success rate (first attempt) | 85-95% for experienced users | 50-70% (higher failure rate under string tension) |
| Setup time before gluing | 15-30 minutes | 30-60 minutes (more troubleshooting) |
| Structural integrity of final joint | Matches or exceeds original | Often weaker due to misalignment stress concentration |
The key difference: a jig doesn't just hold the pieces together, it enforces the original geometry. A misaligned repair, even if glued perfectly, will fail under string tension because stress concentrates at the misaligned point. A properly calibrated jig eliminates this risk.
Calibration for Specific Neck Profiles
Some guitars have non-standard headstock angles or neck profiles. If your jig has adjustable components, you may need to customize calibration:
- PRS-style headstocks (8-10° angle): Adjust the jig holder to a middle position between Gibson and Fender settings
- Vintage Gibson headstocks (steeper, 16-18° angle): Ensure the jig's angled block is set to maximum angle
- Acoustic guitars (often 12-15° angle with wider headstocks): Verify that clamping cauls are wide enough to distribute pressure across the full headstock width
When in doubt, measure your specific guitar's headstock angle with a protractor or digital angle finder, then match that angle in your jig. A 2° calibration error may seem small, but it translates to misalignment that becomes visible after restringing.
Reinforcement Splines and Structural Integrity
For breaks with significant splintering or multiple cracks, reinforcement splines add strength. Splines are thin strips of wood glued into slots cut across the break.
Splines work by:
- Spanning the break across the grain
- Adding mechanical strength beyond the glue bond
- Distributing stress across a wider area
Cut spline slots perpendicular to the break line. Slots should be 1/8 inch wide and run the full width of the headstock. Space them 1 to 2 inches apart.
Glue splines in place before clamping the main break. Let spline glue cure fully before applying pressure to the headstock joint.
Splines are especially important for Gibson-style headstocks, which experience more stress at the neck junction than other designs.
Headstock Alignment and Truss Rod Tension
After clamping, verify that the headstock is perfectly aligned. Misalignment affects playability and puts uneven stress on the repair.
Check alignment with a straightedge:
- Place it along the fretboard
- Look for gaps between the straightedge and the wood
- The break should create no visible step or offset
If alignment is off, the break may not have seated fully. Loosen clamps slightly and reseat the joint.
Once the glue cures, the truss rod can influence the repair. String tension pulls the neck forward, which puts stress on the repair joint. Adjust truss rod tension gradually after restringing. Start loose and tighten only enough to maintain proper neck relief (typically 1/16 inch at the 7th fret).
Restringing and Finish Touch-Up After Repair
After cure time is complete, you can restring your guitar. But do it carefully.
Remove clamps slowly. Check the joint for any separation or movement. If the joint has held, you should see no gaps.
Inspect the glue line. Sand away any dried glue squeeze-out with 220-grit sandpaper. Be gentle, you're removing excess glue, not reshaping the headstock.
Restring gradually. Add strings one at a time and let tension build slowly over an hour. This prevents sudden stress on the fresh repair.
Monitor the repair for the first week. Check it daily for any signs of movement or separation. If you see gaps opening, the repair may have failed and needs to be redone.
Touch up the finish where clamps left marks. Sand lightly and apply matching finish. For vintage guitars, this might be the trickiest part of the whole repair.
Common Mistakes to Avoid During Jig Repair
Most failed repairs fail because of these mistakes:
Rushing cure time. Restringing before full structural cure is the #1 reason repairs fail. The glue line holds initially but fails under string tension within days.
Misaligning the break. A crooked repair looks wrong and is weaker. Always dry-fit and verify alignment before applying glue.
Uneven clamping pressure. Tightening one clamp fully before tightening others causes misalignment. Tighten all clamps gradually and evenly.
Dirty break surfaces. Dust, old glue, or finish contamination prevents bonding. Clean thoroughly and sand lightly before gluing.
Ignoring grain orientation. Breaks that run perpendicular to the grain are weaker. Apply extra pressure and consider reinforcement splines.
Not accounting for humidity. High humidity extends cure time significantly. Plan extra time in damp conditions.
Over-clamping. Crushing wood fibers weakens the joint. Apply steady pressure until squeeze-out appears, then stop.
A guitar neck repair with a jig takes patience, but it's achievable for anyone willing to follow the process. The timeline is straightforward: a few hours of hands-on work followed by 24 to 48 hours of curing. The Atlas C1 jig simplifies this process by handling alignment and pressure distribution automatically, which eliminates the most common sources of failure. When you order the Atlas C1, you'll also receive a 10% product discount and free shipping, making it an investment in your repair success. Whether you're protecting a valuable instrument during travel or fixing a break that's already happened, having the right tool and the right technique makes all the difference. Get started with the Atlas C1 and repair your guitar headstock with confidence.
Frequently Asked Questions
How long should glue cure after a headstock repair with a jig?
Active clamping time typically ranges from 30 minutes to 2 hours, depending on the glue type. Titebond and similar wood glues require 24 hours of full curing before you can safely apply string tension. Epoxy formulations may cure faster (12-16 hours) but demand precise mixing and application. Environmental conditions, humidity, temperature, and air circulation, significantly impact actual curing time. Always follow the manufacturer's specifications for your chosen adhesive and allow full structural curing before restringing.
Is a guitar neck repair with a jig stronger than the original wood?
A properly executed jig repair can match or exceed original wood strength when using quality glue and reinforcement splines. The scarf joint created during repair, combined with proper clamping pressure and grain orientation alignment, distributes stress effectively across the joint. Reinforcement splines add shear strength and tensile strength to the repair area. However, success depends entirely on technique: correct clamping force, adequate curing time, and precise headstock alignment. A poorly executed repair will be weaker than the original, making proper jig calibration essential.
Can I play my guitar immediately after a headstock repair?
No. While the glue may feel set after 24 hours, you must wait for full structural curing before applying string tension. Premature restringing risks reopening the joint or causing the repair to fail under the 130+ pounds of tension modern guitar strings create at the headstock-neck junction. Most luthiers recommend waiting 48-72 hours before tuning to pitch, and even longer if environmental conditions are cool or humid. Always verify the glue manufacturer's full cure time and follow it completely before subjecting the repair to tension.
What makes a jig better than clamping without one?
A precision repair jig maintains consistent headstock alignment and clamping pressure distribution throughout the curing process, eliminating human error. Without a jig, achieving proper grain orientation, scarf joint alignment, and even clamping force across the break becomes extremely difficult. Jigs hold the headstock at the correct angle relative to the neck, preventing the common mistake of allowing the headstock to shift during curing. This pre-aligned design reduces active repair time and increases the likelihood of structural integrity. For DIY repairs, a jig transforms a technically demanding process into a manageable one.