
Table of Contents
- Guitar Repair Jig vs Padding: Quick Safety Comparison
- Why Padding Alone Falls Short for Headstock Protection
- How a Guitar Repair Jig Handles Pressure and Stability
- How to Fix Broken Guitar Headstock: Jig Setup Steps
- Guitar Neck Support for Repair: Material Safety and Finish Protection
- Decision Matrix: When to Choose a Jig Over Padding
- Final Verdict: Invest in the Atlas-C1 for Long-Term Safety
- Frequently Asked Questions
Last Updated: September 7, 2026
Guitar Repair Jig vs Padding: Quick Safety Comparison
When a headstock snaps, the difference between a clean repair and a ruined instrument often comes down to how you support the neck during the job. A guitar repair jig provides rigid, repeatable clamping pressure and precise alignment, while padding alone offers only passive cushioning with no structural control. The choice between a guitar repair jig vs padding for safety is about controlling the forces that cause finish damage and misaligned repairs.

Most players reach for a folded towel or foam pad when they need neck support. That works for a quick rest, but fails the moment you apply clamping pressure or need a stable work surface. Below, we break down where padding comes up short, how a proper jig changes the equation, and which workflow demands which solution.
Why Padding Alone Falls Short for Headstock Protection
Padding fails for one fundamental reason: it cannot hold a position under load. A soft foam cushion or folded cloth compresses unevenly when you apply clamping pressure, which shifts the headstock angle mid-repair. That movement can open the break line, misalign the wood grain, and create gaps that require filler and compromise structural integrity.

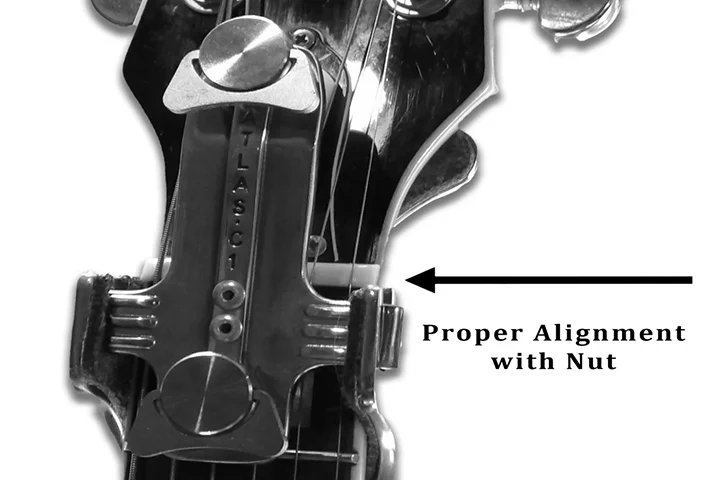
Atlas-C1-A Guitar Headstock Support & Protection tool
The Chemical Reactivity Problem Most Guides Ignore
Material chemistry is where most generic advice breaks down. Many bench mats and cushions contain ethylene-vinyl acetate (EVA) foam or nitrile rubber, both of which contain plasticizers that can migrate out of the polymer over time. When these compounds contact a nitrocellulose lacquer finish, standard on vintage and many custom-shop instruments, they can cause a chemical softening known as "finish crazing" or leave permanent cloudy imprints that only appear days or weeks after contact ends.
Cork and polyisoprene are safer choices because they lack the migratory plasticizers found in synthetic foams, but they still fail on the structural axis. A common pattern is a luthier using a cork-lined caul for one job and a foam pad for another, only to discover the foam has left a ghost outline on the headstock face that requires a full refinish.
Weight Distribution and Pressure Points
Beyond chemistry, padding fails on physics. A flat pad distributes the instrument's weight unevenly because it conforms to the highest point of contact first. On a Gibson-style angled headstock, that point is the volute or the area just behind the nut. Under the 130+ pounds of string tension or the force of a clamp, the pad compresses at that single point, concentrating pressure rather than spreading it. Over a 24-hour curing cycle, that concentrated pressure can dent soft mahogany or maple, imprint the finish, or, worse, allow the headstock to rotate slightly while the glue is still wet.
A rigid support, by contrast, spreads the load across a defined footprint. The pressure per square inch drops dramatically because the contact area is fixed and engineered, not variable based on how the cushion happens to settle.
Debris Accumulation and the Hidden Scratch Risk
Debris accumulation is another overlooked issue. Bench mats collect solder bits, metal filings, and dust that press into the finish under the guitar's weight. A folded towel hides this debris until it has already scratched the surface. For scratch prevention and finish safety, a clean, stable, non-slip surface matters more than cushioning depth.
How a Guitar Repair Jig Handles Pressure and Stability
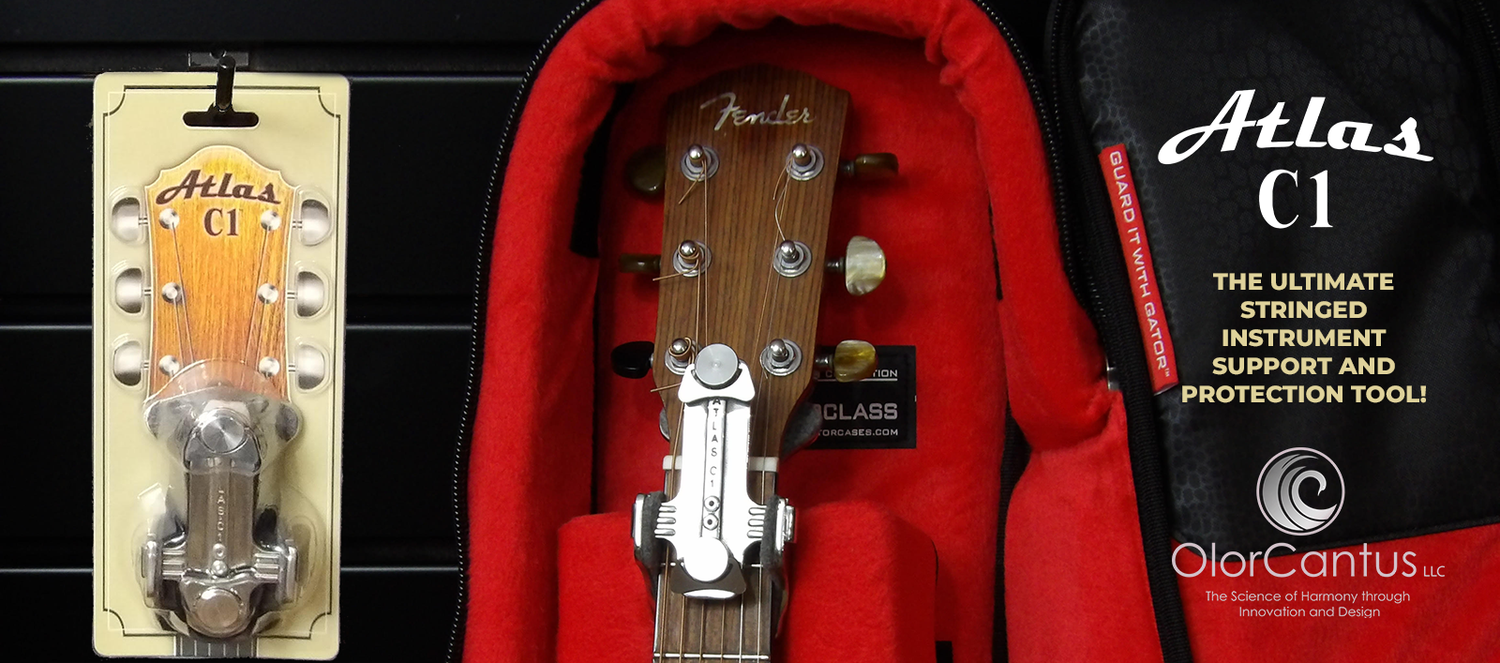
A guitar repair jig solves the stability problem by replacing soft contact with engineered support points. The Atlas-C1, for example, is constructed from high-grade stainless steel and lined with a soft, thick felt cushion that protects the finish while the rigid frame locks the headstock-neck junction in place. This delivers what padding cannot: a fixed geometry that resists movement under load.
The structural benefit becomes obvious during a headstock glue-up. When you apply clamping pressure to close a break, the forces travel through the wood and into the support tool. A jig distributes that force evenly across the repair area, preventing localized stress that can crack thin wood or shift the break line. Instrument stability during the critical curing window separates a lasting repair from one that fails months later.
Vibration dampening is a secondary advantage. Stainless steel absorbs and dissipates the micro-vibrations that occur when you work near the repair site, reducing the risk of disturbing the glue joint. Padding can transmit these vibrations directly into the joint because it moves with the instrument.
How to Fix Broken Guitar Headstock: Jig Setup Steps
For anyone facing a snapped headstock, the repair process demands precision from the first clamp placement. Proper technique matters more than the glue you use, because alignment errors compound through every subsequent step.
Step 1: Clean the break surfaces. Remove all debris and old glue from the fracture lines. Dry-fit the pieces to confirm they mate cleanly before applying any adhesive.
Step 2: Position the jig. Place the Atlas-C1 under the headstock-neck junction so the felt-lined cradle supports the break area from below. The tool should contact the back of the neck and the underside of the headstock simultaneously.
Step 3: Apply glue and align. Spread wood glue evenly across both break surfaces, then press the pieces together. Use the jig's rigid frame as your reference plane to verify the headstock angle matches the original geometry.
Step 4: Clamp through the jig. Apply clamping pressure perpendicular to the break line, using the jig as the opposing surface. The stainless steel frame prevents the headstock from twisting under load.
Step 5: Let it cure fully. Leave the assembly undisturbed for at least 24 hours. The jig stays in place during curing, maintaining constant pressure and alignment.
Step 6: Clean up and inspect. Remove the jig and scrape away excess glue. Check the repair for gaps or misalignment before finishing.
Step |
Action |
Time Needed |
Critical Detail |
|---|---|---|---|
1 |
Clean the break surfaces |
5-10 min |
Remove all old glue and debris |
2 |
Position the jig |
2 min |
Cradle must contact neck and headstock |
3 |
Apply glue and align |
5 min |
Use jig frame as alignment reference |
4 |
Clamp through the jig |
5 min |
Pressure perpendicular to break line |
5 |
Cure undisturbed |
24+ hours |
Do not move or adjust during curing |
6 |
Clean up and inspect |
5 min |
Check for gaps before finishing |
Guitar Neck Support for Repair: Material Safety and Finish Protection
Finish protection is the most underestimated part of any headstock repair. A single scratch on a vintage Les Paul can cut its value by hundreds of dollars, and the wrong support material can cause damage that is invisible until weeks after the repair is complete.
Material Compatibility: Beyond the Basics
Nitrocellulose finishes are particularly sensitive to prolonged contact with certain plastics and rubbers. Plasticizers in foam padding can migrate into the finish over time, causing clouding or soft spots that require professional refinishing. This is why professional luthiers avoid generic cushion foam and choose materials with known chemical compatibility.
The specific failure mechanism is plasticizer migration. EVA foam and PVC-based mats contain phthalate or adipate plasticizers that keep the material flexible. These compounds are not chemically bonded to the polymer matrix, so they slowly migrate to the surface, especially under pressure and warmth. When a guitar rests on such a surface for hours, those plasticizers transfer to the nitrocellulose lacquer, which absorbs them and swells. The result is a soft, cloudy imprint that cannot be buffed out because the damage is below the surface.
Polyurethane foam is marginally better but still risky over long contact periods. The safest materials are natural cork, felt, and polyisoprene (synthetic rubber without plasticizers). The Atlas-C1 uses a soft, thick felt lining specifically to eliminate finish reaction risks. Felt is non-reactive with nitrocellulose and other common guitar finishes, and it provides a non-slip surface that keeps the instrument from shifting during work.
Ergonomic Impact: Jig Height and Posture
A dimension most repair guides miss is the ergonomic effect of the support tool. When you use a flat pad, the guitar sits low on the bench, forcing you to hunch over the work area. Over a multi-hour fret leveling or glue-up session, that posture strains the lower back and neck, reducing fine motor control precisely when precision matters most.
A jig with an adjustable or elevated cradle brings the work up to a height that allows a neutral wrist and straight back. Maintaining a comfortable posture is the difference between steady hands and fatigue-induced slips. The rigid frame of a jig also provides a stable reference plane for your non-dominant hand, reducing the micro-tremor that occurs when you hover without support.
Workflow-Specific Protection Needs
Different repair tasks impose different demands on the support system:
- Fret leveling and crowning: Requires the neck to be dead flat and immobile. A pad allows flex, which translates to uneven fret height. A rigid jig with a flat cradle is mandatory.
- Electronics work and pickup swaps: The guitar is often flipped repeatedly. A padded work surface protects the back finish, but a jig with a swivel or cradle reduces handling risk.
- Glue-ups and structural repairs: Requires absolute immobility under clamping pressure. Only a rigid jig with a non-reactive contact surface qualifies.
- Setup adjustments (truss rod, bridge): The neck is under tension. A jig that supports the neck joint prevents the body from torquing while you turn the truss rod nut.
Decision Matrix: When to Choose a Jig Over Padding
The right choice depends on what you are trying to accomplish. Padding has its place for casual storage or temporary resting, but a jig becomes essential the moment you introduce pressure, alignment requirements, or extended contact.
Choose a jig when:
- You are performing any glue-up or structural repair
- You need repeatable alignment for fretwork or setup adjustments
- You are shipping or traveling with a high-value instrument
- You want to counteract the 130+ pounds of string pressure tension on the neck joint
Choose padding when:
- You need a quick, temporary rest between playing sessions
- You are working on an instrument with no existing damage
- You accept the risk of finish reactions from unknown materials
The weight distribution analysis favors the jig in most scenarios. A rigid support spreads the instrument's weight evenly across a defined surface area, while padding concentrates pressure at the highest point of the cushion. Over hours or days, that concentrated pressure can dent soft wood or imprint the finish.
Scenario |
Best Support |
Why |
|---|---|---|
Headstock glue-up |
Jig |
Maintains alignment under clamping pressure |
Travel in hard case |
Jig |
Counters inertia and kinetic energy on impact |
Temporary bench rest |
Padding |
Quick, no setup required |
Vintage finish protection |
Jig |
Felt lining is non-reactive with nitrocellulose |
Shipping |
Jig |
Rigid support prevents flex during transit |
Final Verdict: Invest in the Atlas-C1 for Long-Term Safety
The evidence is clear: for any scenario involving pressure, alignment, or extended contact, a guitar repair jig outperforms padding on every safety metric. Padding remains useful for casual situations, but it cannot provide the structural control that protects both the repair and the finish.
The Atlas-C1 is the only headstock support and protection tool of its kind, with a U.S. patent received in 2019 protecting its design. It targets the vulnerable headstock-neck junction that fails on Gibson-style angled headstocks and straight-neck Fenders alike, counteracting the inertia and kinetic energy that cause breaks during drops and impacts. Professional touring musicians rely on it, and it has been featured in Premier Guitar Magazine.
The Atlas-C1 delivers lifetime protection against costly headstock repairs. It is available at Guitar Center and through the Atlas-C1 product page, which currently offers free shipping on orders. Get started with Atlas C1 and protect your instrument before the next accident happens.
Frequently Asked Questions
Is a guitar repair jig necessary for minor maintenance?
For minor maintenance like truss rod adjustments or string changes, a full repair jig is not strictly necessary. However, if you are performing any work that involves clamping pressure, sanding, or filing near the headstock, a jig provides critical stability that padding cannot match. Padding compresses unevenly under load, allowing the neck to shift mid-repair. A dedicated jig like the Atlas-C1 locks the headstock-neck junction in a fixed position, preventing accidental movement that could cause finish cracks or structural damage.
Can bench padding prevent headstock damage during repairs?
Bench padding protects against scratches and minor surface contact, but it does not prevent the primary cause of headstock damage during repairs: sudden movement under pressure. When you apply clamping force or use tools near the neck joint, padding compresses and allows micro-movements that can stress the wood or finish. A rigid support system distributes force evenly and keeps the instrument stationary. For any repair involving glue joints or significant pressure, padding alone is insufficient protection.
What are the risks of using only padding for guitar headstock work?
Using only padding creates three specific risks. First, padding density varies, so you cannot guarantee even support across the headstock. Second, certain foam and rubber materials react chemically with nitrocellulose finishes, causing discoloration or softening over time. Third, padding does not resist lateral movement, so a slip with a tool can translate directly to the neck joint. A rigid jig with felt-lined contact points eliminates all three risks by providing stable, chemically inert support.
How does the Atlas-C1 compare to DIY padding solutions for headstock repair?
The Atlas-C1 uses high-grade stainless steel with a soft felt cushion, providing rigid support that DIY padding cannot replicate. A folded towel or foam block compresses under load, changing the neck angle mid-repair. The Atlas-C1 counteracts over 130 pounds of string tension and holds the headstock at a fixed angle. It also doubles as a pre-aligned repair jig, so you do not need to measure or align anything manually.